
TL;DR

Get business pricing on tools and workshop supplies
- Business-only prices and quantity discounts
- Tax-exempt purchasing
- Multiple users, one account, clear invoices
To install click-lock vinyl flooring, check the product instructions, inspect and prepare a clean, dry, stable, flat subfloor, plan the rows, and fit the planks with the specified perimeter gap. Use a utility knife for suitable straight cuts and a jigsaw or saw for detailed cuts, with dust control and PPE; never force locking joints or cover a subfloor problem. Call a qualified professional for uncertain hazardous materials, major moisture or structural issues, and electrical, gas, or roof work.
A new vinyl floor can look crooked before you reach the far wall if your first row is only a little out of line. Click-lock planks move quickly across an open room, but the finish depends on careful measuring, a suitable subfloor, and joints that engage without getting battered.
This step guide to installing vinyl flooring walks you through the work from product checks to trim. You’ll see where a utility knife is enough, when a jigsaw or circular saw earns its place, and how dust control, PPE, and manufacturer instructions affect the job.
Vinyl flooring is popular because it is relatively affordable, durable, and sold in styles that resemble wood or stone. That does not mean every product suits every room, or that a waterproof plank makes the floor beneath it waterproof. Take the time to check the product requirements before the first cut.
Check installation method, room suitability, underlayment rules, acclimation, and required expansion clearance in the specific product instructions.
Prepare a clean, dry, stable subfloor within the manufacturer’s flatness limits before laying planks.
Plan row widths and direction before cutting so the first row stays straight and the last row does not become a narrow sliver.
Use a utility knife for compatible straight cuts and a suitable jigsaw or saw for detailed or repeated cuts, with appropriate PPE and dust control.
Never sand or scrape old flooring that may contain asbestos; get qualified guidance if its age or composition is uncertain.
Field Guide · Flooring · Power Tools
Install Vinyl Flooring With Confidence
A clean finish starts before the first cut. Check the product, prepare the subfloor, plan balanced rows, and use each tool for the cut it handles best.
Match the floor to the room
Products differ in construction, installation method, and room requirements. Their instructions are the authority for your specific floor.
Check the use case
Review traffic suitability, wear layer, water-resistance claims, permitted room conditions, and approved subfloors before purchasing.
Waterproof is not a room fix
A waterproof plank does not waterproof a slab, stop water entering through walls, or protect against leaks. Resolve recurring moisture first.
Follow the system
Confirm whether underlayment is allowed, whether the plank has an attached pad, and what acclimation and perimeter clearance the maker requires.
Make the subfloor installation-ready
High spots can rock planks; dips can leave joints flexing. A power tool cannot correct a surface that moves or falls outside the product’s flatness limits.
Look for the cause
Check for loose flooring, protruding fasteners, grit, uneven areas, and signs of moisture. Vacuum debris and address defects only with methods suitable for the existing surface.
Do not disturb suspect old flooring
If old flooring or adhesive may contain asbestos, do not sand, scrape, or cut it. Get qualified guidance when age or composition is uncertain.
Stop if the floor moves, stays damp, or may contain hazardous material. Major damage, structural movement, or persistent moisture calls for a qualified flooring professional.
Balance the rows across the room
Measure the room, check wall squareness, and account for the required expansion gap. Adjust the starting row so the far edge avoids an awkward narrow strip.
Choose a clean cut and control exposure
Match the tool to the plank and cut. Use the blade and technique recommended for the material, and protect against noise, dust, and moving blades.
| Tool | Useful for | Tradeoff / reminder |
|---|---|---|
| Utility knife + straightedge | Straight cuts on products that can be scored and snapped | Check the product method; keep hands clear and protect the finished face. |
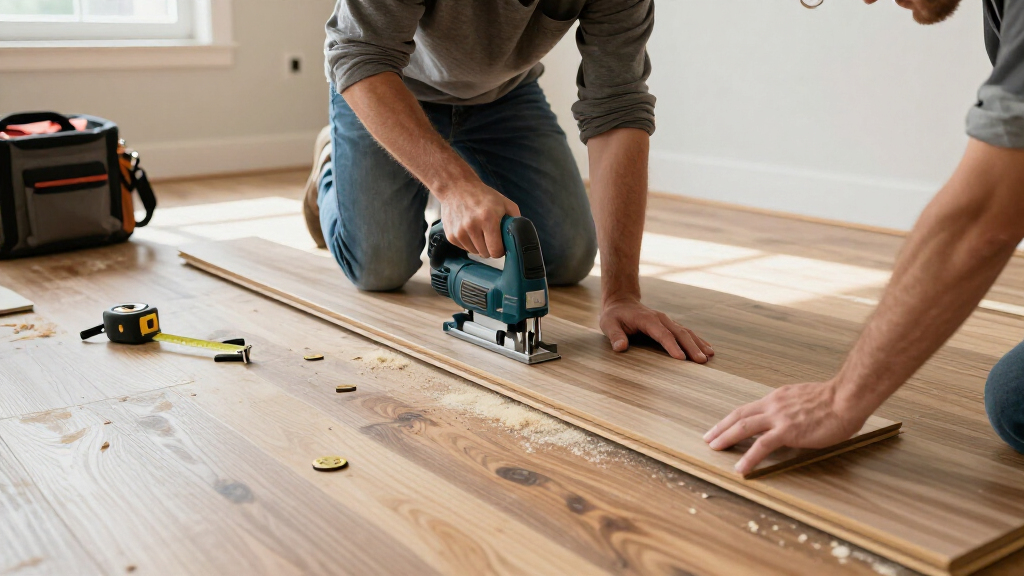
| Jigsaw or oscillating tool | Notches, curves, and cuts near door jambs | Use a suitable blade, secure the plank, and control dust. |
| Circular or miter saw | Repeated straight cuts where the product and setup allow | Can create dust and noise; use eye, hearing, and respiratory protection as appropriate. |
| Tapping block + pull bar | Engaging click-lock joints at edges and final rows | Follow the maker’s technique. Never strike locking edges directly or force a joint. |
Common helpers: tape measure, square, spacers, and a tapping block. Keep the plank stable while cutting and use the manufacturer’s instructions for blade choice and cut orientation.
Build steadily, then inspect
Follow the product’s locking method and gap requirements throughout. Check alignment as you go so small errors do not travel across the room.
Each decision sets up the next
Good results come from a sequence: verify the product, prepare the base, establish a true guide, then cut and lock carefully.
Choose a floor that suits the room before you buy
Click-lock vinyl flooring is a floating floor system: planks connect at their edges and rest over an approved subfloor, usually without glue. Before buying, check the installation method, permitted room conditions, wear layer, water-resistance claims, underlayment rules, and the manufacturer’s temperature and flatness limits. Those details determine whether a product fits your room and how you can install it.
Vinyl flooring is popular because it handles everyday wear and comes in styles that resemble oak, slate, and other materials. A busy kitchen, a quiet guest room, and a damp basement do not put the same demands on a floor. For a basement, investigate moisture and product suitability first; the label “waterproof” on a plank does not waterproof the slab, stop water entering through walls, or protect against a plumbing leak.
Suppose you are replacing worn flooring in a laundry room. A product approved for that setting still needs a dry, suitable subfloor and correct perimeter details. If moisture keeps returning or the room has a floor drain and a history of flooding, resolve the water problem before covering it.
Match the floor to the room, then follow its documentation. Product construction and warranties vary. An extra underlayment that seems like a comfort upgrade can conflict with a product that already has an attached pad, affect the locking joints, or void coverage. Ask the manufacturer or a qualified installer if the instructions do not clearly cover your existing floor or room conditions.
Popular right now

Shark Navigator Lift-Away Upright Vacuum (NV360)

Dreame L40 Ultra Gen 2 Robot Vacuum and Mop

Dreame L50 Ultra Robot Vacuum and Mop
As an affiliate, we earn on qualifying purchases.
Prepare the subfloor so the planks stay tight
A vinyl floor needs a subfloor that is clean, dry, stable, and within the flatness limits printed in the product instructions. High spots can rock planks; dips can leave joints flexing underfoot. Neither a tougher plank nor a faster saw fixes a surface that moves or falls outside the maker’s requirements.
Start by checking for loose sections, protruding fasteners, debris, moisture signs, and uneven areas. Vacuum grit and remove material only using methods suitable for the floor beneath it. If the room has old sheet flooring or adhesive whose age and composition are uncertain, do not sand, scrape, or cut it: some older materials can contain asbestos, and disturbing them can release hazardous fibers. Get qualified guidance before work continues.
Picture a plank rocking slightly over a shallow dip near a doorway. It may seem harmless when you test it with your hand, but repeated foot traffic can work the joint and create a faint click or an opening edge. Correct subfloor issues by methods approved for the existing surface and new flooring; for major damage, movement, or moisture, bring in a flooring professional.
Existing flooring can sometimes remain underneath, but only when it is stable, suitable, and permitted by the product instructions. Also check the combined height at doors, appliances, and transitions. A new floor that prevents a door from swinging or traps a dishwasher can turn a simple renovation into a costly correction.
Stop if the subfloor moves, stays damp, or may contain hazardous material. Covering a problem hides it; it does not solve it.
Lay out the rows before the first cut
A good layout balances the room before installation starts. Measure its width, check whether walls are square, choose a plank direction, and work out the width of the first and final rows. The goal is to avoid an awkward sliver at the far wall while leaving the expansion clearance specified by the flooring maker.
- Read the instructions. Confirm the allowed room conditions, required acclimation, permitted underlayment, locking method, and perimeter clearance. Acclimate only when and for the time the maker calls for it; products do not all share one rule.
- Measure and sketch. Record room dimensions, doorways, fixed cabinets, and obstacles. Check wall squareness instead of assuming the room is a rectangle.
- Test the row widths. Divide the room width by the plank width and account for the required gap at both walls. Adjust the starting row if that avoids an unusually narrow finishing strip.
- Plan the direction and joints. Running boards along the room’s long dimension or toward the main light can work well, but doorway transitions and room shape may change the best layout.
- Set out spacers and a reference line. Use spacers to maintain the product’s specified gap and keep the first row straight as you build.
For example, in a long living room with a slightly crooked exterior wall, measuring from that wall alone can gradually steer the rows off line. A snapped reference line and careful checks along the first row give you a reliable guide. Check any local requirements that apply to the room or renovation; do not assume a general flooring guide replaces building rules or product instructions.
Pick tools that cut cleanly without creating a safety mess
The best cutting tool depends on the plank, the cut, and the product maker’s directions. A utility knife can score and snap many vinyl planks; a jigsaw handles curves and notches; and a suitable circular or miter saw can speed repeated straight cuts. Power tools save time when the job calls for them, but they add noise, dust, and exposure to moving blades.
| Tool | Useful for | Tradeoff |
|---|---|---|
| Utility knife and straightedge | Many straight cuts on products that can be scored and snapped | Requires a sharp blade, steady pressure, and a stable cutting surface |
| Jigsaw | Curves, pipe notches, and irregular shapes | Can leave a rough edge; use a suitable blade and support the work |
| Circular or miter saw | Repeated straight cuts on compatible products | Can throw chips and dust; needs eye, hearing, and respiratory protection as appropriate |
| Oscillating tool | Careful relief cuts, including some door-jamb work | Easy to overcut; control the tool and protect nearby surfaces |
On a small bedroom, a sharp knife and a tapping block may handle nearly everything. In a larger room with many repeated cuts, a saw can save time. Use a blade suited to the flooring and follow tool and flooring instructions; keep the finished face protected from scratches.
Secure the work, keep hands clear of the blade path, and use eye and hearing protection when operating a saw. Control dust with appropriate collection and ventilation, and use respiratory protection when the task and product require it. Battery runtime and torque matter less than choosing a tool you can control and a cutting setup that keeps the plank stable. Rent a saw if a one-off job does not justify buying one, and hire a pro for complex rooms or unfamiliar equipment.
Install the first row carefully, then build across the room
The first row sets the line for every row after it. Place spacers at the wall to hold the specified expansion gap, connect the planks as the manufacturer directs, and check that the row stays straight as you work. If that starting edge wanders, the error can grow until the last row needs awkward cuts or joints stop aligning.
Lay out planks from several boxes to spread natural color and pattern variation. This matters with styles that resemble wood, where repeating a printed grain pattern can make a new floor look artificial. Stagger end joints as required by the instructions, and avoid creating a predictable ladder or H-shaped pattern if the product guidance calls for different joint spacing.
Engage each locking edge at the recommended angle and use the maker’s tapping block and method where needed. A direct hammer blow to a click-lock edge can crush or chip the profile, even when the visible surface still looks intact. If a plank resists, stop and check alignment, debris, and the locking direction rather than increasing force.
For example, when you reach the third row and see a narrow gap opening at the end of each plank, pause before it spreads down the room. Check that the joints in the earlier row fully engaged and that no grit sits in the groove. A clean fit should feel secure without requiring a string of hard blows.
Check alignment every few rows. Keep the rows parallel to your reference line, watch for open joints, and keep spacers in place around the perimeter. This steady inspection takes seconds and can prevent an hour of pulling up planks later.
Cut around pipes, jambs, and the final wall without guesswork
Accurate obstacle cuts come from measuring each plank in its actual position, marking the cut clearly, and leaving whatever movement clearance the manufacturer specifies. Walls are rarely perfectly straight, and pipes rarely land where a drawing says they will. Measure twice, test the fit, and keep the cut edge where trim can cover it when the layout permits.
- Mark the obstacle position. Hold the plank in place or transfer measurements from fixed reference points; check them before cutting.
- Allow for required clearance. Follow the product’s instructions around pipes, door frames, and fixed objects rather than wedging the plank tightly against them.
- Choose the right cutter. Score and snap a suitable straight cut, use a jigsaw for a curve, or choose another approved tool for the product.
- Test the fit before locking it in. Confirm that the plank sits flat and the cut does not interfere with a neighboring joint.
A pipe notch illustrates why rushing backfires. If the opening is too tight, the plank can bind as conditions change; if it is too large, a visible gap may remain around the pipe. A trim ring can hide a neat clearance, but it cannot disguise a cut that runs into the locking edge.
For a door jamb, an oscillating tool may let you undercut the trim so the plank slips beneath it, if the product and door assembly permit that approach. Keep the cut controlled and protect the finished surface. If an obstacle involves a live wire, gas line, plumbing alteration, structural member, or roof, stop and use a licensed professional. For electrical work, power must be shut off and verified before a qualified person works; use appropriate PPE and follow applicable permits and codes.
Finish the edges, transitions, and cleanup without trapping the floor
The final row usually needs individual measurements because the wall may bow or angle across the room. Transfer the gap and cut line for each plank, trim carefully, then use the recommended pull bar or joining method to seat the edge without crushing it. Keep the required expansion space at the perimeter, even if the finished gap will be hidden by trim.
Baseboards or quarter-round can cover the perimeter clearance, while transition strips may be needed at doorways or where vinyl meets another floor. Attach trim in a way that does not pin a floating floor so tightly that it cannot move as designed. Check the transition instructions and fixings; a floor that looks neat but is trapped beneath a tight threshold can develop problems later.
Imagine a hallway that meets tile at a bathroom door. A compatible transition can protect both edges and create a cleaner change in height. If the level difference is substantial or the door clearance is tight, measure before installation and choose a suitable detail instead of forcing a thin strip to bridge the gap.
Inspect the completed surface for rocking planks, open joints, damaged edges, and trapped spacers. Clean with the method the product maker permits; harsh cleaners or excess water can damage some finishes. Follow the flooring instructions for when to walk on the surface, move appliances, and return heavy furniture. Click-lock floors may be usable promptly, while adhesive installations can require curing time.
Leave the floor free to move as designed. That means correct perimeter clearance, compatible transitions, and trim fixed without clamping the planks. A tidy edge should finish the job, not create pressure on the floor.
Know when a DIY installation should become a professional job
Many click-lock floors suit a careful DIY installer, especially in a rectangular room with a sound subfloor and straightforward doorways. Glue-down planks and sheet vinyl can be less forgiving because adhesive spread, open time, seam work, or pattern matching may affect the result. A complicated room or a subfloor problem can make professional installation the safer and cheaper choice in the long run.
Think of a small spare bedroom with clean plywood, simple edges, and no plumbing penetrations: that is a reasonable project for someone comfortable measuring and using hand tools. Now compare it with an older basement that smells musty, has loose flooring, and shows dark staining near a wall. That second job needs investigation before new planks cover evidence of moisture.
Do not use power tools to remove or disturb old flooring when asbestos may be present. Do not cut into unknown walls, floors, or ceilings to make room for a plank. Electrical, gas, structural, and roof work belongs with licensed professionals and applicable permits; shut off power and verify it before any authorized electrical work, and use task-appropriate PPE.
Renting can make sense for a one-day cutting task, but only if you know how to operate the tool safely and can control chips and dust. If the product instructions conflict with advice from a general guide, follow the product documentation or ask the manufacturer. The right call is the one that protects the building, the installer, and the floor warranty.
Frequently Asked Questions
Can I install click-lock vinyl flooring myself?
Many click-lock products are designed for DIY installation in rooms with a suitable, prepared subfloor. Read the exact instructions and call a flooring professional for major unevenness, moisture, complex layouts, or uncertain existing materials. Glue-down planks and sheet vinyl can require more precise adhesive and seam work.
Do I need to remove my existing floor first?
Not always. The existing surface must be stable, dry, suitable, and allowed by the new product’s instructions, and the added height must work at doors and appliances. Do not cover loose, soft, damaged, or moisture-affected flooring; avoid sanding or scraping old material that may contain asbestos.
Do I need underlayment beneath vinyl planks?
Use underlayment only when the flooring maker requires or permits it. Some planks include an attached pad, and adding another layer can affect the locking joints or warranty. Check the product documentation before buying a separate layer.
Which power tool should I use to cut vinyl planks?
A utility knife and straightedge may handle many straight cuts when the product can be scored and snapped. A jigsaw helps with curves and notches, while a compatible circular or miter saw can speed repeated straight cuts. Follow tool and flooring instructions, secure the work, and use appropriate eye, hearing, and respiratory protection.
How much space should I leave at the walls?
Leave the perimeter clearance specified by the flooring manufacturer; it varies by product and installation conditions. Spacers help hold that gap consistently while you work. Baseboards or quarter-round can cover the finished gap without pinning the floating floor in place.
Why are my vinyl planks separating or lifting?
Common causes include an uneven subfloor, debris in a joint, a locking edge that did not fully engage, inadequate perimeter clearance, or moisture and temperature conditions outside the product’s limits. Check the maker’s troubleshooting guidance and inspect the floor rather than forcing a separated joint closed. Persistent moisture or subfloor movement calls for professional assessment.
Conclusion
Measure the room, read the product instructions, and fix the subfloor before you make the first cut. Those three habits do more for a durable vinyl floor than adding another power tool to your cart.
Work steadily, protect the locking edges, and leave the specified movement space around the perimeter. The best finished floor is the one that stays quiet underfoot long after the sawdust has settled.