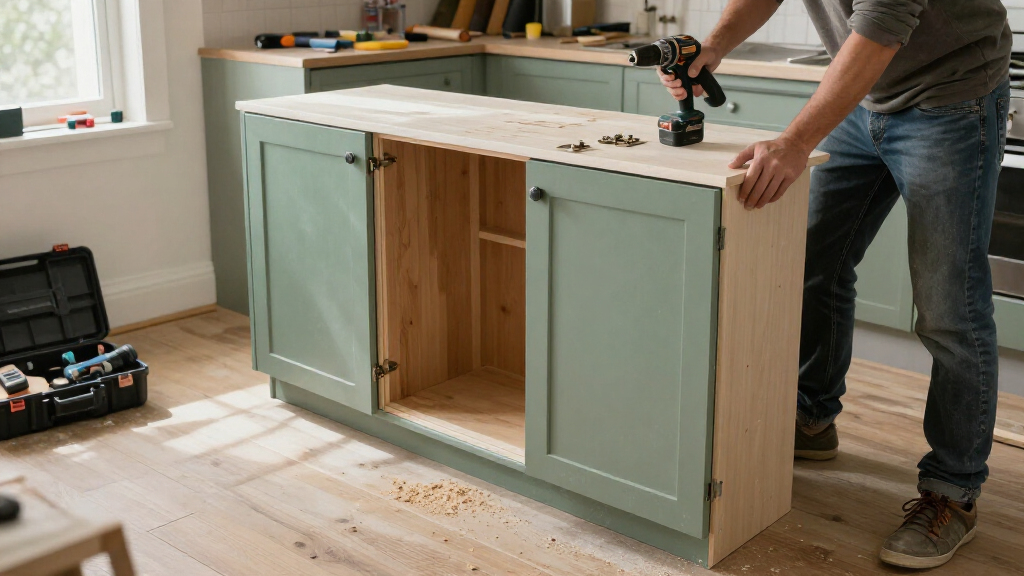

TL;DR

Get business pricing on tools and workshop supplies
- Business-only prices and quantity discounts
- Tax-exempt purchasing
- Multiple users, one account, clear invoices
A cost-effective kitchen renovation starts with a firm budget, accurate measurements, and a plan that keeps plumbing, gas, electrical, and ventilation in place where possible. Use power tools for suitable DIY tasks, rent specialty equipment you will use briefly, and hire licensed professionals for regulated or hazardous work. Keep a 10–20% contingency and protect the home from dust and delays.
A kitchen can look half demolished in an afternoon and still be months away from a safe, usable finish. The expensive mistakes usually start earlier: a cabinet order based on rough measurements, a saw bought for one cut, or a layout change that pulls plumbing and wiring into the budget.
You can control costs by deciding what stays, measuring before you shop, and matching each job to the right tool and skill level. This guide walks you through a practical renovation plan, from budgeting and tool choices to dust control, project order, and the jobs that belong with licensed professionals.
Power tools can save time on demolition, cabinet work, and finishing, but they reward preparation. Think of your budget as a cut list: every accurate decision reduces waste, repeat work, and trips back to the store.
Reserve 10–20% of your budget for hidden damage, price changes, or schedule disruptions.
Measure the room, appliances, and cabinet runs before ordering; keep plumbing and service locations where practical.
Compare tool purchase costs—including batteries and accessories—with rental fees and likely future use.
Use guards, PPE, stable workpieces, and dust extraction; stop if older materials may contain lead or asbestos.
Hire qualified professionals for regulated electrical, gas, plumbing, and structural work, and check local permit rules.
Field Guide / Renovation Planning
How to Plan a Cost-Effective Kitchen Renovation Using Power Tools
Control the budget before the first cut: measure accurately, keep services in place where practical, choose tools by task, and bring in licensed help for regulated work.
Build a budget that can absorb surprises
Price the whole job, including costs that do not show in the finished room. Protect the reserve for repairs and delays.
Separate repairs from upgrades
List work by room element. Repair a swollen sink base before adding decorative changes; reuse sound cabinets and appliances where practical.
Count the indirect expenses
Include labor, tools, delivery, permits, disposal, and temporary meals or dishwashing while the kitchen is out of service.
Compare the same scope
Check current local prices and permit rules. Make sure each estimate says whether demolition, haul-away, and finishing details are included.
Measure first. Keep the layout where it works.
A precise plan reduces wasted material, repeat trips, and last-minute changes after cabinets arrive.
Map the room and clearances
Record wall lengths, cabinet runs, doors, windows, outlets, pipes, vents, and shutoffs. Check appliance manuals for clearances and door swings. Decide cabinet dimensions, countertop, backsplash, and flooring together before you buy.
Price changes to services
Relative planning pressure, not a price estimate. Local conditions and project scope determine actual costs.
Choose the tool for the task
Match the tool, blade, bit, and dust control to the material. Practice on scrap before making a visible cut.
Drill / driver
Cabinet assembly and pilot holes.
Circular saw
Sheet goods with a guide and stable support.
Jigsaw
Curved cuts and sink openings.
Oscillating tool
Small cuts near walls and flooring edges.
Sander
Smooth surfaces with suitable extraction.
| Tool choice | Best fit | Cost check |
|---|---|---|
| Buy | Frequent use across future projects | Purchase + accessories |
| Rent | Specialty equipment used briefly | Rental + time needed |
| Borrow | Short, occasional task with a suitable tool | Check condition and correct accessories |
Protect people, the home, and the finish.
Power tools save time when the setup is sound. Follow the manual, use guards, and stop when a material or task is outside your experience.
Follow an order that avoids rework
Protect finished surfaces and leave access for each stage. Local permits and trade requirements vary by project.
Contain dust; inspect what is exposed.
Resolve hidden damage and service work.
Confirm level, fit, and appliance clearances.
Follow installer and manufacturer guidance.
Backsplash, flooring, fixtures, final details.
Know when to bring in a professional
DIY can suit suitable demolition, assembly, and finishing tasks. Regulated or hazardous work calls for qualified help.
Electrical, gas, plumbing
Use qualified professionals for regulated service work, and check local permit requirements before starting.
Changes to walls or structure
Get an appropriate assessment before altering structural elements or concealed building systems.
Countertops and warranties
Some materials need specialist handling. Confirm manufacturer guidance and warranty requirements.
Set a budget that can absorb the first surprise
A cost-effective kitchen renovation begins with a written budget that covers materials, labor, tools, delivery, permits, disposal, and a reserve for hidden problems. Keep about 10–20% in contingency; a sound-looking cabinet wall can conceal a slow leak, and prices or product availability can change before installation. The reserve matters because problems discovered after demolition can’t always wait for a sale or a convenient time to revisit the budget. Treat it as money for protecting the work, not as extra spending capacity for upgrades.
List the work by room element, then separate must-haves from upgrades. For example, if your cabinets are square and dry, cleaning, repairing, and repainting them may leave room in the budget for better lighting or a more durable floor. If the sink base has swollen from water, replacing that cabinet is a practical repair, not an indulgence. Prioritizing this way helps distinguish work that prevents future damage from work that mainly changes appearance. If costs rise, postpone a decorative upgrade before reducing the scope of a repair that keeps the kitchen sound.
Include the indirect costs people often miss. A week without a working sink may mean takeout, disposable plates, or time spent washing dishes in a bathroom basin. Set up a simple temporary station with a kettle, cooler, and dish tubs; it will not feel like a kitchen, but it can keep daily costs from nibbling away at your reserve. This planning also makes schedule delays easier to absorb: if the countertop is late, you know where meals and washing will happen rather than paying for convenience day after day.
Get current local prices for materials and disposal, and check local permit requirements before setting a final ceiling. One contractor’s estimate may separate demolition from haul-away while another bundles both, so compare the actual scope. A realistic budget gives you room to respond when demolition exposes something that needs proper repair. It also makes estimates more useful: when every quote covers the same work, the lowest number is less likely to reflect a missing disposal fee or unfinished detail you will have to pay for later.
Popular right now

Bose QuietComfort Wireless Bluetooth Headphones with Active Noise Cancellation, Mic, USB‑C Charging, Deep Bass, 24‑Hour Battery – White Smok

DeLonghi Rivelia Automatic Espresso Machine Bundle with Grinder and Frother, Beige

Shark Navigator Lift-Away Upright Vacuum (NV360)
As an affiliate, we earn on qualifying purchases.
Keep the layout and save money before the first cut
For a cost-effective kitchen renovation, keeping the sink, range, and major appliance locations can avoid expensive plumbing, gas, electrical, and ventilation changes. The existing layout is not automatically ideal, but shifting a sink across the room may require new supply lines, drainage, cabinets, flooring repairs, permits, and licensed trade work. The tradeoff is between a layout that improves daily use and the cost and disruption of moving services. A move can be worth it when the current arrangement is genuinely hard to work in, but it should be priced as a coordinated construction change rather than a simple cabinet decision.
Measure the room, cabinet runs, doors, windows, and appliances before choosing finishes. Record both wall lengths and the positions of outlets, pipes, vents, and shutoffs; sketch them on graph paper or a simple digital plan. Check appliance manuals for required clearances, since a refrigerator door that hits a wall or a range squeezed too close to a cabinet can make a polished kitchen irritating to use. These details affect more than fit: a missed pipe or outlet can force last-minute changes, while insufficient clearance can limit access and make routine tasks awkward for years.
Imagine a homeowner who wants a larger island. Moving the sink into it sounds like a small change on paper, but it may mean opening the floor for a drain and water lines. Keeping the sink on its existing wall and choosing a narrower island could preserve the working space while avoiding a costly rough-in. The narrower island sacrifices some counter area, but if it leaves clear paths between the sink, range, and refrigerator, it may improve the kitchen more than a larger island that constricts movement.
Decide on cabinet dimensions, countertop material, backsplash, and flooring before buying. Accurate measurements and a cut list help you order the right quantities and reduce waste. They also make it easier to spot an awkward corner or appliance conflict before a pallet of cabinets arrives. Material choices can affect the plan too: a thick countertop or a different flooring height may alter appliance clearances and cabinet details, so making decisions together reduces the risk of paying twice to adjust work that was already installed.
Rent specialty tools and buy the ones you’ll use again
Choose tools based on the task, material, and how often you expect to use them. A drill/driver, circular saw, jigsaw, oscillating multi-tool, and sander cover many basic jobs, but one renovation rarely justifies buying every tool in a showroom wall. Compare the tool’s purchase price with rental fees, accessories, blades, bits, batteries, and dust-control equipment. Frequency matters because a tool that saves an hour today may sit unused for years; a rental can cost more per day yet less overall when ownership brings storage, upkeep, and accessories you will not use again.
A drill/driver can handle cabinet assembly and pilot holes, while a circular saw with a guide can make straight cuts in sheet goods. A jigsaw handles curves and sink cutouts, and an oscillating multi-tool can trim flooring or cut small sections close to a wall. Each tool needs the right blade or bit: a dull blade burns laminate, wanders in plywood, and can turn a clean edge into a splintered mess. Choosing for the material improves the finish and reduces the chance of damaging a costly panel, but the tool still needs a stable setup and an operator who can control it.
For a one-time countertop cut or specialty flooring task, renting a suitable saw may cost less than buying a tool and its accessories. Ask the rental desk what blade is fitted, whether dust collection is available, and how the tool is returned. If you already own a compatible cordless battery platform, adding a bare tool may make sense; starting a new platform can make the battery and charger a significant part of the price. Rental availability and time limits matter too: if you need repeated cuts over several days, a daily fee or return deadline may make ownership more practical, provided you can store and use the tool safely afterward.
Test the setup on scrap first. If a circular saw kicks, the sheet may be unsupported or the blade may be wrong for the cut. A few minutes of practice lets you check the cut direction, guide position, and finish before the workpiece is part of your visible cabinet run. Scrap testing can also reveal whether you need another person to support a large panel or a different blade; resolving that before a finished piece is on the bench saves material and helps you judge whether the task is suitable for your experience.
Follow a work order that prevents redoing finished work
A kitchen renovation usually costs less when you work in a sequence that keeps finished surfaces safe and makes each trade’s work accessible. A common order is demolition, repairs and rough-ins, cabinets, countertops, backsplash, flooring and fixtures, then final adjustments; the precise order can vary with the flooring and cabinet system. The aim is to avoid enclosing work before it is inspected or damaging a finished surface while completing a later task. Confirm the sequence with the cabinet, countertop, and flooring specifications because some installations depend on the thickness or position of another surface.
- Clear and protect: Remove stored items, cover nearby rooms, and set up a temporary food and dish area.
- Demolish carefully: Shut off relevant services through the proper means, use PPE, and remove finishes in controlled sections.
- Repair and complete rough-ins: Address water damage and have licensed trades handle regulated work and required inspections.
- Install cabinets and surfaces: Check level and square before securing cabinets; coordinate countertop templating and installation.
- Finish and test: Install backsplash, fixtures, hardware, and appliances, then check doors, clearances, and connections.
For instance, sanding cabinets after new counters go in can coat the fresh surface with fine dust. Likewise, rushing a backsplash before confirming countertop level can leave uneven grout lines along the counter. Cover completed work and keep a running task list so a small repair does not force you to undo a finished section. Each step protects money already spent: dust can scratch or contaminate surfaces, and a leveling issue found late may require removing tile rather than correcting the cabinet or counter setup first.
Build downtime into the schedule. If the sink is disconnected, have a plan for dishes and drinking water; if a cabinet delivery slips, do not rush an installation that depends on measurements from the missing units. A few planned meals away from the kitchen may cost less than working around a half-installed countertop for weeks. Scheduling slack is useful because trades, deliveries, and inspections depend on one another; losing a day early can shift several later tasks, especially when a countertop cannot be measured until the cabinets are installed and secured.
Use power tools safely and keep dust out of your home
Safe power-tool work depends on stable materials, clear work areas, proper guards, and protection for your eyes, ears, and lungs. Wear safety glasses and hearing protection, and choose a suitable dust mask or respirator for the material and work. Follow the tool manual, disconnect power or remove the battery before changing a blade or bit, and keep cords and batteries away from water. These habits address different failure points: guards and stable support reduce contact and kickback risks, while hearing and respiratory protection limit exposure that can accumulate even when no single task feels intense.
Dust control starts before the saw starts. Close doors to other rooms, cover openings, use extraction where the tool supports it, and vacuum with equipment suitable for the dust rather than sweeping fine particles into the air. When cutting a cabinet panel in a garage, set up a stable workbench and support the panel so the offcut cannot bind the blade as the cut finishes. Containment matters because fine dust travels through doorways and settles on belongings far from the work area; cleanup after it spreads takes longer and can expose other household members.
Older homes need extra care. Paint, flooring, insulation, or other materials may contain lead or asbestos; ordinary DIY dust masks and a shop vacuum are not a safe plan for disturbing suspect material. Pause work and arrange proper assessment and handling if demolition uncovers suspicious layers or fibers. The cost and delay of assessment can be frustrating, but disturbing hazardous material can spread contamination into rooms and create a much larger cleanup and health problem than the original renovation task.
Take a moment to check the blade, workpiece, and space before each cut. A loose panel, hidden screw, or hand placed in the blade path can turn a quick trim into an injury. If you cannot secure the material or see where the tool will exit, stop and reset the job. This check also improves accuracy: a supported piece is less likely to shift or tear at the end of the cut, so safety preparation protects both the person and the finish.
Know which jobs need a licensed professional
Use a licensed professional for electrical, gas, structural, and plumbing work when local rules or the job’s complexity call for it, and check permit and inspection requirements before work starts. A power tool can cut access holes or fasten materials, but it cannot make unsafe wiring, a leaking gas line, or an undersized vent compliant. The cost of qualified work can seem high beside a DIY tool purchase, but the comparison should include the risk of failed inspection, concealed damage, injury, and having to open finished walls to correct work.
Electrical changes can involve circuit capacity, grounding, protection, and placement rules. Gas work carries fire and carbon-monoxide risks; plumbing changes can cause hidden leaks, and structural changes can compromise a wall or floor. Turn off power before any permitted work near wiring, confirm the correct circuit is de-energized with an appropriate tester, and use PPE during demolition. For regulated work, arrange the qualified trade and inspections rather than relying on a breaker switch or guesswork. These systems often connect to parts of the home beyond the kitchen, so an apparently local shortcut can affect safety or performance elsewhere.
Countertops also deserve a realistic skills check. Some laminate or butcher-block cuts may suit an experienced DIYer with the right setup, while heavy stone counters often require specialist handling, support, fabrication, and installation. A cracked slab or strained back can erase any savings from avoiding an installer. The tradeoff includes more than cutting skill: stone can be expensive to replace, needs reliable support, and may require equipment and enough people to move it safely.
For example, if you want to add an outlet for a new microwave, first confirm the appliance requirements and local electrical rules with a qualified electrician. You can still save by clearing the cabinets and preparing the work area, but leave the circuit design and connection to the professional. That division keeps your labor useful without placing safety or code compliance on a guess. A clear handoff also helps the electrician work efficiently and gives you a chance to ask whether the existing circuit can support the appliance before cabinets or finishes make access harder.
Spend where durability matters and reuse what still works
A cost-effective renovation spends on the parts that are hard to replace later and reuses items that remain safe, functional, and sound. Repairing a solid cabinet box, keeping working appliances, and changing doors or hardware can preserve budget for a durable floor, better storage, or lighting that suits the way you cook. This is a lifecycle choice: saving on something that will soon fail may simply move the expense into a second renovation, while replacing a serviceable item can use money that would better solve a daily problem.
Inspect cabinets before committing to a refinish. If the boxes are square, firmly attached, and free of water damage, new doors or paint may refresh the room for far less than full replacement. But peeling veneer, swollen particleboard, or a cabinet that has pulled away from the wall may call for repair or replacement; paint can hide the color, not fix the structure. Check hinges, drawer slides, and wall attachment as well as the visible faces, because the underlying box carries the weight of dishes and counters. A small repair now can make reuse reliable; cosmetic work alone cannot restore a weakened box.
Energy-efficient appliances and lighting may reduce energy use, but compare the purchase price, expected use, installation needs, and any current local incentives. Availability and rebate rules change, so check current local information instead of counting an unconfirmed discount toward the budget. A bright, efficient task light over the counter can be a more useful upgrade than a decorative fixture that leaves you chopping in shadow. The value depends on how long you expect to keep the equipment and how often you use it, so an efficiency label alone does not tell you whether the higher upfront price fits your budget.
When deciding where to spend, ask what it would take to change the item later. Flooring and storage often sit under or behind installed cabinets and counters, making them awkward to replace. Choose finishes you can maintain, and spend on sound construction and well-planned storage before paying extra for a trend that may not suit your next cooking routine. The more disruptive an item is to replace, the more important it is to choose it before installation; easily swapped hardware can wait, while a floor or cabinet layout deserves careful thought now.
Frequently Asked Questions
How much should I reserve for surprises?
Set aside about 10–20% of the project budget for hidden damage, price changes, or delays. The right amount depends on the home’s age and how much you are opening up. If demolition reveals a leak or damaged flooring, that reserve lets you address it before installing new finishes.
Which power tools do I need for a basic kitchen renovation?
A drill/driver, circular saw, jigsaw, oscillating multi-tool, and sander can cover many common cabinet and finish tasks. You may not need all of them: match each tool to the material and cut, use the correct blade or bit, and rent specialty equipment for short jobs. Practice on scrap before making visible cuts.
Is it cheaper to rent or buy tools for a one-time project?
Compare the rental fee with the full cost of buying, including batteries, charger, blades, bits, and dust control. Renting often makes sense for a specialty tool you will use once, while buying a drill/driver may pay off if you expect to use it for future repairs. Ask the rental desk about the right accessory for your material.
Can I replace cabinet doors or refinish cabinets instead of replacing them?
Yes, if the cabinet boxes are dry, square, stable, and firmly attached. New doors, hardware, or a careful refinish can change the room without the cost and waste of full replacement. Repair or replace cabinets with swollen panels, loose attachment, or water damage before covering them with paint.
What renovation work should I leave to a professional?
Electrical, gas, structural, and complex plumbing work can carry safety and code requirements, and local rules may require licensed trades or permits. Some heavy countertop installations also need specialist handling. Check local requirements, use PPE during demolition, and have a qualified professional plan and complete regulated work.
How do I control dust during demolition and cutting?
Close off nearby rooms, cover openings, use tool extraction where possible, and clean with suitable vacuum equipment instead of dry sweeping fine dust. Wear eye, hearing, and respiratory protection suited to the job. In older homes, stop if you suspect lead paint or asbestos and arrange proper assessment before disturbing it.
Conclusion
Control renovation costs before you pick up a saw: settle the layout, measure carefully, and budget for the work behind the visible finishes. Use power tools where your skill and setup match the job, rent equipment you will use briefly, and call licensed professionals for regulated work.
A good kitchen renovation leaves you with more than fresh cabinet fronts. It leaves you with safe wiring, dry cabinets, clear counters, and a budget that did not vanish into avoidable rework.