TL;DR

Get business pricing on tools and workshop supplies
- Business-only prices and quantity discounts
- Tax-exempt purchasing
- Multiple users, one account, clear invoices
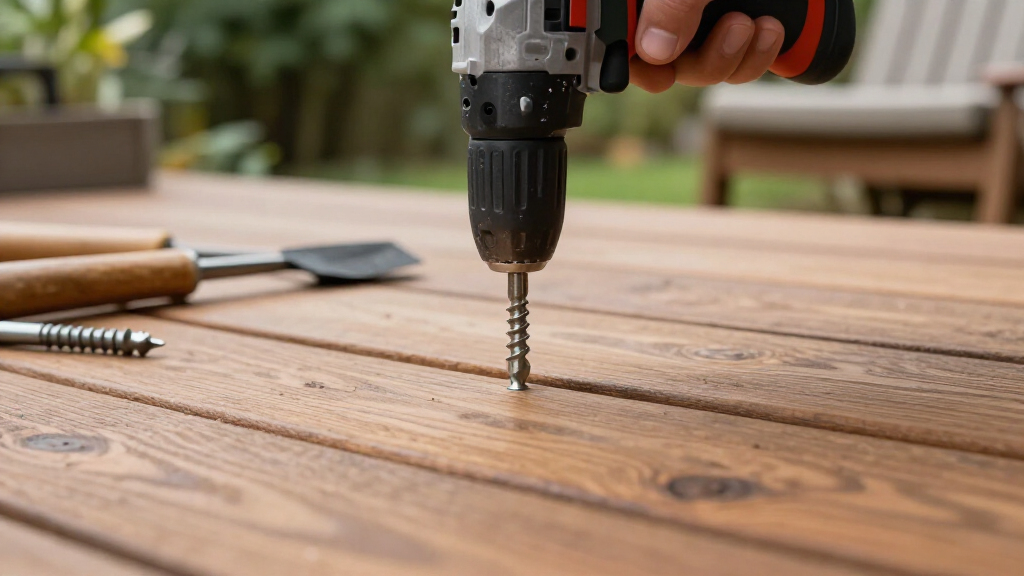
To drive long fasteners without stripping the head, use an undamaged, impact-rated bit that fits the screw exactly, keep the driver square, and apply firm forward pressure. Start slowly, let the screw track, then ease off as the head reaches its intended depth; if it stalls or slips, stop and check the bit, alignment, pilot hole, and fastener choice.
A long screw can bury itself in a deck board in seconds—and leave you with a mangled head just as quickly. An impact driver’s sharp rattling bursts make tough fasteners feel easy, but they can also chew up a screw when the bit slips or you keep driving after the head seats.
You can avoid most of that damage with a few deliberate choices: match the bit to the head, start the screw straight, and ease off near the surface. This guide walks you through a repeatable method for deck screws, structural screws, and other long fasteners, including when to drill a pilot hole or reach for a drill/driver instead.
You’ll also see where an impact driver’s speed helps, where its torque can work against you, and what to do when a screw begins to bind. For load-bearing work, follow the fastener maker’s specifications for the material, load, and pilot hole; a general-purpose technique cannot replace them.
Use an undamaged, impact-rated bit that fits the fastener’s drive recess snugly.
Start slowly with the driver square to the screw, then ease off as the head reaches its intended depth.
Use firm, steady forward pressure so the bit stays engaged; stop if the screw stalls, backs out, or slips.
Check manufacturer guidance for pilot holes, material, loads, and structural fasteners.
Choose a drill/driver or hand screwdriver when delicate work calls for finer control.
Why an impact driver can bury long screws so quickly
An impact driver drives a screw by combining rotation with short bursts of rotational force, called impacts. Those bursts help it keep turning when a long fastener meets resistance, so it can drive long screws quickly through dense wood or into a framing member. The practical benefit is fewer pauses as resistance changes, but that same ability can make it harder to notice that the screw has reached its intended depth.
That action is useful when you’re fastening deck boards or installing structural screws overhead. You hear the tool’s sharp chatter as resistance rises, and the screw keeps moving. But impact force does not guarantee control: if the bit is crooked or only partly engaged, each burst can knock it out of the recess and round off the head. Once the recess edges wear down, the bit has less surface to grip, so repeated attempts often make the problem worse rather than restoring control.
Think of the driver as a strong helper with a heavy hand. It can finish a job quickly, but you still need to steer it. A drill/driver often gives you a clutch and smoother control for delicate work, while an impact driver usually offers more turning force in a compact tool. The tradeoff is speed and torque versus a more gradual finish: a clutch can limit how far a small screw goes, while an impact driver may keep turning through changing resistance. Features vary by model, so check whether yours has selectable modes or depth control before you rely on them.
For example, when fastening a thick deck board to a joist, an impact driver can make short work of a long deck screw. When installing a small brass screw into a cabinet hinge, the same bursts can overwhelm the recess; a drill/driver or hand screwdriver gives you a gentler finish. Choosing the calmer tool in that case can take longer, but it also gives you more time to stop before the screw damages the hinge or its surrounding material.
Popular right now

Apple AirPods Pro 3 Wireless Earbuds with Active Noise Cancellation

KitchenAid Classic Series 4.5 Quart Tilt-Head Stand Mixer K45SS, Onyx Black

Ninja Specialty Coffee Maker CM401, 10-Cup Carafe, Fold-Away Frother, Black
As an affiliate, we earn on qualifying purchases.
Pick a bit that fits tightly before you pull the trigger
To reduce stripped heads, use a clean, undamaged bit that matches the screw’s drive type and size exactly. The bit should sit fully in the recess without rocking, because even a small gap gives the driver’s impacts room to slip and round the edges. A snug fit spreads the force across the recess; a loose fit concentrates it on a few edges, which can wear them down with each burst.
Check the fastener head before you start: Torx, square-drive, and Phillips screws each need their matching bit. A bit that almost fits is not close enough. If you’re driving a box of square-drive deck screws and the bit wobbles in the head, try the correct size rather than leaning harder on the tool. Extra pressure cannot make mismatched surfaces fit, and it may make the bit harder to keep square as the driver twists.
Choose an impact-rated bit for an impact driver. These bits are designed to flex under repeated torque; ordinary screwdriver bits can break more readily under that load. Look for visible wear, rounded corners, cracks, or a twisted tip. Replace a damaged bit instead of trying to squeeze one more screw out of it. A worn tip may still turn a screw in easy material, but it can slip when resistance rises—the point when the driver’s impacts are most likely to damage the head.
Keep a spare bit nearby on a long job. If the tip starts slipping, stop and inspect it before the screw head suffers more damage. A spare costs little compared with digging out a stripped fastener or replacing a board. Good fit does not fix a poor-quality or already damaged screw head, but it removes one of the most common causes of cam-out.
Follow these six steps for a straight, clean drive
To drive a long fastener without stripping its head, use an impact-rated bit, hold the driver square, and build speed only after the screw starts tracking straight. Stop if the screw stalls or the bit slips; more force can turn a minor setup problem into a ruined head. The sequence matters because each early step creates better conditions for the next: a stable workpiece helps the screw start straight, and a straight start keeps the bit engaged as resistance builds.
- Choose the right screw and bit. Confirm the fastener suits the material and job, then match its drive recess exactly. A screw intended for another material or connection can bind or fail to hold as expected even if it drives cleanly.
- Set up the workpiece. Support or clamp it where practical so it cannot shift as the screw bites. Movement at the start can tip the screw off line; correcting that later may enlarge the hole or leave the head at an angle.
- Align the driver. Seat the bit fully and hold the tool in line with the screw, not at an angle. Square alignment keeps contact across the recess and helps the screw follow its intended path.
- Start with a controlled trigger pull. Use a low-speed setting or gentle mode if your model offers one, and apply firm, steady forward pressure. A slower start gives you a chance to correct alignment while the screw is still easy to remove.
- Let the screw advance. Once it tracks straight, allow the driver to work without forcing the tool harder. The impacts supply turning force; excess body weight does little to improve the fit and can make the tool harder to control.
- Ease off near the surface. Slow down as the head approaches the material and stop at the intended depth. If it binds, backs out, or slips, release the trigger and reassess. Continuing after a stall can strip the head, heat the tool, or drive the screw too deep before you react.
Try the setup on scrap material if you need a flush or countersunk finish. For instance, test one screw in an offcut of the same deck board before committing to a row of visible fasteners. This shows how the screw and wood behave together, so you can adjust the trigger and stopping point before marks are repeated across the finished surface. If your impact driver lacks fine depth control, a depth-setting attachment may help with repeatable results; check that it suits your tool and fastener.
Steady forward pressure helps the bit stay engaged, but it does not mean leaning your full weight into the driver. Brace the tool with both hands if the position calls for it, keep your hands clear of the fastener path, and let the screw’s progress—not the sound alone—tell you when to slow down. Noise changes with the material and tool, so watching the head approach the surface gives you a more reliable stopping cue.
Use a pilot hole when the wood or screw calls for one
A pilot hole can lower driving resistance and reduce the chance of splitting wood, especially near an edge, in dense lumber, or with a larger fastener. The right hole size depends on both the screw and the material, so follow the fastener maker’s guidance instead of choosing one by guesswork. A hole that is too small may leave the screw working against too much wood; one that is too large can leave less material for the threads to grip.
Imagine driving a long screw into a dry, dense hardwood board close to its edge. The screw may bind before its head reaches the surface, and continued impacts can strip the recess or split the board. A properly sized pilot hole can give the fastener a clearer path while still letting its threads grip the wood. This is a useful tradeoff: drilling takes an extra step, but can reduce the force needed to drive the screw and protect both the board and the screw head.
Not every wood screw needs a pilot hole, and a hole that is too large may reduce holding strength. For structural screws, use the manufacturer’s instructions for the specific application and material. Those instructions may cover pilot holes, spacing, embedment, and the load the fastener can carry. The details matter because a screw that feels easy to drive is not necessarily installed to provide the connection’s intended strength.
When you’re fastening a board with a visible face, test the screw on an offcut first. If the trial split, stalled, or left the head proud, check the pilot-hole guidance and the screw type before repeating the drive. A brief setup step can save a board and spare the driver from unnecessary heat and battery drain.
Match the tool and fastener to the material and finish
The best driving setup depends on the fastener, material, and the control your tool offers. An impact driver suits many long deck and structural screws, while a drill/driver can give you finer control on small screws or delicate finishes. The choice affects more than speed: the wrong tool can make it harder to stop at the right depth or keep a small recess intact.
| Job | Useful setup | Why it helps |
|---|---|---|
| Long deck screw into lumber | Impact-rated bit, straight alignment, controlled start | Impact action can push through rising resistance without constant stalling. |
| Large screw near a board edge | Check pilot-hole guidance; clamp the board | A suitable pilot hole can reduce binding and splitting risk. |
| Small or delicate fastener | Drill/driver with a suitable clutch, or hand screwdriver | Finer control helps avoid overdriving and damaging the material. |
| Load-bearing structural connection | Specified structural fastener and maker’s installation instructions | Correct screw type, spacing, and installation affect the connection’s performance. |
For example, an impact driver can be a practical DIY tool for a short deck repair, but a long run of dense hardwood screws will work it harder and drain the battery faster. Keep a charged spare battery ready if the job is within the tool’s capacity. If you need a specialized high-torque tool for a one-off project, renting may cost less than buying and storing it. That convenience has a limit: if the tool keeps stalling or the fastener maker specifies equipment you do not have, reassess the setup instead of relying on more trigger time.
Never treat a driver’s maximum torque as permission to use any screw in any material. For structural or load-bearing work, follow the fastener maker’s specifications. Electrical, gas, roof, and structural changes can involve code or permit requirements; use a licensed professional where the work calls for one, and follow job-specific safety guidance. A connection’s performance depends on the specified fastener and installation details, not simply on how tightly the screw feels driven.
Stop these common causes of stripped screw heads
A stripped head usually means the bit stopped staying seated in the screw’s recess. The usual culprits are a mismatched or worn bit, crooked alignment, too little forward pressure, a rushed start, excessive force near the end, or a damaged screw head. These causes share a practical consequence: once the bit begins to slip, every additional burst can remove more of the shape it needs to grip.
Watch the bit and screw as you begin. If the fastener leans, pause and reset it while the screw is still shallow; trying to straighten it once it has sunk into the board can make the head slip. On a narrow deck board, clamp the workpiece if it shifts when the screw catches. A small correction early is usually easier than removing a deep, crooked screw and repairing the enlarged hole it may leave.
Also listen to the tool, but don’t treat its noise as a depth gauge. A rising burst of chatter can indicate greater resistance, while a sudden slip can mean the bit lost its seat. If the screw stops moving, backs out, or the bit begins to skate, release the trigger and inspect the setup instead of pressing harder. The pause helps distinguish a correctable issue, such as a worn bit, from a binding screw that may need a pilot hole or different fastener.
If a head is already damaged, stop driving. More impacts can leave the bit with nothing to grip. The next move depends on how badly it is damaged and what access you have; protect the surrounding material and use an appropriate removal method. If the fastener is part of a structural connection, follow the fastener maker’s guidance for replacement and installation.
Keep your hands, eyes, and work area out of the danger zone
Wear eye protection, keep your free hand clear of the screw’s path, and follow your tool and fastener manufacturers’ instructions. A slipping bit can kick sharply, while wood chips or a broken bit can fly toward your face. The risk increases when you try to correct a slipping bit while the tool is still running, so release the trigger before repositioning it.
Secure loose boards when practical and keep your stance stable, especially when working from a ladder or overhead. Don’t brace your hand behind the point where the screw will emerge. If you’re working near wiring, plumbing, or other concealed services, check the area before driving; a long fastener can reach farther than a trim nail. Knowing what lies behind the surface matters because a fastener that is long enough for the job can also penetrate concealed materials.
Dust control matters when you drill pilot holes indoors or cut material for the job. Use suitable extraction and respiratory protection for the material and conditions, and clear chips from the work area so you can see whether the screw is tracking straight. Visibility helps you catch a crooked start before the screw gets deep enough to be difficult to correct.
For electrical work, turn off power at the appropriate breaker and verify the circuit is de-energized before work. Gas, roof, and structural work can carry serious hazards and code requirements; use a licensed professional when the task falls into those areas. A fastener is small, but the assembly it holds may not be.
Frequently Asked Questions
Can I use regular screwdriver bits in an impact driver?
Use impact-rated bits for repeated impact-driver work. They are designed to flex under the tool’s torque; ordinary bits can break more readily. Replace any bit with a rounded, cracked, or twisted tip.
How much pressure should I apply while driving a long screw?
Apply firm, steady forward pressure to help keep the bit fully seated. Don’t lean your full weight on the tool. If the bit slips or the screw stops advancing, release the trigger and inspect the fit, alignment, and pilot-hole needs.
Should I drill a pilot hole for a long screw in wood?
Sometimes. A pilot hole can reduce resistance and splitting risk near an edge, in dense lumber, or with a larger fastener. Follow the fastener maker’s instructions for the screw and material, since the suitable hole size varies.
How do I drive a screw flush without overdriving it?
Start with a controlled trigger pull and slow down as the head approaches the surface. Stop at the intended depth; if your driver lacks fine control, test on scrap or use a suitable depth-setting attachment. A drill/driver may be easier for delicate finishes.
Why does my impact driver keep slipping out of the screw head?
Common causes include the wrong bit size or type, a worn bit, poor alignment, too little forward pressure, or a damaged screw head. Stop when slipping begins, then check the fit and hold the driver square before trying again.
Conclusion
For long fasteners, let a snug bit, straight alignment, and steady pressure do the work. Start under control, watch the screw advance, and ease off as the head reaches its intended depth; if it binds or slips, stop and check the setup.
That small pause can save a screw, a board, and a lot of cleanup. The driver brings the force; you bring the judgment.