
TL;DR

Get business pricing on tools and workshop supplies
- Business-only prices and quantity discounts
- Tax-exempt purchasing
- Multiple users, one account, clear invoices
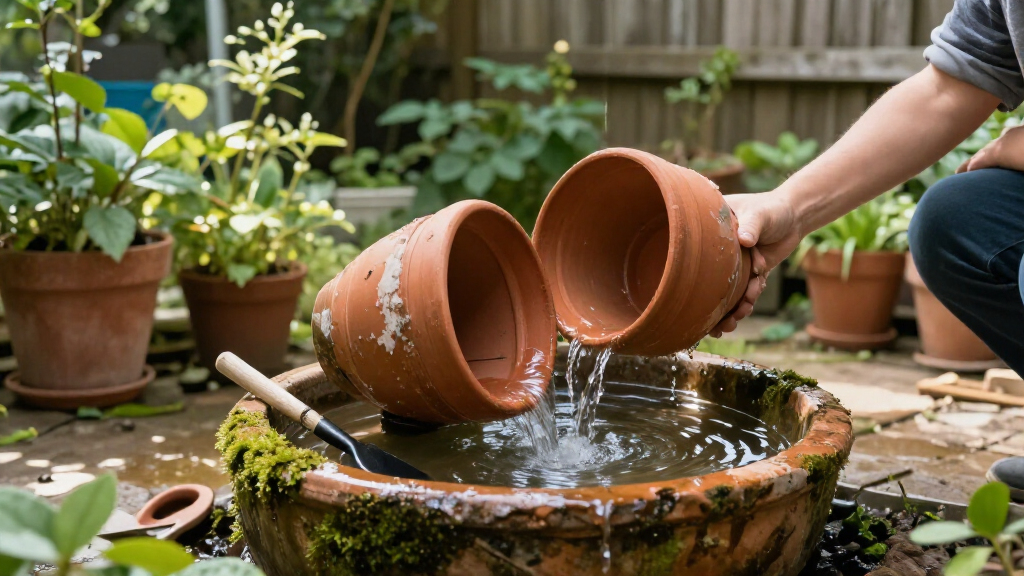
Hunker published instructions for turning old plant pots into a backyard fountain using a pump, tubing and a spray nozzle. The project calls for sealing the base pot against leaks, fitting the tiers so the tubing can pass through, and testing the assembly with water; cost and performance are not quantified.
Hunker has outlined a do-it-yourself method for making a backyard fountain from old plant pots, using a water pump, tubing and a spray nozzle instead of buying a ready-made feature. The project repurposes pots as the fountain’s tiers, but the report does not provide a price estimate or compare the finished fountain’s performance with commercial options.
The basic design uses several pots in different sizes, arranged from smaller at the top to larger at the bottom. The largest pot forms the water-holding base, while the pump sits inside it and pushes water through tubing routed up through the drainage holes in the upper pots. A spray nozzle attaches at the top. The report also lists waterproof caulk and rubber stoppers as useful supplies for sealing openings and cracks.
Before assembling the fountain, Hunker advises sealing the base and allowing the caulk to cure. A dry fit can show whether the tiers sit securely and whether the tubing lines up. For a deep base, an upside-down smaller pot may raise the pump; a flat, waterproof saucer with a hole in the center can provide a steadier support for an upper tier. Once the fit is checked, the pieces can be taken apart, the base filled with water, and the fountain reassembled and switched on.
The report suggests using stones to add weight and help keep tubing in place, and says the pots can be painted or decorated with water-safe materials. More elaborate designs could include decorative-rimmed pots, a small lightweight statue, or an angled upper pot that lets water spill back into the base. Any ornament must leave the spray nozzle unobstructed; the article also notes that drilling a spillway depends on the pot material.
A Fountain Built Around Reused Pots
The method offers homeowners a way to reuse containers already on hand rather than purchasing a complete fountain. Its practical appeal is the flexibility of the design: different pot sizes and styles can be stacked or arranged, and the visible tiers can be customized with paint, stones or other water-safe decoration. That makes the project adaptable to a garden’s existing look, although the report does not establish how much a household would save.
The instructions also highlight the main functional challenge: the lower pot must hold water, while the pump and tubing need to remain correctly positioned. A poor seal can cause leaks, and unstable tiers can shift. The proposed dry fit and careful sealing are therefore not just cosmetic steps; they address whether the fountain can hold water and run as intended.
Popular right now

Shark Navigator Lift-Away Upright Vacuum, NV360

De'Longhi Dinamica Plus Fully Automatic Espresso Machine

LG 85-Inch QNED73B Mini LED 4K Smart TV (2026)
As an affiliate, we earn on qualifying purchases.
How the Pot Fountain Works
Hunker frames the pot arrangement as an alternative to buying a conventional outdoor fountain or placing a solar fountain in a birdbath. The report says conventional fountains can be expensive and difficult to install, and notes that a birdbath setup may be prone to clogging from feathers. These are the article’s stated considerations, not a comparative cost or reliability study.
The pot design relies on ordinary features of planters: a range of shapes and sizes that can form tiers, and drainage holes that may provide a route for tubing. Materials vary, so the directions treat sealing and drilling as dependent on the specific pots. The article gives no model recommendations for pumps or instructions for particular materials, leaving those choices to the project builder.
“Plant pots make excellent fountains for a few reasons.”
— Hunker
Costs and Long-Term Use Remain Unknown
The supplied report does not state the total cost, build time, pump capacity, water use or expected lifespan of the DIY fountain. It also does not provide testing results showing how well the design performs outdoors or how often it needs maintenance. Those details may depend on the pump, pot materials, seal quality and local weather.
The instructions do not specify a particular pump model, nozzle type or sealant, and they do not explain how to protect the pump or water from freezing conditions. The article says pots are generally water- and weather-resistant, but that description should not be treated as a guarantee for every planter. Builders will need to check product guidance for their own pots, caulk and pump.
Check the Fit Before Adding Water
The next step for anyone trying the project is to choose pots that can be safely stacked, confirm the pump and tubing fit, and seal the base according to the sealant instructions. After the caulk has cured, the dry fit can reveal wobbling or misaligned drainage holes before water is added. The fountain should then be tested with the nozzle clear and the pump positioned as its manufacturer directs.
Hunker’s report does not announce a follow-up test or provide additional performance data. For now, the outcome depends on the materials and assembly used in each build, including whether the base remains watertight once the pump is running.
Key Questions
What supplies are needed for the plant-pot fountain?
The report lists pots in several sizes, a fountain pump, tubing and a spray nozzle. Waterproof caulk and rubber stoppers can help seal the base; stones and other water-safe decorations are optional.
How do you stop the bottom pot from leaking?
Hunker advises sealing cracks and drainage holes in the largest pot. A rubber stopper can be held in place with caulk, with more caulk applied underneath; allow the sealant to cure before filling the pot, following its product instructions.
Does the tubing pass through the pots?
Yes. The design routes tubing from the pump in the base upward through the drainage holes in the upper tiers, ending at a spray nozzle. A dry fit helps check that the openings line up.
Can the fountain be decorated?
The report suggests painting pots and adding water-safe stones or other decorative elements. It also describes more elaborate tier arrangements, but says a statue or ornament should not block the nozzle.
Is this DIY fountain guaranteed to cost less than a store-bought one?
The article presents the project as an affordable reuse idea, but it gives no itemized budget or direct price comparison. The final cost will depend on whether the builder already owns suitable pots and on the pump, sealant and other supplies needed.
Source: hunker.com