
TL;DR

Get business pricing on tools and workshop supplies
- Business-only prices and quantity discounts
- Tax-exempt purchasing
- Multiple users, one account, clear invoices
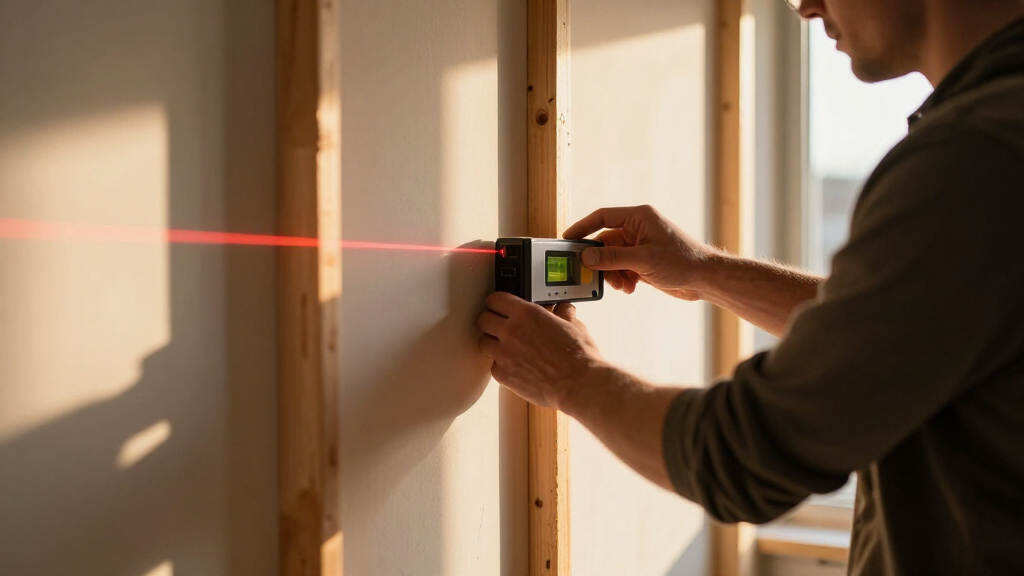
To use a laser level for interior wall alignment, mount it on a stable tripod, let it self-level (typically accurate to ±1/8 inch over 30 feet), project your horizontal or vertical reference line, and mark the wall at intervals with a pencil. Green beam line lasers are the right tool for most interior work — they’re up to 4x more visible than red beams in bright rooms, and checking calibration with a two-wall flip test before every major job keeps your walls dead straight.
The crooked wall nobody notices on day one becomes the wall everybody notices after the trim goes on. I’ve ripped out $2,000 worth of misaligned framing because somebody trusted a 4-foot level and a hopeful eye instead of a laser level. That’s the honest reason this tool exists: it removes guesswork from interior wall alignment, and it does it in seconds.
Here’s the thing most guides skip: the laser isn’t magic. Set it up wrong — soft footing, out of calibration, bumped mid-job — and it will confidently hand you a crooked line all day long. The tool is only as good as your process.
In this guide, you’ll learn how to choose the right laser for interior work, set it up so it stays put, verify calibration in five minutes, and mark walls like a pro. I’ll also tell you where the DIY-grade gear stops and the pro-grade stuff starts, plus when renting beats buying. Safety first, always — these are lasers, and we’ll cover eye protection too.
A green beam self-leveling cross-line laser ($150–$250) is the right tool for nearly all interior wall alignment — green reads roughly 4x brighter than red in…
Respect the self-leveling range: most units only level within ±3–4 degrees of plumb. A flashing or beeping beam means your tripod is out of range — fix the mou…
Run the two-wall flip test before every major job; drift over 1/16 inch at 10 feet means the unit needs factory recalibration ($50–$100).
Mark the center of the projected line with a sharp pencil at 4–6 foot intervals — the beam itself is 1/8–3/16 inch wide, and sloppy marks multiply error down t…
A laser keeps your layout straight, not legal: structural wall changes need permits, engineers, and licensed trades where applicable.
How to Properly Set Up and Use Laser Levels for Interior Wall Alignment
The honest reason this tool exists: it removes guesswork from interior wall alignment in seconds. I’ve ripped out $2,000 worth of misaligned framing because somebody trusted a 4-foot level and a hopeful eye instead of a laser.
The laser isn’t magic. Set it up wrong — soft footing, out of calibration, bumped mid-job — and it will confidently hand you a crooked line all day long. The tool is only as good as your process.
Pick the Right Laser: Dot, Line, or Rotary
For interior wall alignment, the right laser is a self-leveling cross-line laser — it projects crisp horizontal and vertical planes and does 90% of interior layout work. Dot lasers just throw points; rotary lasers are overkill for a single wall. And beam color matters: green reads roughly 4× brighter than red in the same power class.
| Laser Type | Best For | Indoor Range | Price Ballpark | Wall Alignment? |
|---|---|---|---|---|
| Dot laser | Transferring single points (plumb bob replacement) | 30–50 ft | $40–$100 | ✗ Useless for wall runs |
| Red line laser (cross-line) | Dim rooms, occasional DIY projects | 30–50 ft | $60–$150 | ~ OK in dim basements |
| Green line laser (cross-line, self-leveling) | Wall alignment, tile, cabinetry — most interior work | 50–100 ft | $150–$400 | ✓ The right tool |
| Rotary laser | Large commercial interiors, drop ceilings | 100+ ft (with detector) | $400–$1,200 (rent ~$50/day) | ~ Overkill for one wall |
Bottom line: a $180–$250 green cross-line laser with self-leveling handles 95% of interior wall jobs. Need a rotary for one basement project? Rent it. Don’t buy a $900 tool for a single weekend.
Set Up Your Laser in 6 Steps So It Doesn’t Move All Day
Proper setup comes down to one idea: a stable mount, a level start, and nobody touching it afterward. Follow these steps and the line you mark at 8 a.m. will still be true at quitting time.
Clear & stabilize the floor
Sweep debris. Spread tripod legs wide and press firm — never on loose plywood scraps. A quarter-inch shift drops your line a quarter inch.
Mount at working height
Chest height (50–60″) puts the line where your eye reads it. A wall bracket with micro-adjust beats a cheap tripod.
Let it self-level
Give the pendulum 5–10 seconds. A flashing beam or beep = you’re outside the ±3–4° range. Re-level until solid.
Verify with bubble vial
Self-leveling is great, but a 30-second cross-check costs nothing.
Lock pendulum for transport
Never carry the laser free-floating — that’s how calibration dies. Locked, padded case, every time.
Secure the power cord
Drape or tape it — a drop cloth snagging a cord can pull the laser off a mantel mid-layout.
Runtime note: most modern line lasers run 10–20 hours on a lithium pack or AA batteries. For full-day framing, carry spares or a USB power bank — a dead laser mid-layout kills momentum fast.
The 5-Minute Calibration Check That Saves Whole Walls
Calibration is the difference between a straight wall and a slow, invisible bow. One drop off a truck tailgate can knock a laser out of spec — it might read fine at 5 feet and drift half an inch at the far end of the room.
Relative Beam Visibility Indoors
Error Multiplied Down a Wall Run
The two-wall flip test: place the laser 5–10 ft from a wall and mark where the horizontal line hits. Rotate 180° and project back onto the mark. Line lands on the mark = you’re level. Repeat at 90° for the vertical axis. Drift over 1/16″ at 10 feet = factory recalibration ($50–$100).
Mark Walls Like a Pro
Mark the center of the projected line with a sharp pencil at 4–6 foot intervals. The beam itself is 1/8–3/16″ wide — sloppy marks multiply error down the run.
Sharp pencil, center of beam
A dull pencil adds its own 1/16″ of error. Mark the line’s center, not its edge, every time.
Every 4–6 feet
Snap a chalk line between marks, or strike a straightedge — never freehand across a 12-foot run.
Protect your eyes
These are lasers — avoid direct beam exposure, use appropriate eye protection, and follow manufacturer instructions.
Straight, not legal: a laser keeps your layout straight — structural wall changes still need permits, engineers, and licensed trades where applicable.
Pick the Right Laser: Dot, Line, or Rotary (and Why Green Beats Red Indoors)
For interior wall alignment, the right laser is a self-leveling line laser — it projects crisp horizontal and vertical planes across your walls and does 90% of interior layout work. Dot lasers just throw points (fine for transferring a mark, useless for checking a wall run), and rotary lasers spin a beam 360° around the room — powerful, but overkill and overpriced for a single wall.
Beam color matters more than most DIYers expect. Green lasers read roughly 4x brighter to the human eye than red in the same power class, which is why green dominates interior work — your eye picks up the line instantly across a sunlit room. Think of it like a flashlight in daylight versus dusk: a red line is easy to spot in a dim basement but practically disappears against a bright window, while a green line cuts through the glare. If you’re tiling a bathroom with one small light bulb, red saves you $50. If you’re working in a daylight-filled living room, spend the money on green.
Picture the typical jobs to see the difference: hanging kitchen cabinets, a dot laser can’t help you check a 12-foot cabinet run, but a cross-line laser throws one continuous horizontal reference across the whole wall. Framing a basement? A cross-line handles every stud wall in the room. Only when you jump to full commercial layout — drop ceilings across a 5,000-square-foot floor — does a rotary earn its price.
Here’s a quick comparison:
| Laser Type | Best For | Typical Range (Indoor) | Price Ballpark |
|---|---|---|---|
| Dot laser | Transferring single points (plumb bob replacement) | 30–50 ft | $40–$100 |
| Red line laser (cross-line) | Dim rooms, occasional DIY projects | 30–50 ft | $60–$150 |
| Green line laser (cross-line, self-leveling) | Wall alignment, tile, cabinetry — most interior work | 50–100 ft | $150–$400 |
| Rotary laser | Large commercial interiors, drop ceilings, full-room layout | 100+ ft (with detector) | $400–$1,200 (rent: ~$50/day) |
The bottom line: a $180–$250 green cross-line laser with self-leveling handles 95% of interior wall jobs. If you need a rotary for one basement project, rent it. Don’t buy a $900 tool for a single weekend.
Popular right now

KitchenAid Artisan Series 5-Quart Tilt-Head Stand Mixer, Dried Rose (KSM150PS)

Vitamix Propel Series 510 Professional-Grade Blender, 3 Programs, Black

Dreame L50 Ultra Robot Vacuum and Mop
As an affiliate, we earn on qualifying purchases.
Set Up Your Laser in 6 Steps So It Doesn’t Move All Day
Proper setup comes down to one idea: a stable mount, a level start, and nobody touching it afterward. Follow these steps and the line you mark at 8 a.m. will still be true at quitting time.
- Clear and stabilize the floor. Sweep the debris. If the slab or subfloor is uneven, don’t set the tripod on loose plywood scraps — spread the legs wide and press them firm. A tripod set on a scrap that shifts a quarter inch under load will drop your reference line the same quarter inch across the whole room.
- Mount on a tripod or wall bracket at working height. Chest height (about 50–60 inches) puts the line where your eye naturally reads it. A wall bracket with a micro-adjust knob beats a cheap tripod for fine tuning — useful when you’re matching an existing datum line on a backsplash, for example.
- Power up and let it self-level. Give the pendulum 5–10 seconds to settle. If the beam flashes or the unit beeps, you’re outside its self-leveling range (typically ±3 to ±4 degrees) — re-level the tripod until the line goes solid and steady.
- Verify with the bubble vial if your model has one. Self-leveling is great, but a 30-second cross-check costs nothing.
- Lock the pendulum only for transport. Never carry the laser with the pendulum free-floating — that’s how calibration dies. Locked pendulum, padded case, every time.
- Drape or tape the power cord (if it’s not battery-powered) so nobody snags it walking past. A common jobsite failure mode: a painter’s drop cloth brushing a cord and pulling the laser off a mantel or shelf mid-layout — an expensive, entirely avoidable mistake.
Runtimes matter here too. Most modern line lasers run 10–20 hours on a lithium pack or AA batteries. For a full-day framing job, carry spares or a USB power bank if your model supports charging — a dead laser mid-layout kills momentum fast.
The 5-Minute Calibration Check That Saves Whole Walls
Calibration is the difference between a straight wall and a slow, invisible bow — and you should check it before every major job, because a single drop off a truck tailgate can knock a laser out of spec. A quality unit holds ±1/8 inch accuracy over 30 feet; a dropped one might read fine at 5 feet and drift half an inch at the far end of the room.
Here’s a concrete example of why this matters: say you’re hanging a run of upper cabinets using a laser that drifts 1/4 inch over 12 feet. The first cabinet is set perfectly, but by the fourth one the reference line has crept low — and now every cabinet is out of level relative to the countertop below. That’s the kind of error you don’t see until the reveals are shot.
Here’s the two-wall flip test, the standard field check for line lasers. Set the laser on a stable surface 5–10 feet from a wall and mark where the horizontal line hits. Rotate the laser 180° (same spot, facing the opposite direction) and project toward a second mark or back on itself. If the line lands where your mark is, you’re level. Now repeat the process rotated 90° to test the vertical axis. Any deviation more than about 1/16 inch over that distance and your laser needs factory recalibration — most manufacturers do it for $50–$100, which is cheaper than rehanging a wall of cabinets.
Rule of thumb from the Bauecho jobsite files: check calibration after every drop, every truck ride over rough ground, and before anything you can’t easily redo — tile, cabinetry, finished trim.
Dust is the quiet killer too. A gritty lens scatters the beam into a fuzzy blob instead of a crisp line — think of a car windshield with road film: the light source smears instead of focusing. Wipe the glass with a lens cloth (not a shirt tail, not a shop rag) at the end of each day, and store the unit in its case. A laser living loose in a tool bag picks up scratches that no calibration fixes.
Mark the Wall Like a Pro: Reading the Line Without Chasing It
Reading a laser line sounds trivial until you realize the beam has thickness — a projected line is typically 1/8 to 3/16 inch wide at 30 feet, and sloppy marking multiplies that error across a whole wall. The fix: mark the center of the line, consistently, every time. An analogy: it’s like tracing a fat marker line versus a fine pen — if you mark the top edge of the beam one day and the bottom edge the next, you’ve added the beam’s full width to your error before you’ve even picked up a tool.
For wall alignment specifically, here’s the workflow. Project a vertical line down the stud face or drywall plane you’re checking, then hold your tape or straightedge against the wall and note where the beam kisses it. Gaps between the beam and the wall tell you where the framing bows. A typical example from basement framing: a wall can be out by 3/8 inch over 12 feet — invisible to the eye, glaring under the laser, and exactly the kind of bow that shows up as a wavy shadow line when the finish lights hit it.
- Mark with a sharp pencil, not a fat carpenter’s pencil — you’re transferring precision, so keep the mark under 1/16 inch wide.
- Mark at intervals (every 4–6 feet) rather than trying to scribe one continuous line along the beam — then connect the dots with a straightedge, the same way you’d connect survey points.
- Use a laser detector/receiver beyond the visible range — most line lasers read cleanly to 50–100 feet indoors, but in a long commercial space, the receiver extends that dramatically and keeps accuracy tight.
- Rotate the laser between walls without moving the base when you need square corners — many cross-line lasers project a fixed 90° plumb-dot pair for exactly this, which is how you keep a tile wainscot square to both walls of a corner.
- Don’t eyeball the beam at a steep angle. Read it square-on, or mark a point and step to it. Viewing angle alone can shift your perception 1/8 inch — the same way a gauge needle reads differently depending where you stand.
For textured walls, hold a straightedge or piece of flat stock against the surface and mark off that — the beam will scatter across heavy orange-peel texture, but a clean flat reference reads perfectly.
Laser Safety, Code Reality, and When to Rent Instead of Buy
Laser safety for interior work is simple: don’t stare into the beam. Virtually all line lasers used for interior layout are Class 2 or 2M (under 1 milliwatt), which your blink reflex protects you from in a glancing hit — but a deliberate stare into the aperture can cause eye injury, and rotary lasers can run hotter. Wear laser-rated safety glasses when working with rotary units or when multiple beams are in play, and never aim any laser at another person’s face. Keep the unit off while carrying it around; the flashing beam across a room is how coworkers take a hit in the eye.
Now the compliance angle, because it’s my job to be honest about it: a laser level helps you build straight, but straight isn’t the same as code-compliant. Wall framing, load-bearing changes, and anything structural still needs to meet your local building code, and most jurisdictions require a permit and inspection for structural wall work. If your “wall alignment” project involves moving or removing a wall, get an engineer and a licensed contractor involved before you cut anything. Electrical in that wall? Licensed electrician, power confirmed off at the panel, verified with a tester. The laser keeps your layout honest — it doesn’t make you a structural engineer.
And the rent-vs-buy math: buy a green cross-line laser if you’ll use it more than three or four times a year — at $150–$250, it pays for itself by the second tile job. Rent a rotary ($40–$60/day) for one-off large spaces. DIY-grade red line lasers under $80 are genuinely fine for hanging pictures and a single accent wall; they’re not fine for full-room layout where cumulative drift matters.
Frequently Asked Questions
Can I use a laser level on uneven or textured walls?
Yes, but don’t try to read the beam directly off heavy texture like orange-peel or knockdown — the line scatters into a blurry halo. Instead, hold a straightedge or flat piece of stock against the wall and read the beam off that clean edge. For framing behind drywall, project the vertical line and measure gaps with your tape at stud intervals to find bows and humps.
How accurate are laser levels for interior wall alignment?
A quality self-leveling line laser holds ±1/8 inch over 30 feet, which is far tighter than a 4-foot spirit level stretched across a room. Accuracy degrades if the unit is dropped, mounted on a soft surface, or pushed beyond its self-leveling range (typically ±3–4 degrees). Check calibration with a two-wall flip test before critical work.
Why is my green laser line flickering or beeping?
That’s the out-of-level alarm. The pendulum can only self-level within about ±3–4 degrees of plumb, and beyond that range the unit flashes or beeps to warn you the line is unreliable. Re-level the tripod or mounting bracket until the line goes solid and steady. Some models also pulse the beam when battery voltage drops low.
Do I need laser safety glasses for interior laser level work?
For Class 2 line lasers, ordinary care is enough — don’t stare into the beam and don’t aim it at anyone’s face. For rotary lasers or multi-beam setups, laser-rated glasses are a smart call, especially over long distances. Never disable the pendulum lock to project a tilted ‘manual’ line at eye level around other people.
Should a DIYer buy a laser level or rent one?
Buy a green cross-line laser in the $150–$250 range if you’ll use it a few times a year — hanging cabinets, tiling, framing accent walls. It pays for itself fast. Rent a rotary laser ($40–$60/day) for one-off large spaces. Sub-$80 red line lasers are fine for hanging pictures, but their dimmer beams and looser tolerances make them a poor choice for full-room wall layout.
Conclusion
If you remember one thing: accuracy is a setup habit, not a tool spec. Stable tripod, settled pendulum, calibration checked, marks taken at the center of the line — do those four things and a mid-priced green line laser will give you walls straight to a sixteenth of an inch. Skip them and the fanciest tool on the shelf will lie to you all day.
Set the laser up, flip-test it, and let the line do the arguing with your framing. The finish carpenter who comes after you will notice — guaranteed.