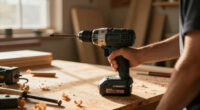
TL;DR

Get business pricing on tools and workshop supplies
- Business-only prices and quantity discounts
- Tax-exempt purchasing
- Multiple users, one account, clear invoices
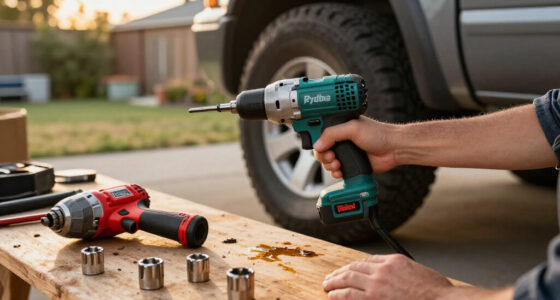
The best practices for using cordless impact drivers in tight spaces are to compare head length, use short impact-rated accessories, start on the lowest useful setting, and keep the bit square to the fastener. Protect nearby finishes, remove the battery before changing accessories, and use a hand tool or torque wrench for final tightening when accuracy matters.
Maximum torque means nothing when the back of your impact driver hits a cabinet wall before the bit reaches the screw. In tight quarters, a tool with less headline power can finish the job faster because its short head, compact battery, and controllable trigger let you work squarely instead of wrestling the housing sideways.
You will learn how to choose a driver that fits, pair it with impact-rated accessories, and control the tool before a screw strips or a bit skates across fresh paint. You will also see why 12V tools, right-angle attachments, work lights, and short trigger bursts often beat brute force inside cabinets, between studs, and beneath sinks.
Tight-space driving rewards preparation. The chuck can hide the screw head, an extension can wobble like a bent shopping-cart wheel, and a sudden stop can trap your fingers against a pipe. Follow the fastening sequence in this guide, respect hidden wiring and plumbing, and you can trade frantic rattling for controlled, clean fastening.
Measure chuck-to-housing head length and include the seated bit when checking rear clearance.
Use only short, impact-rated bits, sockets, holders, adapters, and extensions; every added joint increases play.
Start on the lowest useful setting, apply straight forward pressure, and drive with short trigger bursts.
Remove the battery before changing accessories, protect your eyes and hearing, and isolate nearby electrical circuits.
Switch to a clutched drill, hand driver, torque wrench, or rented right-angle tool when the impact driver cannot stay aligned.
Best Practices for Using Cordless Impact Drivers in Tight Spaces
Access beats advertised power. Compare head length, use the shortest impact-rated accessory, start on the lowest useful setting, and keep the bit square. Protect nearby finishes and switch tools when accurate final torque matters.
Measure from the chuck to the rear housing, then include the seated bit.
Apply forward pressure before using short, deliberate trigger bursts.
An impact driver is powerful, but it is not a calibrated torque wrench.
From workspace inspection to final fastener check.
Keep the bit directly in line with the fastener.
Often easier to maneuver inside cabinets and cavities.
Every added joint introduces play, wobble, and energy loss.
Measure the working envelope
Maximum torque is irrelevant when the rear housing hits a cabinet wall before the bit reaches the screw. Check the entire drive path, including the seated bit, your hand position, and enough withdrawal space to leave cleanly.
The number that predicts access
Overall tool length can mislead. The critical dimension is the working length behind the screw.
Compact 12V impact driver
Strong everyday choice for cabinets, appliance work, electrical trim, and routine repairs.
Best balanceRight-angle impact driver
Choose when rear or overhead clearance remains too limited for an inline housing.
Extreme accessClutched drill/driver
Better for delicate wood, plastic anchors, thin metal, and small screws that do not need impact action.
Controlled seatingRented specialty tool
Ideal for one awkward heavy-duty project where proper alignment cannot be achieved with your current tools.
Occasional workNine steps to a clean fastener
Impact action begins after resistance builds. That sharp hammering is useful for stubborn fasteners, but it magnifies poor alignment, loose adapters, and late trigger release.
Use short bursts
A half-second of unnecessary hammering can bury a screw, crush fibers, strip threads, or damage an anchor.
Push straight forward
Steady axial pressure keeps the bit seated. Side loading encourages cam-out and increases accessory stress.
Plan the escape path
The tool can jump or wedge when a fastener stops suddenly. Never brace fingers beside a pipe, wall, or joint.
Complete the job with a hand driver, clutched drill/driver, or calibrated torque wrench. Electronic assist modes improve control but do not provide calibrated final torque.
Short, rated, and fully seated
Accessories experience repeated pulsing loads. Use components explicitly rated for impact work and keep the stack as short and simple as the fastener location allows.
Use the exact fit
Choose the correct bit size, replace rounded tips, and clean debris from the fastener recess. Torx and Robertson generally retain the bit better than Phillips.
Confirm impact rating
Use impact sockets with compatible impact-rated adapters. Ordinary chrome hand-tool sockets can crack or shatter under repeated blows.
Respect the joints
Confirm the impact rating, torque limit, and fastener range. Hold only the designated grip and keep fingers away from input and output joints.
Every connection adds play
Long holders, stacked extensions, and adapters make the tip harder to control and can absorb impact energy.
Maximum control Single short extension
Use only if needed Stacked adapters
High wobble risk
Match the tool to the constraint
The best choice is the one that stays aligned, leaves room for your hand, and provides enough control for the material—not necessarily the option with the highest voltage or torque figure.
| Situation | Best option | Why it works | Main limitation |
|---|---|---|---|
| Narrow cabinet or furniture cavity | ✓Compact 12V impact driver | Short head and small battery improve access and balance. | ~May be slower on large structural fasteners. |
| Minimal rear clearance | ✓Right-angle impact driver | Redirects the drive axis where an inline housing cannot fit. | ~Specialized tool with a different grip and reaction path. |
| Occasional recessed fastener | ✓Impact-rated right-angle attachment | Adds access without purchasing another complete tool. | ~Introduces gears, movement, and torque limits. |
| Plastic, thin metal, or finished wood | ✓Compact clutched drill/driver | Adjustable clutch reduces the risk of crushing or overtightening. | ✗Less effective on heavily resisted fasteners. |
| Specified final torque | ✓Calibrated torque wrench | Provides measured final tightening instead of estimated impact duration. | ✗May require the impact driver to stop short first. |
| One heavy, unusually awkward job | ✓Rent a specialty tool | Turns an unsafe compromise into a straight, controlled drive. | ~Availability and rental time must be planned. |
✓Preferred solution ~Tradeoff to manage ✗Not suitable for that part of the task
Preparation creates a clean finish
Each decision protects the next. Good access supports alignment; alignment supports control; control protects the fastener, the surrounding surface, and the operator.
Understand the Hammering Action Before It Controls the Job
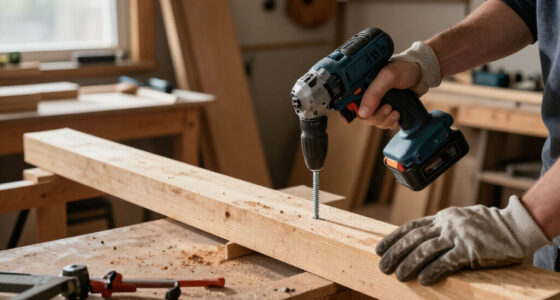
A cordless impact driver turns a fastener while delivering rapid concussive blows, giving you strong driving force with less sustained wrist twist than a conventional drill. That hammering action helps with stubborn screws, but inside a cabinet the same force magnifies poor alignment, loose adapters, and contact with nearby finishes.
Think of an impact driver as a small mechanic tapping a wrench thousands of times while you hold the handle. The blows arrive only after resistance builds, which is why the tool may start quietly and then erupt into a sharp metallic chatter. Impact drivers are powerful, but their noise and speed can make a half-second mistake surprisingly expensive.
For example, you may drive a 75 mm construction screw through a cabinet rail with almost no effort. When the head reaches the wood, another burst can bury it below the veneer, crush the fibers, or split the rail. The driver cannot feel the finished surface for you; your trigger finger remains the control system.
A drill/driver behaves more like a faucet with a pressure regulator. Its clutch can stop driving near a selected resistance, while an impact driver usually keeps hammering until you release the trigger or an electronic mode intervenes. Assist modes help with slow starts, self-tapping screws, and automatic stopping, but they do not deliver calibrated torque.
An impact driver is not a torque wrench. Battery charge, impact duration, adapters, fastener friction, and joint material all change the final result.
The practical lesson is simple: use impact action for the resistant part of the drive, then stop before final seating when the material is delicate or the torque specification matters. Finish with a hand driver, a clutched drill/driver, or a calibrated torque wrench. That small tool change can save a plastic anchor, electrical terminal, or expensive cabinet face.
Popular right now

DeLonghi Rivelia Automatic Espresso Machine Bundle with Grinder and Frother, Beige

Shark Navigator Lift-Away Upright Vacuum (NV360)

Dreame L40 Ultra Gen 2 Robot Vacuum and Mop
As an affiliate, we earn on qualifying purchases.
Choose a Driver That Actually Fits Behind the Screw
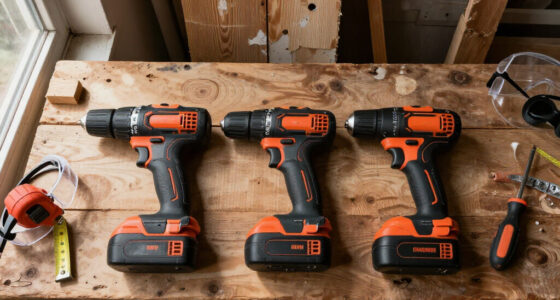
Best practices for using cordless impact drivers in tight spaces start with measuring the path behind the fastener, then comparing that clearance with the tool’s head length, battery shape, grip, and bit. A subcompact 12V driver is often easier to maneuver than a larger model carrying twice the advertised torque.
Measure from the screw head to the nearest wall, pipe, shelf, or framing member. Then add the length of the seated bit and leave enough room for your hand to hold the tool straight. Overall tool length can mislead you; the useful figure is the distance from the chuck to the rear housing.
Suppose you have 145 mm between a cabinet rail and the opposite panel. A driver with a 120 mm head plus a 25 mm bit may technically fit, yet it leaves no room to align the bit or withdraw it cleanly. A 100 mm head provides breathing room, much like using a stubby screwdriver instead of forcing a full-length handle into a drawer.
Do not judge compact tools by voltage alone. A modern 12V brushless driver can handle cabinet installation, appliance work, electrical trim, and general repairs while keeping the battery out of your wrist’s path. Large structural screws may call for an 18V tool, but the bigger pack and thicker grip can become a liability between studs.
- Choose a subcompact impact driver for routine cabinet and framing cavities.
- Choose a right-angle impact driver when overhead or rear clearance stays extremely low.
- Use a compact drill/driver with a clutch for small screws in plastic, thin metal, drywall anchors, or finished wood.
- Rent a specialty right-angle tool when you face one heavy job and cannot justify owning it.
A DIY-grade compact driver makes sense for occasional shelves, flat-pack furniture, and cabinet repairs. Frequent installers benefit from pro-grade controls, better thermal protection, shorter brushless heads, and stronger service support. Buy for repeated work; rent for one awkward project where a specialty tool turns an unsafe compromise into a straight, controlled drive.
Use Short, Impact-Rated Accessories to Cut Wobble
Best practices for using cordless impact drivers in tight spaces require impact-rated bits, holders, sockets, extensions, and adapters kept as short as the job permits. Standard accessories can crack under repeated blows, while long accessory stacks add wobble, absorb driving energy, and make a square approach harder.
Impact-rated accessories use materials and shapes built to flex under pulsing loads. An ordinary chrome hand-tool socket may look stronger because it shines like a mirror, but that hard surface can crack or shatter when hammered. Use a black-finished impact socket with the correct impact-rated adapter, and inspect both before each cramped job.
Imagine reaching a recessed screw by joining a bit holder, two extensions, and a right-angle adapter. Every connection adds play, so the tip can orbit around the fastener like a loose wheel. When the bit slips, the stored movement sends the stack toward your knuckles, a copper pipe, or the glossy cabinet side.
A right-angle attachment can solve a real access problem, but the label must explicitly permit impact use. Check its maximum torque and compatible fastener sizes, hold the body only at its designated grip, and keep fingers away from the input and output joints. Start slowly because internal gears introduce friction and movement.
- Remove the battery before fitting or removing an accessory in a cramped position.
- Seat the one-piece bit fully in the chuck and tug it gently to confirm retention.
- Choose the shortest extension that reaches without forcing the driver off line.
- Never stack several adapters merely because their ends happen to fit.
- Stop if an attachment becomes hot, noisy, loose, or difficult to turn.
A flexible shaft belongs on light-duty screws, not structural fasteners. It behaves like a garden hose trying to turn a bolt: useful around a gentle bend, poor at carrying heavy force accurately. For repeated high-load work, a purpose-built right-angle impact tool offers better support and control than an improvised chain of accessories.
Drive Every Fastener Cleanly in Nine Controlled Steps
Best practices for using cordless impact drivers in tight spaces turn each fastener into a controlled sequence: inspect, align, brace, start slowly, and stop before final seating. This method protects the screw head, your hands, and the surrounding material while keeping impact force available for the resistant part of the drive.
- Inspect the work area. Find wiring, pipes, glass, finished surfaces, pinch points, and the direction the tool could jump.
- Remove the battery. Fit the correct impact-rated bit, then check it for cracks, twisting, rounding, and excess play.
- Select the lowest useful mode. Use slow-start or assist mode when your driver provides one.
- Clean the screw recess. Pick out paint, rust, wood chips, or plaster so the bit seats to full depth.
- Set the bit squarely. Push directly along the screw axis before touching the trigger.
- Brace the tool. Use two hands when clearance permits, keeping fingers away from joints and trap points.
- Start slowly. Establish solid engagement before the impact mechanism begins hammering.
- Use short trigger bursts. Pause as the head approaches the surface and check alignment after each burst.
- Finish and inspect. Complete precision tightening manually, then check the fastener, bit, and surrounding material.
On a cabinet hinge, this process may take five seconds longer than squeezing the trigger once. That small pause can prevent a Phillips bit from climbing out and drawing a silver crescent across white paint. Use firm forward pressure, but do not lean so hard that a slip throws your shoulder into the work.
What if the screw stops halfway? Do not respond with full speed. Back it out, inspect the threads, confirm the pilot hole and fastener type, then clear the obstruction. A squealing screw, smoking wood, or rapidly heating bit signals excess resistance, not a request for more trigger.
For long screws, drive most of the length with the impact driver, then slow down for the final few millimetres. Where a specification controls the joint, stop early and use a calibrated torque wrench or torque-controlled tool. Controlled fastening sounds measured—brief rattles separated by quiet checks—not one long metallic burst.
Protect Your Hands, Hearing, and Hidden Utilities
Safe tight-space driving starts by isolating nearby power, locating concealed utilities, wearing eye protection, and leaving room for the tool to move without trapping your fingers. The driver produces less steady reaction than many drills, but it can still twist, jump, pinch, or launch broken debris when a fastener stops suddenly.
According to OSHA workplace guidance, eye and face protection is required where flying particles can injure a worker [1]. For home work, wear ANSI-rated safety glasses because rust flakes, snapped bits, screw fragments, and grit can leave the recess at speed. A cabinet acts like a drum, bouncing both debris and noise back toward your face.
Repeated impacts can sound harsh enough outdoors; inside a sink cabinet, each blow cracks like a spoon against a steel pan. According to NIOSH, its recommended exposure limit is 85 dBA over eight hours, with permitted exposure time halved for each 3 dB increase [2]. Wear hearing protection during repeated driving, especially inside enclosed joinery or metal housings.
Before working near electrical wiring, switch off the correct circuit at the breaker and verify the conductors are de-energized with a suitable tester. Standard driver bits are not insulated electrical tools. If wiring is hidden, damaged, or outside your training, use a licensed electrician and follow local permit and code rules.
Treat gas lines with even less tolerance for guesswork. Stop if the fastener path could reach a pipe, appliance connector, or concealed service, and call a licensed gas professional. For structural connectors, roof framing, or work at height, follow the specified fastener schedule, use proper PPE and fall protection, and bring in a licensed contractor or engineer when the load path or code requirement is unclear.
Keep loose sleeves, jewellery, and unsuitable gloves away from rotating accessories. Do not wrap your free hand around a right-angle joint or place fingertips between the battery and a wall. If you cannot hold the tool without blocking its vents or creating a pinch point, change the setup rather than forcing the drive.
Keep Screws Straight and Finished Surfaces Unscarred
A clean result comes from pairing the correct drive style and bit size with square alignment, steady forward pressure, good lighting, and a physical shield over nearby finishes. In a confined space, Torx and Robertson screws usually retain the bit better than Phillips screws, reducing cam-out and sudden sideways movement.
Alignment works like pushing a drawer closed: force applied straight along the runners moves it smoothly, while sideways pressure makes it bind. A bit held at an angle loads one edge of the recess, rounds the screw, and bends adapters. If the tool cannot remain in line, use a right-angle solution or change the fastening sequence.
Lighting matters because the driver’s own LED can cast a dark ring around the chuck. A headlamp, magnetic work light, or flexible inspection lamp can place light beside the screw rather than behind it. Clean sawdust and dried paint from the recess; a fully seated bit feels solid, while a shallow bit rocks under finger pressure.
During a kitchen refit, a single slipped bit can carve through a sprayed cabinet panel that took days to order. Place painter’s tape, thin cardboard, or a plastic shield between the tool and the finish. Keep that protection clear of the rotating bit, chuck, and adapter because loose tape can wrap around moving parts.
- Use the exact bit type and size marked or matched to the fastener.
- Replace rounded bits before they begin skating out of screw heads.
- Start fasteners while surrounding panels are still removed when the assembly order allows it.
- Use a short non-marring sleeve where the tool body may brush finished joinery.
- Stop immediately when the bit begins to cam out; speed will only polish the damaged recess.
Dust control also improves grip and visibility. Vacuum chips from pilot holes and recesses instead of blowing them into your eyes or an electrical enclosure. When drilling masonry creates silica dust, use the correct extraction, respirator, and work method; the impact driver handles the fastener, but a HEPA-equipped extraction setup should handle the dust.
Pick the Better Tool Before Tight Clearance Becomes a Fight
The best tool is the one that reaches the fastener squarely and gives you enough control for the material, not the one with the highest torque number. Use this comparison to match access, fastener resistance, and final accuracy before your knuckles and the workpiece pay for a poor choice.
| Situation | Best option | Why it works | Main limitation |
|---|---|---|---|
| Narrow cabinet or stud cavity | Subcompact impact driver | Short head and small battery are easier to maneuver | May still be too long behind the fastener |
| Fastener close to a wall | Impact-rated right-angle attachment | Redirects the drive through 90 degrees | Adds play and reduces control |
| Very low overhead clearance | Right-angle impact driver | Purpose-built head reaches where a standard body cannot | Specialized and often more expensive |
| Small screw in delicate material | Compact drill/driver with clutch | Smoother drive and adjustable stopping force | Slower on long or resistant fasteners |
| Specified final torque | Torque wrench or torque-controlled driver | Provides measured final tightening | Less convenient in restricted positions |
| Light screw around a gentle bend | Rated flexible extension | Reaches around a minor obstruction | Unsuitable for high-torque fastening |
For example, fitting a soft-close hinge into predrilled particleboard calls for a clutched drill/driver or hand screwdriver, not a hammering burst. Installing a long cabinet rail screw into a stud is a better impact-driver job. The material and finish decide the tool just as much as the available clearance.
Frequent service work can justify a professional right-angle impact driver with multiple speeds, ring lighting, overload protection, and compact high-output batteries. A homeowner replacing one dishwasher bracket should rent or borrow that specialty tool instead of stacking adapters. Frequency and consequence matter more than the thrill of buying another machine.
The most important aspects of tool choice are head clearance, alignment, control, and accessory rating. Raw torque sits farther down the list. When access forces the driver sideways, the job has already chosen another tool for you—perhaps a ratcheting hand driver, a clutched drill, or a rented right-angle model.
Frequently Asked Questions
Can you use an impact driver inside a tight cabinet?
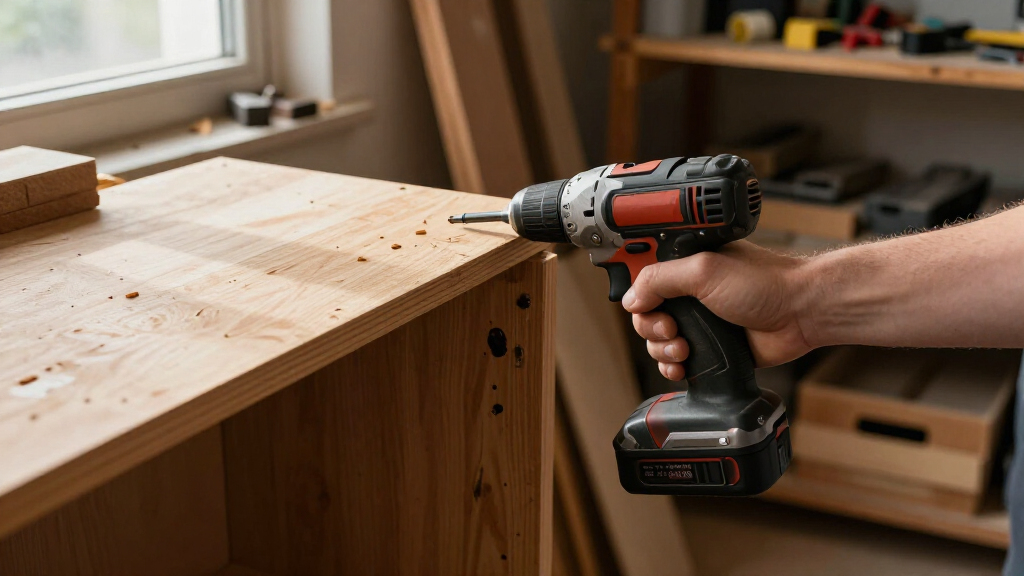
Yes, provided you have enough clearance to keep the bit square and operate the trigger without trapping your hand. Use a subcompact driver, short bit, strong side lighting, and a shield over finished panels. If the housing forces an angled approach, switch to an impact-rated right-angle attachment or another tool.
Is a 12V impact driver powerful enough for tight-space work?
A modern 12V impact driver is often powerful enough for cabinets, appliance repairs, electrical trim, and general installation work. Its smaller grip and battery can matter more than maximum torque in a narrow cavity. Large structural fasteners may need an 18V tool or a specialty model rated for the load.
Is a right-angle adapter safe on an impact driver?
It is safe only when the attachment is explicitly impact-rated and used within its torque and fastener-size limits. Hold the designated grip, start slowly, and keep fingers away from both rotating joints. Stop using it if you notice heat, looseness, grinding noise, or rough movement.
Why does the bit keep slipping out of the screw?
Bit slip usually comes from the wrong bit size, a worn tip, poor alignment, too much speed, shallow seating, or weak forward pressure. Clean the recess, replace damaged parts, and restart squarely on a low setting. Once cam-out begins, stop; continued impact will turn the recess into a smooth metal crater.
Can an impact driver tighten a bolt to a specified torque?
No, an impact driver does not provide reliable final torque because battery charge, impact time, adapters, threads, and joint friction all change the result. Use it for rundown, then finish with a calibrated torque wrench. This matters for structural connectors, vehicle parts, and any assembly carrying a stated torque specification.
Conclusion
Control beats torque whenever the walls close in. Measure the space, choose the shortest sound setup, illuminate the screw, and let brief trigger bursts do the work. If you cannot keep the bit square or your fingers clear, stop and change tools; forcing the driver only converts a clearance problem into damaged material or an injury.
Your goal is not to make the loudest rattle inside the cabinet. It is to leave one straight, properly seated fastener, an unmarked finish, and both hands intact. Set up carefully, squeeze slowly, and let the final click come from your hand tool—not from a screw disappearing beneath the surface.