
TL;DR

Get business pricing on tools and workshop supplies
- Business-only prices and quantity discounts
- Tax-exempt purchasing
- Multiple users, one account, clear invoices
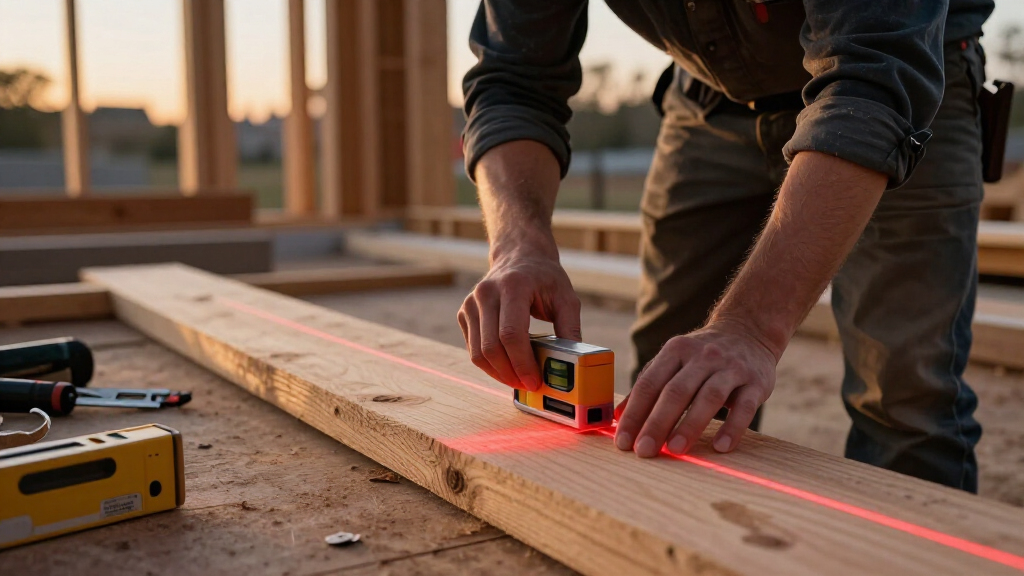
The best practices for using jobsite lasers start with choosing the right laser, checking its calibration, and tying every mark to one trusted benchmark. Keep the unit stable, use the same part of the beam, account for blade kerf, and verify critical cuts, holes, and elevations with a tape, square, or control measurement before committing.
A laser can paint a dead-straight line across an entire room and still lead you into a costly mistake. A bright beam is not proof of accuracy, and a self-leveling mechanism cannot rescue a bad benchmark, a loose tripod, or an instrument knocked out of calibration.
You will learn how to choose the right laser, check it before critical work, protect your reference, and carry the layout through to an accurate cut. The goal is not merely a tidy red or green line. It is repeatable reference lines or points that cabinets, framing, tile, ceilings, penetrations, and concrete work can all follow without small errors stacking up.
Think of the laser as a lighthouse, not a set of rails. It tells you where the route lies, but your marks, kerf allowance, fence, and final check still control the cut. On a renovation, that distinction can separate a clean 3 mm reveal from a row of cabinet doors that appears to climb toward the ceiling.
Match the laser to the work: cross-line units suit interior installation, while rotary lasers and compatible receivers handle grading and long elevations.
Check calibration before critical layout, after impacts or transport, and whenever the beam conflicts with a known control.
Use one documented benchmark and one consistent part of the beam to prevent accumulated transfer errors.
Treat the laser as a layout reference, then account for kerf, mark the waste side, and cut against a physical guide.
Verify expensive or irreversible work with a second method before cutting, drilling, fastening, or pouring.
Field Guide / Accurate Layout
Best Practices for Using Jobsite Lasers for Accurate Cutting and Layout
Choose the right instrument, prove its calibration, and tie every mark to one trusted benchmark. The beam establishes a reference—but stability, consistent marking, kerf allowance, and a final control check determine whether the finished work is truly accurate.
01 / Match the tool
Choose for the work, not the glow
Projection type determines what the laser can control. Beam color changes visibility, not inherent precision; compare the manufacturer’s stated tolerance over distance before comparing brightness.
Cross-line
Horizontal and vertical lines for cabinets, tile, partitions, fixtures, and room-scale installation.
Watch: limited coverage and widening linesRotary
A 360-degree level plane for foundations, grading, ceilings, elevations, and large working areas.
Watch: receiver compatibility and tripod stabilityPoint or plumb
Transfers precise locations for penetrations, lighting, walls, and mechanical services.
Watch: a point transfer does not establish squareCombination / 360°
Multiple lines and points for varied interior work across walls, floors, and ceilings.
Watch: extra planes increase cost and battery demandGreen beam
Usually appears brighter indoors, especially in daylight-filled rooms, but often costs more and may consume batteries faster.
Red beam + receiver
Often economical and fully effective. Outdoors, a compatible electronic receiver matters more than visible color or tinted glasses.
02 / Prove the reference
Self-leveling is not self-calibrating
A laser can settle into a steady line while its internal calibration is wrong. Self-leveling corrects limited instrument tilt; it cannot repair a shifted pendulum, unstable support, poor benchmark, or excessive setup angle.
Basic horizontal calibration check
Mark the projected height on two opposing walls. Reposition the unit closer to one wall, allow it to settle, and compare the new readings with the original marks. Judge the difference only against the model-specific procedure and tolerance.
03 / Trusted cutting flow
Turn a projected line into a defensible cut
The laser is a layout reference—not usually the physical cutting guide. Transfer the reference carefully, define which side remains, and use a fence, track, square, or other positive guide to control the tool.
Use one documented benchmark, one defined part of the beam, and one independent control measurement.
04 / Control the variables
What protects accuracy—and what defeats it
Small inconsistencies become visible when cabinets, panels, tile joints, ceiling channels, openings, and service penetrations must align across distance.
| Control point | Best practice | Reliable? | Failure mode |
|---|---|---|---|
| Benchmark | Return to the original verified datum instead of copying secondary marks. | ✓ Strong | Repeated transfers accumulate error across the room. |
| Beam reference | Use the center—or one documented edge—every time. | ✓ Strong | Changing beam edges shifts layout as the line widens. |
| Support | Plant and lock tripod legs; isolate the unit from traffic and vibration. | ✓ Strong | A twisting pole or settling leg moves every downstream mark. |
| Visible brightness | Use stated tolerance and a receiver where needed. | ✗ Not proof | A bright line may still be miscalibrated or poorly referenced. |
| Short spirit level | Use only if its own accuracy is known and appropriate. | ~ Limited | Unknown tool history creates false confidence in vertical checks. |
| Final verification | Check with tape, square, diagonals, plumb reference, or established control. | ✓ Essential | Irreversible work proceeds from a single unproven reference. |
Relative control strength
05 / Before commitment
Three non-negotiable checks
Five minutes of verification is cheaper than replacing a custom door, stone panel, ceiling grid, service run, or slab edge.
Does the line mean what you think it means?
Confirm the datum, offset, finished build-up, center or edge convention, and the dimension being controlled.
Has the laser stayed trustworthy?
Check calibration after transport, impact, vibration, storage, conflicting marks, or any suspicious change in results.
Has a second method agreed?
Verify critical cuts, holes, elevations, and square layouts with a tape, square, diagonals, plumb reference, or survey control.
Choose the Laser That Matches the Work in Front of You
Best practices for using jobsite lasers begin with matching the projection to the task: line lasers handle most interior alignment, rotary lasers control long elevations, and point lasers transfer exact locations. Beam color affects visibility, not inherent accuracy, so compare the stated tolerance over distance before you compare brightness.
| Laser type | Best use | Watch for |
|---|---|---|
| Cross-line | Cabinets, tile, partitions, fixtures | Limited coverage and widening lines |
| Rotary | Grading, foundations, ceilings, elevations | Receiver compatibility and stable tripod setup |
| Point or plumb | Penetrations, lighting, mechanical services | Confusing a point transfer with a square layout |
| Combination or 360-degree | Multi-surface interior layout | Higher battery demand and extra planes you may not need |
Say you are hanging a run of wall cabinets in a 4-metre kitchen. A cross-line or 360-degree line laser gives you a continuous horizontal reference and a vertical line for cabinet edges. Renting a rotary laser for that room adds bulk without adding useful control; using a tiny point laser makes you transfer more marks by hand.
Now move outside to set concrete form elevations across a 25-metre garden. The visible green line that looked razor-sharp indoors fades into pale grass and sun glare. A rotary laser with a compatible receiver gives you electronic detection at the grade rod, while tinted viewing glasses merely make the beam easier to notice and do not extend its detection range.
Green beams generally appear brighter to your eye indoors, especially in rooms flooded with daylight, but they often cost more and may draw batteries faster. A red laser paired with the right receiver can be the better working setup. Buy for documented accuracy and service support; rent when you need long-range grading, controlled slope, or survey-grade capability for one project.
Popular right now

Dreame L40 Ultra Gen 2 Robot Vacuum and Mop

KitchenAid Artisan Series 5-Quart Tilt-Head Stand Mixer, Dried Rose (KSM150PS)

Vitamix Propel Series 510 Professional-Grade Blender, 3 Programs, Black
As an affiliate, we earn on qualifying purchases.
Prove the Laser Is Accurate Before the Layout Becomes Expensive
Using jobsite lasers safely and accurately means checking calibration before critical layout, after a drop, after rough transport, and whenever marks disagree with a known reference. Self-leveling only compensates within a limited tilt range; it does not confirm that the internal pendulum or electronic system remains correctly calibrated.
For a basic horizontal check, place the laser between two opposing walls and mark the beam height on both. Move the unit closer to one wall, let it settle, and compare the projected height with the earlier marks using the model-specific procedure. The permitted difference comes from the manufacturer, because one model may state accuracy at 10 metres while another states it at 30 metres.
A real warning often arrives quietly. You set a dropped laser on a tripod, the line stops flashing, and every stud mark looks clean. At the far end of an 8-metre room, however, the ceiling channel misses your control mark by 6 mm; steady does not mean correct, and that error will show when doors, panels, or shadow gaps meet.
Check vertical accuracy against a long, trusted plumb reference, not a short spirit level with unknown history. For room squareness, use equal diagonals, a large 3-4-5 triangle, or established survey control. Level, plumb, and square describe different conditions: a level line can cross two walls that are nowhere near 90 degrees.
Stop after any impact. Recheck the laser before drilling, cutting, fastening, or pouring. Five minutes spent proving the reference beats replacing a stone panel, a custom door, or a slab edge.
Keep a simple calibration record if the laser supports paid work. Note the date, check distance, result, impact history, and any service. According to Bauecho field guidance, critical work needs a second verification method before an irreversible operation [2].
Build Every Mark From One Benchmark and Stop Error Creep
Best practices for using jobsite lasers depend on one verified benchmark that defines the job: finished-floor elevation, framing face, gridline, opening center, or another documented control. Return to that original datum whenever possible, because copying one secondary mark from another compounds small errors across the room.
Before switching on the laser, write down what the dimension means. Is the cabinet line measured from the finished floor or the bare subfloor? Does the projected line represent its center, top edge, or bottom edge? A correct measurement tied to the wrong surface is still a wrong layout.
Consider a bathroom where the tile installer expects finished floor level, but the carpenter sets the laser from the plywood deck before uncoupling membrane, adhesive, and 10 mm tile are installed. The vanity plumbing, mirror, and niche can all land low. A clearly labelled offset mark prevents that chain reaction: finished floor elevation equals this control line minus the recorded offset.
Beam thickness matters as distance grows. A line that looks like a sharp thread at 2 metres can resemble a fuzzy marker stroke across a long room, especially on rough concrete or textured drywall. Use the center of the line consistently, keep projection distances sensible, and make fine marks with a sharp pencil or marking knife where the material allows.
- Create at least two durable control marks away from demolition and traffic.
- Label the datum, offset, date, and beam convention beside the mark.
- Record whether dimensions refer to framing, finished surfaces, centers, or edges.
- Recheck the benchmark after breaks, impacts, or heavy equipment activity.
- Tell the crew which line edge or center controls the work.
On a large renovation, treat control marks like the master copy of a drawing. Copies can circulate, but the master remains the authority. That habit is how jobsite lasers improve consistency rather than spreading one unnoticed mistake across every trade.
Set Up a Beam That Will Stay Put While the Site Moves
An accurate setup puts the laser on a rigid, protected support, keeps it within its leveling range, and lets the compensator settle before anyone marks the work. The best position minimizes projection distance without placing the instrument in a doorway, beside a vibrating saw, or where a hose can hook a tripod leg.
Plant tripod feet firmly and lock every clamp. On bare soil, press the legs into stable ground rather than balancing them on loose stone; on a slab, keep them clear of rolling carts and scissor-lift routes. A magnet mount stuck to a flexible metal stud can sway each time someone closes a nearby door.
After switching on the unit, wait for the pendulum, motor, or electronic leveling system to settle. A flashing line, stopped rotary head, or warning tone often signals excessive tilt, low battery, manual mode, or another fault. Do not mark from a warning beam until you read the status and correct the cause.
Temperature can move the apparent reference. Bring a cold laser from a van into a warm, damp room and condensation may cloud the optical window while internal parts acclimate. Give the instrument time to match the room, wipe only with a suitable nonabrasive material, and keep wet equipment out of a sealed case until it dries.
Outdoors, wind can pulse through a tall tripod, while heat above black asphalt can make the air shimmer like water. Shorten the tripod, shield it where practical, use a receiver, and check against a fixed control point during the day. Glass is another trap: refraction and reflections can split or shift the beam, so do not project through a window for precision layout.
Dust deserves equal respect. Fine drywall or concrete dust coats optical windows and battery contacts, dulling the line and causing unreliable connections. Wear the required eye, hearing, and respiratory PPE for the surrounding task, use extraction at the cutting tool, and place the laser beyond the direct dust plume.
Turn a Laser Reference Into a Cut You Can Trust
Using jobsite lasers for accurate cutting means transferring the reference to the material, marking the waste side, allowing for blade kerf, and guiding the saw with a fence, track, or square. The beam locates the cut; it does not control blade wander, bowed stock, material movement, or saw calibration.
- Verify the benchmark and dimension. Confirm the finished or structural reference, the material orientation, and the exact line convention.
- Transfer two precise marks. Keep the laser close enough for a narrow line, then connect the marks with a straightedge when needed.
- Mark the waste side. Add a clear X so a moment of distraction does not reverse the cut.
- Account for the kerf. Place the correct edge of the blade on the keep side of the mark rather than centering an unknown-width blade over it.
- Set a physical guide. Clamp a track, fence, or square and check that the material cannot rock or pinch the blade.
- Measure or test-fit again. Use scrap for a test cut when the finish piece is costly, matched, or difficult to replace.
Suppose you need to trim a 600 mm cabinet end panel to follow a laser-established ceiling line. You mark both ends, join them with a straightedge, identify the offcut, and place the track so the blade removes material from the waste side. That process respects the 2 to 3 mm kerf common to many circular-saw blades instead of letting it eat into the finished panel.
Do not confuse a room-layout laser with a saw-mounted laser guide. A saw guide may indicate one blade edge, the blade center, or an approximate path at only part of the travel. Blade changes can shift that relationship, while a shadow-line system often shows actual blade width more clearly but still deserves a test cut.
For plumbing, electrical, gas, structural, or roofing work, the laser can locate penetrations and reference heights, but it cannot judge hidden services, load paths, flashing details, or permit rules. Switch power off and verify it dead before electrical work, wear suitable PPE, scan before drilling, and use licensed professionals where the trade or local code requires them.
Keep Sunlight, Thick Lines, and Busy Crews From Stealing Accuracy
Best practices for using jobsite lasers include controlling visibility, distance, vibration, and crew contact throughout the job. Use a compatible receiver outdoors, keep the projection reasonably short indoors, and recheck the setup after nearby impacts. A visible beam and an accurate beam are separate things.
Bright sunlight can erase a red or green line from your view even while the instrument projects normally. A receiver detects the signal electronically and gives audio, visual, or numerical guidance. Match it to the laser’s beam color, wavelength, pulse or rotation mode; a detector that cannot read the signal is no more useful than a radio tuned to the wrong frequency.
Imagine setting deck-post elevations at noon. You can barely glimpse a green flicker on the grade rod, so you chase it by eye and mark four posts at slightly different heights. With a compatible receiver set to fine sensitivity, you get one repeatable electronic reference instead of four guesses made through glare.
Laser-enhancement glasses may improve contrast, but they do not make the instrument more accurate and do not replace rated eye protection. According to OSHA, laser controls depend on the laser class and exposure conditions, and workers should never stare into a beam or aim it toward people, vehicles, or aircraft [1]. Position the line above or below normal eye level where the work permits.
Busy crews create another kind of drift. A plasterer nudges the pole mount, a lift shakes the slab, or someone changes plane selection through an app without telling the installer. Use barriers or warning signs, preserve backup control marks, and make a fresh benchmark check before drilling a bank of holes or fastening a full run.
Connectivity, motorized adjustment, brighter diodes, multiple 360-degree planes, and longer lithium-ion runtime make modern lasers quicker to operate. They do not replace calibration, stable control, or human communication. Automation adds convenience; verification adds confidence.
Use a Two-Minute Final Check Before You Commit
A reliable final check confirms the benchmark, dimension, orientation, beam convention, kerf, waste side, material position, and tool setup before the work becomes permanent. Use a second method for expensive or safety-related work, because one independent measurement can catch a shared mistake that repeated laser marks will simply reproduce.
For a door opening, check the laser layout against a tape, level, and diagonal measurements before framing. For tile, dry-lay several pieces with the planned joint width so the laser line does not leave a thin sliver at the opposite wall. Geometry can be correct and still produce an ugly finish.
Before cutting a stone threshold, place the piece in its installed orientation and label the room side, finished edge, and waste. Confirm the opening at more than one point because old jambs often pinch or flare. A scrap test cut proves blade alignment and surface quality before the diamond blade touches the paid-for piece.
- Check the original control mark, not only a nearby transferred mark.
- Confirm the laser has settled and shows no warning condition.
- Compare the critical dimension with a tape, square, diagonal, or known elevation.
- Check tool calibration, blade condition, kerf, clamps, and material support.
- Pause when two methods disagree; find the cause before proceeding.
This is where speed and care stop fighting each other. A laser removes repetitive measuring, while the short final check catches reversed dimensions, disturbed mounts, and incorrect assumptions. Measure from control, verify by another route, then commit—the same pattern works for cutting, drilling, fastening, and concrete placement.
Frequently Asked Questions
How accurate are jobsite lasers?
Accuracy varies by model and must be read as a tolerance over a stated distance, such as at 10 or 30 metres. Current calibration, mounting stability, temperature, distance, and how you read a thick beam all affect the result, so compare specifications rather than relying on advertised range.
Does a self-leveling laser still need calibration checks?
Yes. Self-leveling corrects limited instrument tilt, but it cannot prove that the internal mechanism is calibrated. Check it before critical work, after a drop or hard trip in the van, and whenever the beam disagrees with a trusted benchmark.
Is a green laser more accurate than a red laser?
No. A green beam is often easier to see indoors, but color does not set accuracy. Compare the manufacturer’s tolerance, calibration support, durability, runtime, and receiver compatibility; a less visible red beam can come from the more accurate instrument.
Can you use a jobsite laser outside in daylight?
Yes, but you will usually need a compatible receiver for dependable outdoor work. Sunlight can hide a functioning beam from your eyes, while the receiver detects it electronically; tinted glasses may improve contrast but do not replace detection equipment.
Which part of a thick laser line should you mark?
Use the center of the line unless the manufacturer or job procedure specifies another convention. The bigger rule is consistency: switching between the top, center, and bottom edges can introduce several millimetres of disagreement across a long layout.
Can you cut directly along a projected laser line?
Use the beam to establish and transfer the layout, then guide the saw with a track, fence, or square. The projected line does not account for blade kerf, bowed material, saw alignment, or movement, so mark the waste side and make a test cut when the finished piece is expensive.
Why is the laser line flashing?
A flashing line commonly signals that the unit is outside its self-leveling range, in manual or slope mode, low on power, or reporting another status condition. Stop marking, stabilize the mount, check the controls and manual, and wait for a steady valid reference.
Conclusion
The habit that matters most is simple: trust a verified process, not a bright line. Start from one documented benchmark, protect the setup, use the same part of the beam, and check the result by another route before you make an irreversible move.
A jobsite laser should make your work faster without making you careless. When the tape, square, control mark, and beam all agree, you can lower the saw, start the drill, or set the form with confidence. Clean light on the wall; clean work when it counts.