
TL;DR

Get business pricing on tools and workshop supplies
- Business-only prices and quantity discounts
- Tax-exempt purchasing
- Multiple users, one account, clear invoices
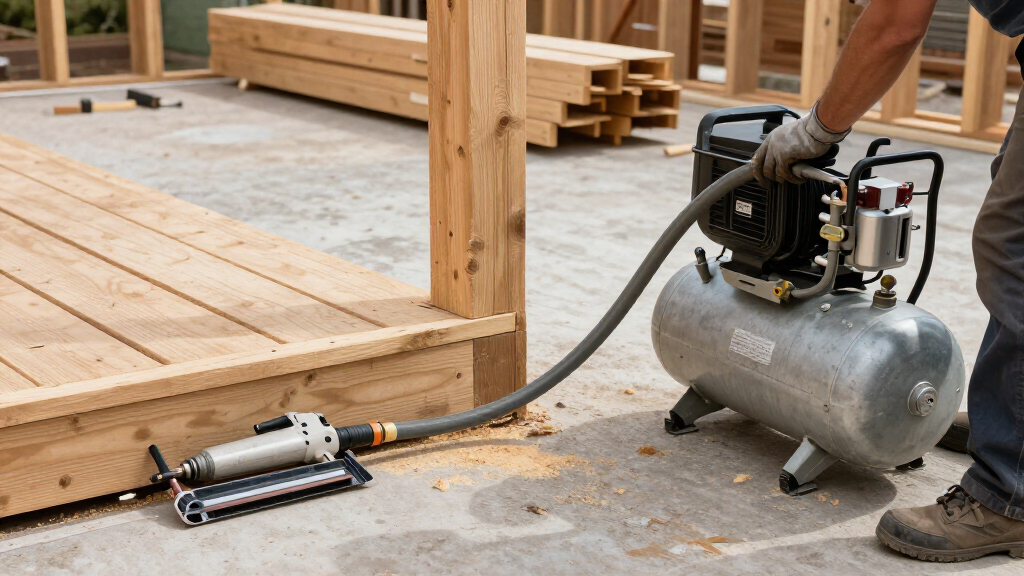
To use an air compressor for continuous jobsite work, match its delivered airflow at the required pressure to the tools running at the same time, and confirm its duty cycle supports that workload. Set it up with clear ventilation, sound hoses and fittings, and tool-appropriate pressure; drain moisture and follow the manual’s service schedule. Stop and investigate repeated cycling, overheating, pressure loss, or unusual noise.
A full tank can still leave your nailer starving for air halfway through a shift. The reason is simple: tank capacity stores air, while delivered airflow keeps replacing it. When a crew runs tools for hours, that difference shows up as slow cycling, low pressure at the tool, hot equipment, and lost time.
This guide shows you how to size the compressor for the actual workload, set it up safely, and keep heat and water from turning routine work into a breakdown. You’ll also get a practical inspection routine and clear signs that tell you when to stop, troubleshoot, or call for service.
Think of a compressor as the crew’s air supply line: when it is sized and maintained well, the tools barely interrupt the work. When it falls behind, everyone waits.
Compare delivered airflow at the tool’s required pressure, add simultaneous tool demand, and allow a margin for line losses.
Confirm the compressor’s duty cycle supports the planned runtime; a larger tank does not make an intermittent model continuous-duty.
Place the unit on a stable, ventilated surface, inspect air and power connections, and use regulator settings within every component’s rating.
Drain condensate and maintain filters, belts, guards, oil, and controls on the schedule in the manufacturer’s manual.
Stop for repeated breaker trips, overheating, pressure loss, constant cycling, unusual noise, or suspected tank damage.
How to Properly Use and Maintain Air Compressors
Keep the compressor sized for the work, operate it within its limits, and follow a steady maintenance routine. Continuous use adds heat, moisture, and wear—so airflow, safe setup, and early checks protect both tools and crew time.
The receiver stores compressed air. Delivered airflow is what keeps replacing it as the crew works.
Choose a compressor that can keep up
Size for the tools that may run together, at the pressure they actually need—not by receiver capacity alone.
Add simultaneous demand
Compare delivered CFM or L/min at the same PSI or bar as the tool rating. Add overlapping tool demand, then leave room for pressure loss and changing use.
Check the runtime rating
An intermittent-duty unit may overheat under continuous work. A bigger tank stores more air, but does not increase pump output or change the duty rating.
Plan for the whole site
Consider power supply, portability, noise limits, dust, and ambient temperature. Rent a suitable unit when a short project needs more capacity than your regular setup.
Long or undersized hoses, restrictive fittings, and poor regulators can drop pressure at the tool. Check pressure at the connection: a healthy tank gauge does not rule out a line restriction.
Build a safe starting routine
Follow the equipment manual for connections, startup, pressure settings, shutdown, and transport.
Place
Use a stable, level surface with clear cooling airflow. Avoid standing water, combustible materials, and heavy dust where practical.
Inspect
Check hoses, couplings, cords, guards, fittings, and cooling areas. Replace damaged parts; never improvise a pressurized hose patch.
Regulate
Set pressure for the tool and stay within every tool, hose, fitting, and compressor rating. More pressure cannot fix low airflow.
Protect
Wear eye and hearing protection. Secure connections and depressurize the line before changing accessories or servicing equipment.
Never aim compressed air at a person or use it on skin or clothing. Run fuel-powered compressors outdoors or in a properly managed location; carbon monoxide can make an enclosed or poorly ventilated space dangerous.
Keep cooling and drainage in the routine
Continuous operation builds heat. As compressed air cools, moisture collects in the receiver and air system.
Use a short routine to prevent downtime
A consistent check catches small problems while they are still manageable. Follow the manual for exact procedures and intervals.
Record dates, operating hours, service performed, and recurring issues. A pattern in the log can point to a developing problem before it costs the crew a shift.
Know when to stop and investigate
Repeated symptoms can signal a capacity, electrical, air-line, or equipment fault. Don’t keep pushing the unit through the shift.
Repeated breaker trips
Stop and check the setup and equipment according to the manual. Have electrical or compressor faults assessed by a qualified professional.
Pressure loss or constant cycling
Check for leaks and line restrictions, then compare sustained tool demand with delivered airflow at working pressure.
Overheating or new noise
Stop for unusual heat, knocking, grinding, or vibration. Inspect only as directed and arrange service when the cause is unclear.
Also stop if the tank may be damaged or badly corroded. Depressurize only by the approved procedure and have the receiver assessed; never repair or modify a pressure vessel yourself.
Match airflow and duty cycle to the work
For continuous jobsite use, choose a compressor that delivers enough CFM or L/min at the tool’s working pressure and is rated for the expected duty cycle. Add the airflow demand of tools that may run together, then leave a practical margin for pressure loss and changing demand. A tank’s gallon or litre rating alone cannot tell you whether the compressor can keep up. The distinction matters because stored air can cover a brief demand spike, but the pump must replace that air fast enough to sustain production. If it cannot, the tank pressure falls, tools slow down, and the compressor may run for longer periods while getting hotter.
Check the tool and compressor specifications at the same pressure. A compressor that supplies plenty of air at a lower pressure may fall short where a particular tool needs it. For example, if two framing nailers can fire together, their combined demand matters more than the fact that the compressor has a large receiver. Match the unit’s delivered airflow to that combined use, not to one tool operating alone. The practical question is not just how many tools are connected, but how often they draw air and whether their demand overlaps. A tool used in short bursts may be buffered by the receiver; a grinder or sprayer drawing air steadily gives the pump less time to recover.
Duty cycle tells you how much of a period the compressor is designed to run. A model intended for intermittent use can overheat if a crew expects it to run continuously. If the manual does not make the rating clear, ask the manufacturer or rent a unit specified for the workload rather than guessing from its tank size. A unit operating beyond its intended duty cycle may seem adequate at first, but repeated heat buildup can shorten component life and create unpredictable pauses as it cools. Choosing more capacity can cost more and take up space; choosing too little can cost crew time every day. The right size is the one that meets sustained demand without being pushed beyond its rating.
For air compressors for continuous jobsite use, also check the power source, noise limits, portability, dust exposure, and ambient temperature. A DIY-grade unit may suit brief trim work in a home; it may struggle on a busy crew running air tools throughout the day. If you only need pro-grade capacity for one short project, renting can make more sense than buying and storing a larger machine. The site conditions affect useful capacity too: poor ventilation or high ambient temperatures make heat harder to shed, while a long carry across the site can make a heavy unit impractical. Weigh those constraints against the work pattern before choosing.
Air lines affect the result too. An undersized or very long hose, restrictive fittings, or a poor regulator can reduce pressure at the tool even when the tank gauge looks healthy. On a long run across a renovation site, use adequately sized hose and fittings, then check pressure where the tool connects. This check helps distinguish an undersized compressor from a line restriction: replacing the compressor will not solve a pressure drop caused by a narrow hose, while upgrading the line will not solve a pump that cannot provide enough sustained airflow.
Popular right now

Vitamix Propel Series 510 Professional-Grade Blender, 3 Programs, Black

Dreame L50 Ultra Robot Vacuum and Mop

Bose QuietComfort Wireless Bluetooth Headphones with Active Noise Cancellation, Mic, USB‑C Charging, Deep Bass, 24‑Hour Battery – White Smok
As an affiliate, we earn on qualifying purchases.
Set up the compressor so it can run safely
Set a jobsite compressor on a stable, level surface with clear airflow around its cooling and ventilation areas. Keep it away from standing water, combustible materials, and heavy dust where practical. A cramped corner piled with offcuts can block cooling air; the unit may run hotter just when the crew needs it most. Stability also reduces the chance of movement or tipping from vibration, which can strain connections and create a hazard around workers. A few minutes choosing a suitable location can prevent both avoidable heat buildup and repeated hose or power-cord adjustments.
Before starting, follow the manufacturer’s instructions for connection, start-up, pressure settings, shutdown, and transport. Inspect hoses, couplings, cords, guards, and fittings for wear or damage. If a hose is cracked or a fitting is loose, replace or repair it using parts and procedures approved for the equipment; improvised patches have no place on a pressurized line. A small leak wastes the compressor’s output, so the pump runs more often to maintain pressure; a failed connection can also release air suddenly. That makes inspection useful both for safety and for keeping the compressor from working harder than the tools require.
Set the regulator to the pressure the tool requires. Do not exceed the ratings of the tool, hose, fitting, or compressor, and do not assume a higher setting will make a struggling tool work better. Extra pressure cannot correct insufficient airflow or a restrictive line, and it can expose lower-rated components to forces they were not designed to handle. Wear eye and hearing protection, secure connections, and depressurize the line before changing accessories or servicing the equipment. Never aim compressed air at a person or use it to clean skin or clothing; a narrow stream can cause serious injury.
If you use an engine-driven compressor, operate it outdoors or in a location specifically managed for exhaust. Carbon monoxide has no smell, and a garage or enclosed room can become dangerous even with a door partly open. On a small interior renovation, put the fuel-powered unit outside and route the air hose in, keeping exhaust away from windows and doors. A hose carries air into the work area; it does not carry exhaust away from it, so locating the engine outside is the key control.
Electrical work deserves the same care. Use an extension cord only when the manufacturer allows it and the cord is rated for the compressor’s current draw, length, and site conditions. An unsuitable cord can contribute to voltage drop, poor starting, or overheating, making a compressor appear unreliable when the supply is the problem. Power must be off before electrical service, and electrical repairs should go to a qualified professional; comply with applicable codes and permit requirements.
Control heat and moisture before they damage tools
Continuous operation creates heat, and compressed air releases water as it cools. Drain the receiver tank and any moisture traps or filters at the interval in the manual, adjusting for heavy use and humid conditions. Moisture does not announce itself politely: it can spit from a line, corrode the tank, damage air tools, or leave spots in a finish. The amount of condensate is a useful clue about conditions, but visible water is only part of the concern: water collecting inside a receiver can support corrosion over time, weakening equipment that must safely hold pressure.
For instance, a crew spraying a finish on a humid day may find water in the line that was not a problem during framing. If the application is sensitive to water or oil, use filtration and drying equipment suited to that work. Check it too; a saturated filter cannot protect a finish just because it is still connected. The tradeoff is that extra treatment equipment adds setup and service tasks, but a contaminated finish can require much more time to repair or redo. Choose filtration based on the application, then maintain it so it can actually do its job.
Give the compressor’s cooling surfaces and ventilation paths room to breathe. Dusty cutting and sanding work can coat an intake filter or block airflow, so inspect and clean those areas as the manual directs. If the unit starts running unusually hot, shut it down safely, let it cool, and look for blocked cooling airflow, excessive demand, or needed maintenance. Heat is a signal to investigate, not merely an inconvenience: sustained overheating can shorten the life of components and may cause protective controls to stop operation. Restarting without addressing the cause can repeat the cycle and cost more time.
Drainage is a small task with a large payoff. On a busy day, assign it to a named person at a set point in the shift rather than trusting everyone to remember. Open the drain as instructed, keep clear of the discharge, and check moisture traps too. If condensate builds faster than expected, note the conditions and increase checks within the manufacturer’s guidance. A consistent routine helps the crew see whether high moisture is an occasional weather effect or a persistent operating condition that calls for different checks or equipment.
Water in the receiver is more than a nuisance: it can compromise tools and finishes, and contribute to corrosion inside a pressure vessel.
Never drill, weld, or otherwise modify a receiver tank. If you see corrosion, damage, or a suspected pressure-vessel fault, stop using the unit and have it assessed by a qualified service provider. Because the receiver stores energy under pressure, a structural repair or alteration can change how it withstands that pressure; assessment belongs with someone qualified to determine whether the vessel remains safe.
Use a short maintenance routine to prevent downtime
A consistent maintenance routine catches small problems while they are still small. Follow the model’s manual for exact procedures and intervals; compressors differ, and oil-lubricated and oil-free designs do not share the same service needs. A five-minute check before a shift can spare a crew from discovering a leak after materials are staged and tools are ready. The routine is most useful when it creates a baseline: a new rattle, slower refill, or rising service frequency is easier to spot when someone knows how the machine normally sounds and behaves.
Use this sequence at the start of a workday and during scheduled service:
- Before use: Look for air leaks, loose fittings, damaged cords or hoses, blocked cooling areas, and new noise or vibration.
- During and after heavy use: Drain condensate as the manual directs, and check moisture traps where fitted.
- On the manual’s schedule: Clean or replace intake filters, inspect belts, guards, and fasteners, and check oil level and condition on lubricated models.
- At specified service intervals: Change oil where applicable and inspect safety valves and pressure controls using the instructed procedures.
- Periodically: Check the receiver for corrosion or damage; send concerns to a qualified service provider.
Imagine a compressor that takes longer to refill each week. A maintenance log can show that the change began after filter cleaning was missed or a hose was replaced with a restrictive one. Record date, operating hours, service performed, and recurring issues; that simple history helps separate a one-off problem from a pattern. It also gives a service provider useful context, which can narrow diagnosis instead of relying on memory after a breakdown.
Do not treat maintenance as permission to work on a live, pressurized machine. Shut down and isolate power as the manual instructs, release pressure safely before service, and use appropriate PPE. Electrical repairs, pressure-control problems, and pressure-vessel concerns belong with qualified service personnel. The routine should catch conditions early; it does not change the hazards involved in opening or repairing the equipment.
Oil-free does not mean maintenance-free. Those models may avoid oil changes, but they still need the inspections and cleaning their manuals call for. Conversely, do not add oil to an oil-free unit or skip oil checks on a lubricated one. Maintenance differs because the designs manage lubrication differently, so using the wrong routine can either miss needed care or introduce a problem the equipment was designed to avoid.
Spot trouble early and keep the crew moving
Stop and investigate if the compressor repeatedly trips a breaker, runs unusually hot, cycles constantly, loses pressure, leaks air, or develops new knocking or grinding. These signs can point to excess demand, a leak, blocked cooling, or a control problem. Continued operation can turn a minor fault into a shift-ending failure. Look at when the symptom occurs: trouble only when several tools run may indicate a capacity mismatch, while new noise at startup or when idle may point to a mechanical issue. That distinction can guide safe initial checks, but it does not justify continuing to run a unit with a suspected fault.
When pressure looks low at the tool but the tank gauge looks fine, check the regulator setting, hose length and diameter, fittings, leaks, and tool demand. A long narrow hose can act like a pinched garden hose: the tank is full, but air cannot reach the tool fast enough. For example, a nailer at the far end of a long line may fire inconsistently while a nearby tool works normally. Checking pressure at the tool helps locate the loss along the path. If it is low there but normal at the outlet, focus on the line and fittings; if pressure is low at both points under load, the compressor may be unable to keep up.
Frequent cycling deserves a closer look. Find obvious leaks using an approved method, check whether demand exceeds the compressor’s capacity, and confirm pressure settings against the manual. If cycling continues, or you suspect a faulty control or safety device, stop and consult a service professional. Never bypass a safety device to keep production going. Repeated starts add operating wear and can indicate that air is escaping or demand is outpacing recovery; solving the cause can reduce both downtime and unnecessary run time.
Compact designs, quieter operation, digital controls, hour displays, and battery or hybrid options can help on some sites. A display may make service hours easier to track; a quieter unit may suit noise-sensitive work. Yet features do not replace correct sizing, ventilation, drainage, and maintenance. Check each model’s specifications for the task rather than assuming a feature suits every crew. A quieter model, for example, can improve communication nearby but still needs enough airflow and a suitable duty cycle; a battery option can simplify placement while making runtime and recharge planning part of the work plan.
When a compressor cannot meet continuous demand, renting one built for that duty can protect the schedule. That is often a better call than running a small unit flat out or buying a larger machine for a single short job. Keep the work moving by treating repeated warnings as useful information, not background noise. If the crew records the symptom and conditions when it appears, the next decision—adjust the line, reduce simultaneous demand, service the unit, or bring in a different compressor—can be based on evidence rather than guesswork.
Frequently Asked Questions
How large a compressor do I need for my tools?
Compare each tool’s required airflow with the compressor’s delivered airflow at the same working pressure. Add the demand of tools that may run together and allow for pressure loss through hoses and fittings. A large tank cannot make up for too little delivered airflow over a long run.
Can I run a compressor continuously all day?
Only if its duty cycle and operating instructions support that use. A compressor rated for intermittent work may overheat if run continuously, even if it has a large tank. Check the manual or ask the manufacturer when the rating is unclear.
How often should I drain the tank?
Follow the manufacturer’s manual, then adjust checks for humidity and heavy use within its guidance. Frequent operation or humid conditions often produce more condensate. Check moisture traps and filters as well as the receiver.
Why is pressure low at the tool when the tank is full?
The regulator setting, a long or undersized hose, restrictive fittings, a leak, or high tool demand can limit airflow. Check the pressure where the tool connects and compare the line setup with the tool’s needs. If pressure loss persists after those checks, consult the manual or a service professional.
Is a gas-powered compressor safe to use indoors?
No. Engine exhaust can create a deadly carbon-monoxide hazard, and the gas has no smell. Operate fuel-powered compressors outdoors or in a location specifically designed to manage exhaust safely.
Do oil-free air compressors need maintenance?
Yes. Oil-free models do not need oil changes, but they still require the inspections, cleaning, and service listed in their manuals. Lubricated models need oil checks and changes at their specified intervals.
Conclusion
Before the next shift, compare the compressor’s delivered airflow and duty cycle with the tools your crew will actually run. Then set it up with clear cooling airflow, sound lines, the right pressure, and a maintenance check that someone owns.
A dependable compressor should fade into the background. If it starts shouting through heat, leaks, or a hammering noise, stop and listen before the jobsite does.