
TL;DR

Get business pricing on tools and workshop supplies
- Business-only prices and quantity discounts
- Tax-exempt purchasing
- Multiple users, one account, clear invoices
Run a gas-powered air compressor outdoors in genuinely open air, following the manufacturer’s clearances; an open garage door does not make indoor operation safe because the engine emits carbon monoxide. Inspect the tank and accessories, stay within rated pressure, shut down and cool the engine before refueling, and follow the manual for depressurizing, draining, and storage.
A compressor can keep a nailer firing at a remote jobsite without electrical power, but a running gas engine also sends carbon monoxide into the air. That gas has no color or smell to warn you. An open garage door does not turn a garage into a safe operating spot.
This guide walks you through where to set the machine, what to inspect before starting, how to handle hoses and fuel, and how to shut down, drain, and store it. Those details matter whether you use a small portable unit for trim work or a larger machine feeding several tools.
Gas-powered models trade access to a power outlet for engine, fuel, heat, and exhaust hazards. You can manage those risks with open-air placement and the right operating steps, but the manual has the final word on clearances, pressure, draining, and storage. Treat the tank as a pressure vessel, not an ordinary metal can.
Run a gas-powered compressor outdoors in open air; an open garage door does not make indoor operation safe.
Place it on firm, level ground and follow the manual’s ventilation clearances with exhaust directed away from occupied spaces.
Inspect the tank, hoses, fittings, guards, and safety devices before startup; stop using a damaged or corroded tank.
Shut off the engine and let it cool before refueling; store fuel in an approved container away from ignition sources.
Follow model-specific instructions to isolate, depressurize, drain, and prepare the compressor for storage.
Put the compressor in open air before you start it
Use a gas-powered air compressor only outdoors in genuinely open air, with the exhaust directed away from buildings, occupied spaces, doors, windows, vents, and other openings. Its engine produces carbon monoxide, an odorless, colorless gas that can quickly become deadly. An open garage door or shed entrance does not make indoor operation safe: exhaust can accumulate in a partly enclosed space and move into adjoining rooms, even if the compressor itself is near the opening.
Set the unit on firm, level ground so vibration cannot walk it toward a step or make it tip. Leave the manufacturer’s specified clearance around the engine for cooling and ventilation, and keep the machine away from flammable materials and ignition sources. Clearance serves two purposes: it lets hot engine parts shed heat and gives air space around the machine. A cramped outdoor corner can still create overheating or direct exhaust toward people. The right setback varies by model and site, so follow the manual rather than guessing at one universal distance.
These placement choices work together: open air helps exhaust disperse, while the required clearance lets the engine shed heat. A spot that seems breezy can still direct exhaust through a nearby window, and a tight corner can trap heat even outdoors. If wind or the work area changes, reassess the exhaust direction and keep the specified clearance; a longer hose is safer than moving the machine closer to an occupied space. The longer hose adds trip and pressure-loss considerations, so route it away from walkways and use a length and size suitable for the tools.
For example, if you are framing a detached garage, place the compressor outside on level ground with its exhaust pointed away from the house and the crew. Keep the hose long enough to reach the work, then route it so nobody trips. A portable carbon monoxide alarm in a nearby occupied space may add protection, but it never makes indoor compressor operation safe or replaces proper placement; an alarm is a backup warning, not a way to judge whether exhaust is dispersing safely.
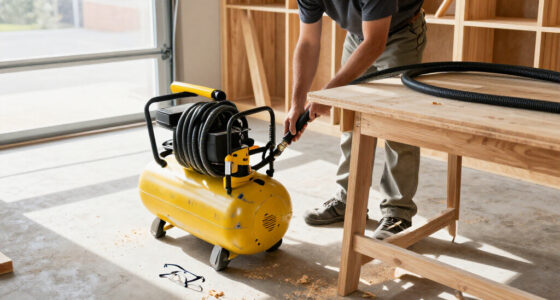
Open air means open air. Do not run a gas compressor in a home, garage, basement, shed, tent, or other enclosed or partly enclosed area, even with doors open.
Popular right now

Ninja Specialty Coffee Maker CM401, 10-Cup Carafe, Fold-Away Frother, Black

Bose QuietComfort True Wireless Earbuds with Active Noise Cancellation, Black

DeLonghi Rivelia Automatic Espresso Machine Bundle with Grinder and Frother, Beige
As an affiliate, we earn on qualifying purchases.
Use this five-step check before connecting your tools
- Read the manual. Find the model’s operating limits, ventilation clearances, startup steps, and emergency shutdown method.
- Inspect the machine. Look over the tank, fittings, hoses, guards, and safety devices for damage, corrosion, leaks, and loose connections.
- Check fluids. Check oil and fuel as the manufacturer directs, on stable ground and with the engine off.
- Match the accessories. Choose a regulator, hose, couplings, and tools rated for the pressure and airflow they need; secure the connections before startup.
- Set up your work area. Wear eye and hearing protection, secure loose hair and clothing near moving parts, and keep children and bystanders away.
This quick routine catches trouble before the engine is loud and the tank is pressurized. Say you spot a cracked hose jacket or a loose guard while unpacking: deal with it before startup instead of hoping it will hold through a few framing nails. A crack can worsen under pressure or flexing, while a loose guard can expose moving parts. If the tank is rusty, damaged, or leaking, stop using the compressor; do not weld, patch, or bypass its safety valve.
The checks protect different parts of the job. A sound tank and working safety devices contain stored energy; rated accessories keep that pressure within the limits their materials can handle; guards and clear space reduce contact with moving parts. Skipping one check can undermine the others, so a fitting that seals tightly is not enough if the hose rating is unknown or the tank shows corrosion. A leak can also signal that a connection or component is failing, so do not treat simply tightening it as proof that the system is safe.
Keep the tank pressure within the unit’s rated limits, and use the regulator where the tool or process requires one. A hose that fits the coupling can still be the wrong hose if its pressure rating is too low. Tool airflow demand matters too: a compressor that cannot sustain the tool’s requirements may cycle frequently or fail to deliver consistent performance. Never point compressed air at yourself or anyone nearby; air can drive debris into eyes or cause serious injury.
Keep fuel, hot parts, and moving machinery under control
Turn the engine off and let it cool before refueling, then handle fuel outdoors away from sparks, flames, and smoking. Store gasoline in an approved container, separate from ignition sources and in line with local fire rules. If you spill fuel, clean it up before restarting; a hot muffler and fresh fuel are a dangerous combination. Shutting off the engine stops operation, but it does not instantly cool the exhaust or remove fuel vapor, so allow the cooling period specified by the manufacturer.
Picture a midmorning refill after a compressor has run through a stack of siding nails. The engine housing and exhaust can still be hot after shutdown, so set the fuel can aside, wait for the machine to cool, and follow the manual’s refueling directions. Rushing the last few minutes can create a fire risk that careful placement and PPE cannot fix. Plan refills around breaks when practical, rather than running the tank nearly dry and feeling pressure to pour fuel onto a hot machine.
During operation, keep hands, loose sleeves, and hair clear of belts, fans, and other moving parts. Wear eye protection for flying dust and fragments and hearing protection for sustained engine and tool noise; add whatever protective gear the task calls for. Keep bystanders out of the work area, especially when you are blowing dust or debris from a surface. The engine adds continuous noise beyond the tool itself, so hearing protection matters even during pauses in tool use if the compressor remains running.
A gas compressor can run tools at a jobsite without electrical power, but that convenience does not make every setup suitable. If the machine cannot get proper open-air clearance, or the site needs quieter operation or a different power source, choose another setup or rent equipment that fits the job. Do not compromise exhaust placement to save a walk for the hose. The practical tradeoff is between bringing the machine closer for convenience and keeping exhaust, heat, and noise away from people and occupied spaces; plan hose routing and work location around the safer placement.
Shut down and release pressure without surprises
Stop the engine using the manufacturer’s shutdown procedure, then isolate the part of the air system you plan to service and release pressure with the specified controls. Do not remove plugs, fittings, or the tank drain while they are under pressure. A trapped burst of air can send hardware flying or whip a hose across the work area. Stopping the engine prevents more air from being produced, but does not mean the tank or hose is empty; stored pressure can remain after shutdown.
For example, if a quick-connect leaks at the end of the day, switching off the engine alone does not tell you whether the line or tank still holds pressure. Follow the manual to isolate and depressurize the relevant part before touching the connection. Keep your face and hands out of the path of air and debris while you work. A leak may worsen when disturbed, so if the prescribed controls do not release pressure or the connection is damaged, stop and get qualified service rather than forcing it apart.
Isolation matters because pressure can remain in one section even after another section is vented. Releasing it in a controlled way reduces the chance that a hose or fitting moves suddenly, and helps you avoid exposing yourself to debris propelled by escaping air. Use the designated controls and verify the system is depressurized as the manual describes before loosening anything. This takes longer than simply switching off, but it makes the state of the system predictable before hands go near a connection.
Use the manual’s drain procedure for moisture in the tank. Compressed air can leave water inside, and that moisture can contribute to corrosion over time. Drain frequency and method depend on the model, use, humidity, and environment; a humid coastal jobsite may leave more water than a dry interior project. Draining reduces accumulated moisture, but it does not restore metal already weakened by corrosion, which is why inspection and the manufacturer’s schedule both matter.
Handle a damaged pressure vessel as a stop-use problem. If you find a leak, deep corrosion, or physical damage, do not patch or weld the tank yourself. Have it assessed by a qualified service provider or replace it as the manufacturer directs. Pressure vessels need sound materials and correctly functioning safety devices; appearance alone cannot prove a repair is safe. A tank failure can release stored energy suddenly, so continued use to finish a small task is not a reasonable tradeoff.
Store it dry, cool, and ready for the next job
Before storage, let the engine cool, close fuel controls as directed, and put the compressor in a dry, well-ventilated place away from heat, flames, and children. Protect it from weather, but never wrap or enclose a running engine in a way that traps heat or exhaust. Storage preparation varies, so follow the manual for tank pressure, moisture removal, fuel, oil, and long-term shutdown. These instructions address different parts of the machine: moisture can affect the tank, while stale fuel and oil condition affect the engine.
After a wet exterior job, for instance, wipe mud and standing water from the machine and store it under cover once it has cooled. Then use the specified tank-draining process. Do not assume every model should be stored with the tank completely empty or at a particular pressure; the manufacturer’s directions govern that choice. A covered, dry location limits exposure to weather, but airflow around stored equipment also helps prevent trapped dampness.
Those directions balance several concerns. Removing moisture can limit corrosion, while fuel and oil procedures help protect the engine during a long idle period. Tank-pressure instructions also account for the design and storage conditions. Applying a routine from a different compressor may leave moisture behind or create a condition the manufacturer did not intend. For frequent use, the steps may be brief; before months of storage, the manual may call for additional engine care.
Seasonal storage deserves its own pass. The engine may call for fuel draining or treatment, while the compressor may need cleaning, inspection, oil care, or a specific tank procedure. Check the manual before you put it away for months, and check for current recalls or local emissions requirements when those apply to your equipment or location. These steps reduce avoidable deterioration, but they do not replace inspection when the unit returns to service.
Before the next job, take a fresh look at the tank, guards, hose, fittings, and safety devices. A dry storage shed helps protect equipment, but it cannot undo corrosion or damage that was already there. If a part looks unsafe or the pressure behavior seems wrong, keep the unit out of service until it has been assessed. Storage is part of readiness: a compressor is only ready when its condition and operating limits have been checked again.
Choose the right compressor setup for the site
A gas-powered model suits a job that needs portable airflow without a nearby electrical supply, but the site still needs room for safe outdoor operation. Match the compressor’s pressure and airflow to the tools you plan to run, and check each accessory’s rating. Portability does not erase exhaust or pressure limits. Matching airflow matters because a tool that demands more than the compressor can supply may perform poorly or cause the unit to run continuously, while choosing a much larger unit can add cost, noise, and fuel use.
Imagine a small trim crew working on a detached structure with open ground outside. A suitable gas compressor can sit away from the crew while rated hoses reach the nailers. Compare that with interior finish work in an occupied home: the crew should not run the gas unit in a garage or doorway to shorten the hose. Use an appropriate alternative power setup or rent equipment that suits the location and workload. The hose may add setup time, but that is a manageable tradeoff compared with putting engine exhaust near workers or occupants.
Model features and controls vary, including on portable and inverter-style compressors. Do not assume a familiar-looking lever or drain works the same way on every unit. Read the manual for clearances, rated pressure, shutdown, draining, and fuel handling before operation, especially if you have borrowed or rented an unfamiliar machine. A short orientation can prevent errors in controls and procedures that are easy to confuse across models.
A practical site decision weighs airflow needs, runtime, noise, exhaust placement, and the work area. If the job requires more airflow than a DIY-grade compressor can supply continuously, a larger rental may be safer and more productive than pushing a small unit beyond its intended duty. You want steady tool performance and a safe location, not a machine forced to keep up. Consider how long the unit will run and where people will be during that time; a setup that works for a brief outdoor task may be unsuitable for an all-day job near occupied space.
Frequently Asked Questions
Can I run a gas-powered air compressor in my garage if the door is open?
No. A garage can trap carbon monoxide, and exhaust can enter adjoining spaces even when the door is open. Run the compressor outdoors in open air, following the manual’s clearances.
How far should it be from a house, window, or door?
Follow the manufacturer’s specified clearance and point exhaust away from buildings and occupied areas. No single distance fits every model and site, so do not substitute a guessed measurement for the manual.
How often should I drain the tank?
Use the frequency and procedure in your compressor’s manual. Moisture depends on the unit, how often you run it, and conditions such as humidity; shut it down and position it safely before draining as directed.
Can I refuel while the compressor is running or still hot?
No. Shut the engine off and let it cool before refueling. Refuel outdoors away from flames, sparks, and smoking, and clean up any spill before restarting.
Should I release all the air before storing the compressor?
Storage directions vary by model. Follow the manual for tank pressure and moisture removal, and never open a drain or fitting while it is pressurized unless the manufacturer specifically instructs that procedure.
Can I use any hose or air tool with my compressor?
No. Match the hose, couplings, regulator, and tool to the pressure and airflow requirements. A connection that fits is not proof that the accessory is rated for the job.
Conclusion
Remember the order: open-air placement, sound equipment, rated connections, cool-engine refueling, and controlled depressurizing. Follow your compressor’s manual for its clearances, drain method, pressure limits, and storage preparation. If the tank is damaged or the site cannot support safe exhaust placement, stop and choose a qualified service provider or a different setup.
A compressor should leave the jobsite as calmly as it arrived: cool, inspected, drained as directed, and stored dry, with no hidden pressure waiting in a loose fitting.