
TL;DR

Get business pricing on tools and workshop supplies
- Business-only prices and quantity discounts
- Tax-exempt purchasing
- Multiple users, one account, clear invoices
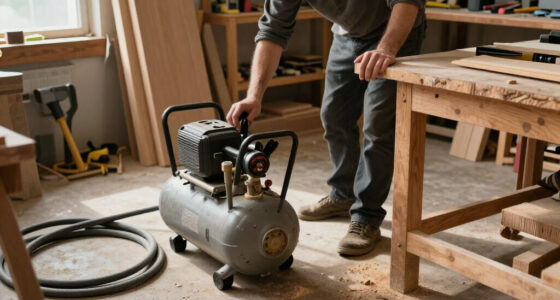
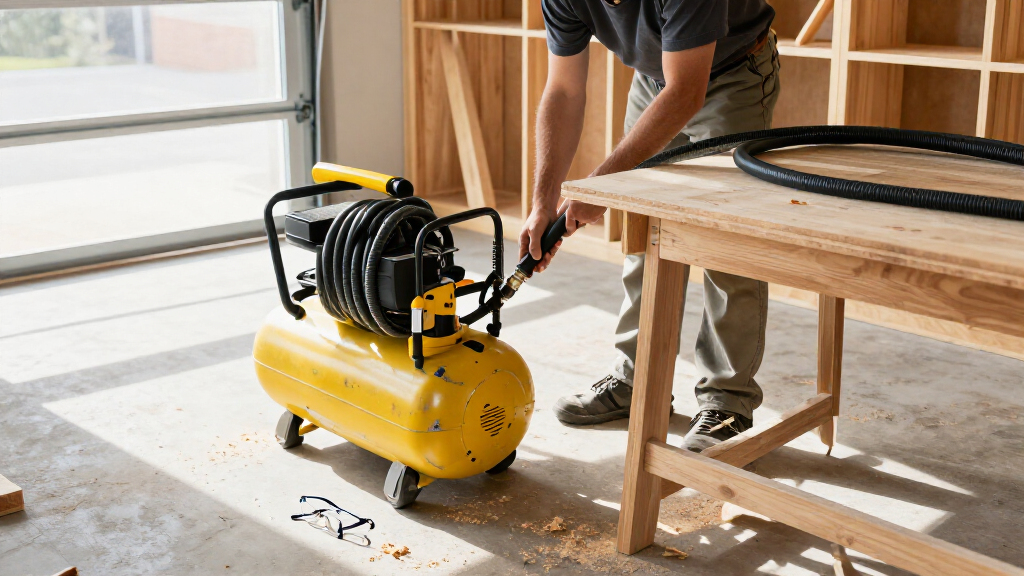
To safely operate portable air compressors on job sites, inspect the tank, controls, hoses, fittings, and guards; set the machine on stable ground; and match its delivered airflow and pressure to the tool. Use rated components, eye and hearing protection as the task requires, and never point compressed air at people or use engine-powered equipment in enclosed spaces. Drain moisture, service the unit by its manual, and remove damaged equipment from service.
A nailer that keeps firing is usually a sign of a well-matched compressor. A hose that whips loose, a tank with a failing safety device, or a gas engine running in a closed garage can turn the same tool setup into a serious hazard. The difference starts before you pull the trigger.
This guide shows you how to choose and set up portable air compressors, control pressure, electrical, fuel, noise, and debris hazards, and maintain the machine through a busy renovation. You’ll also learn when a compact DIY unit fits the task, when a crew needs pro-grade runtime, and when renting makes more sense than buying.
Your compressor’s manual and the job-site rules govern the work. Equipment design and local requirements vary, so treat the steps here as a practical framework, then follow the instructions and rules that apply to your machine and location.
Compare a tool’s airflow demand with the compressor’s delivered output at the required pressure; tank PSI alone does not show whether the tool will keep runnin…
Inspect the tank, hoses, fittings, guards, controls, and safety devices before use, and remove damaged equipment from service.
Use rated hoses and fittings, set pressure to the tool maker’s specification, and depressurize the line before disconnecting.
Never run an engine-powered compressor in an enclosed or poorly ventilated space, and never use compressed air on people or clothing.
Drain condensate and service filters, oil, belts, and cooling areas according to the exact model’s manual.
Field guide / Job-site safety
How to Safely Operate and Maintain Portable Air Compressors on Job Sites
A safer setup starts before the trigger: match airflow to the tool, inspect the pressure system, place the unit with care, and service it by the manufacturer’s manual.
TL;DR Inspect the tank, controls, hoses, fittings, and guards. Use stable ground, rated components, and tool-specific pressure. Keep engine exhaust outdoors; never aim compressed air at people. Drain moisture and maintain by the manual.
01 / Choose the right setup
Size for the work, not the label
PSI describes pressure; it does not tell you how quickly a pump can replenish air. Check tool requirements against compressor output at the working pressure.
Intermittent demand
Nailers & short bursts
Intermittent tools give the pump time to recover between uses. A compact unit may suit trim work or small repairs when its output meets the tool specification.
Continuous demand
Sanders & long runs
Continuous draw can empty the tank faster than the pump refills it. Falling pressure and constant cycling can reduce performance and increase wear.
Crew planning
Multiple tools
Add the demand of tools likely to run together. Long, narrow hoses and restrictive fittings can reduce delivery at the far end of the line.
Full-shift use may call for higher delivered airflow and service support. Renting can fit a short project. Account for size, weight, noise, fuel, emissions, and local site rules.
02 / Before the trigger
Run a deliberate pre-start check
Inspect while the system is depressurized. Set the compressor on stable ground, clear of traffic, water, combustibles, and places where exhaust or noise could expose others.
Check the tank, guards, wheels, controls, and safety devices for damage, corrosion, leaks, or loose parts.
Inspect hose covers, couplings, and fittings. Confirm every component is rated for pressure and application.
Keep workers clear during inspection and testing. Route hoses away from traffic and walking paths.
Identify the controls and make sure the operator can reach them without crossing a hazard.
Never weld, drill, patch, or modify a pressure tank. Remove damaged equipment from service for qualified assessment.
03 / Air-line control
Keep pressure within every rating
A safe air line depends on every component: compressor, hose, coupling, tool, and attachment. Set operating pressure to the tool maker’s specification.
Tank PSI is not the tool setting.
The tank’s maximum pressure describes the vessel’s limit. It does not establish the right pressure for every connected tool. Too little can hurt performance; too much can damage equipment or work.
04 / Exposure controls
Control air, power, fuel, and noise
Protect workers and bystanders from stored energy, exhaust, electrical hazards, flying debris, and sound exposure. Follow the machine manual and site rules.
- Never aim compressed air at people or use it to clean skin or clothing.
- Depressurize the line as directed before disconnecting tools or fittings.
- Keep engine-powered units outdoors. Never run them in enclosed or poorly ventilated spaces.
- Protect cords and connections from damage and moisture; use equipment suitable for site conditions.
- Refuel as directed with the engine off and cool, away from ignition sources.
- Use eye protection around pneumatic work; assess noise and use hearing protection when needed.
05 / Keep it serviceable
Maintain by model and schedule
Service intervals and procedures vary. Use the exact model’s manual, specified parts, and fluids; record inspections and repairs on shared equipment.
After use / as directed
Drain condensate
Control pressure and discharge direction according to the manual. Keep people clear of the outlet; frequency depends on the compressor and conditions.
Scheduled service
Filters, oil & cooling
Clean or replace filters as specified. Check oil only on lubricated models, and keep intake and cooling areas unobstructed.
Inspect as applicable
Belts & fasteners
Check belts, hardware, guards, hoses, fittings, and safety controls where applicable. Remove damaged units from service.
Shut down and isolate the compressor as the manual directs. Secure the equipment and accessories for transport, and never lift or tow beyond specified limits.
Match compressor airflow to the tool before you start
Before choosing a compressor, match its delivered airflow and pressure to the tool’s requirements. PSI describes pressure; it does not tell you how much air the pump can replenish over time. The tank stores a reserve, but that reserve only delays the point when an undersized compressor falls behind. Check the tool manual for its operating pressure and air demand, then compare those numbers with the compressor’s output at that pressure.
That difference matters as soon as work continues beyond a brief burst. A framing nailer fires intermittently, giving the pump time to recover between shots. A sander draws air continuously, so it can deplete the tank faster than the pump refills it. The result may be a falling pressure, slow or inconsistent tool performance, and a compressor that runs almost constantly. That can slow the job and increase wear. A high tank pressure rating does not solve a shortage of airflow.
Size for the actual setup, not just one tool’s label. Add together the demand of tools likely to run at the same time, and allow for the pressure and airflow losses that can occur through long, narrow hoses and restrictive fittings. A tool may meet its demand at the compressor but still perform poorly at the far end of a long hose. On a shared crew setup, planning for simultaneous use helps avoid one worker’s tool starving another’s.
DIY-grade units can suit occasional trim work or small repairs, where intermittent use gives the pump time to recover. A crew using air tools through a full shift may value higher delivered airflow, longer runtime, and accessible service support; that capacity may cost more and can bring added size, weight, noise, or fuel needs. Renting can be a sensible way to get the capacity for a short project without buying and maintaining equipment that will sit afterward. Include site noise and emissions rules in the choice, since a technically capable machine may still be unsuitable for the location.
Popular right now

Bose QuietComfort True Wireless Earbuds with Active Noise Cancellation, Black

Dyson Ball Animal 2 Plus Corded Vacuum

Shark Rocket Pet Plus Corded Stick Vacuum, Bordeaux, HV322
As an affiliate, we earn on qualifying purchases.
Run a pre-start check that catches damage before it catches you
A pre-start inspection helps catch damage while the system is depressurized, before stored air can turn a small defect into a sudden failure. Check the tank, hoses, couplings, fittings, guards, wheels, controls, and safety devices for cracks, corrosion, leaks, missing parts, or loose hardware. A hose cover may hide wear beneath it, and corrosion or deformation on a tank can signal a pressure-vessel concern. If the tank or a safety device looks damaged or unreliable, stop and take the unit out of service; continued use puts everyone nearby at risk.
On a kitchen remodel, an inspection might reveal a cracked hose cover where the line rubs against a sharp cabinet edge. Finding it before pressurizing the line gives the crew a chance to replace the hose in a controlled setting. If a damaged line fails under pressure, it may whip, startle nearby workers, or strike someone. Keep workers and bystanders clear while inspecting and testing equipment, and do not try to repair a pressurized connection.
Before starting, set the compressor on stable ground as directed by the manual. A level, secure position helps prevent movement or tipping and can reduce vibration, while placement away from vehicle paths lowers the chance of impact. Keep the unit away from standing water, combustible materials, and locations where noise or exhaust could expose others. Position it so the operator can reach the controls without stepping over a hose or entering equipment traffic; good placement makes it easier to stop the machine quickly and keeps routes clear.
Make the inspection a brief crew routine: scan the machine, confirm the correct tool and hose, check the work area, and identify the stop control. Eye protection is commonly appropriate around pneumatic work because fasteners and debris can travel unexpectedly. Hearing protection depends on actual noise exposure and the site assessment; a “quiet” label alone does not show that exposure is safe. Add PPE for the material and task, since the compressor is only one source of risk on the job.
Connect and use air lines without pressure surprises
Use hoses, fittings, tools, and attachments rated for the compressor’s maximum pressure and the application. Each component is part of the pressure system: a weak hose or fitting can fail even when the compressor and tool are suitable. Secure each connection, inspect the line for wear, and set the regulator to the tool maker’s specified operating pressure. Never exceed a component’s rating or adjust, block, or disable the pressure switch, regulator, relief valve, or another safety control. Those controls limit or direct pressure so the system operates within its design.
When a crew switches from a nailer to an impact wrench, check the wrench specifications instead of assuming the previous setting will work. Too little pressure can reduce tool performance; too much can damage the tool or workpiece and raise the risk of failure. The tank’s maximum pressure describes the vessel’s limit, not the correct operating pressure for every connected tool.
Follow a deliberate connection and shutdown routine:
- Shut down or isolate the compressor as the manual directs before changing accessories or clearing a jam. This reduces the chance of an accidental start or unexpected tool movement.
- Check the hose and couplings, connect the tool securely, then set pressure for that tool. A secure connection and correct setting help prevent leaks and poor performance.
- Keep bystanders clear and aim the working end away from people and fragile surfaces. Fasteners and debris can travel beyond the immediate point of work.
- Before disconnecting a hose or fitting, shut off the supply and depressurize the line according to the equipment instructions. A line that still holds pressure can release suddenly when opened.
Never point compressed air at a person or use it to clean skin or clothing. Air can drive particles into eyes or beneath the skin, and a brief puff can cause serious injury. For dust, use a suitable vacuum or the site’s approved cleanup method, which captures debris rather than propelling it into the air. Route hoses out of walkways to reduce trips, protect the line from damage, and make movement around the work area easier.
Control power, exhaust, noise, and flying debris
Control the energy source before you think about speed. For an electric compressor, use cords and connections suited to job-site conditions and protect them from damage and moisture. Keep plugs and connections out of puddles, and route cords away from cutting edges, wheels, and busy walkways. Damaged or wet connections can expose workers to electrical hazards, while an undersized or unsuitable supply may cause operating problems. Follow the machine’s electrical instructions and site procedures.
Fuel-powered compressors need a different setup. Refuel only as the manual directs, with the engine off and cool and away from ignition sources, because fuel vapors can ignite. Run engine-powered equipment outdoors where exhaust can disperse; never run it in an enclosed or poorly ventilated space. A gas engine can produce carbon monoxide, an odorless gas that can kill. An open garage door does not guarantee enough ventilation to keep exhaust from building up, so move the equipment and work outdoors rather than relying on an open doorway.
Noise and debris deserve the same practical attention as power and exhaust. Compressors and pneumatic tools can be loud, and fastening or blowing work can send particles toward the face. On a trim crew, the operator may stand several feet from the nailer but still share the noise and debris zone. Use eye protection and hearing protection based on the task and site exposure assessment, and keep bystanders outside the work area. Distance and barriers can reduce exposure, but they do not replace the protections required by the site assessment.
Battery-powered compressors can reduce cord and fuel handling for lighter tasks, but runtime, airflow, and recharge time can limit a full shift. A battery unit that suits short punch-list work may need frequent pauses under sustained demand, so weigh convenience against the time lost waiting for recovery or charging. Compact or quieter equipment can improve handling and reduce disturbance; it does not remove the need to check the specifications or protect workers. Connected service alerts can help track maintenance, but they only provide information and do not replace inspection, training, or sound judgment.
Drain tank moisture and keep the compressor ready for tomorrow
Drain tank condensate according to the compressor’s manual, controlling both pressure and the direction of discharge. Moisture enters the tank with the air and can collect during operation; leaving it unmanaged can contribute to internal corrosion, which matters because the tank is a pressure vessel. The right drain frequency and procedure depend on the machine and working conditions. Keep people away from the outlet while draining, since pressure can spray water and debris.
For example, a compressor working through a humid week may collect moisture faster than a unit used briefly in dry conditions. The crew should follow the manufacturer’s schedule and observe the machine’s condition, rather than assume every tank needs the same routine. Plan the drain point so water does not run across a walkway or into a place where it creates a slip hazard. That small setup choice keeps routine maintenance from creating a new job-site hazard.
Maintenance varies by design. Clean or replace air filters as specified; a dirty filter can restrict intake and make the compressor work harder or perform poorly. Keep intake and cooling areas clear so airflow can do its job, and check belts, fasteners, and cooling surfaces where the model calls for it. On lubricated models, check oil using the prescribed method and fluid; the wrong level or type can harm the pump. Many portable compressors are oil-free, but oil-free does not mean maintenance-free.
Record inspections, repairs, and service dates when equipment is shared among crews. A simple tag or log shows who last drained the tank or changed a filter, making it easier to spot missed service and recurring problems. Follow the manual for service intervals and parts, since a generic schedule may not suit the model. Shut down and isolate the machine before maintenance so it cannot start unexpectedly; use qualified service support when the repair exceeds the crew’s training.
Know when to stop, tag out, and call for service
Remove a compressor from service if its tank, hose, fitting, guard, or safety control is damaged or malfunctioning. Stop work if the unit leaks, overheats, makes an unusual noise, or behaves differently than normal; these changes can signal a fault that may worsen under pressure. Shut it down and isolate power or fuel according to the manual, then tag it so another worker does not unknowingly put it back into use. Taking a unit out of service can delay the job, but continuing with a suspected fault can expose the crew to a failure with more serious consequences.
Tank damage calls for special caution. Corrosion, deformation, cracking, or an unreliable safety device can point to a serious pressure-vessel problem, where stored energy makes an improvised repair especially dangerous. Never weld, drill, patch, or modify a pressure tank. Have it assessed by a qualified service provider; replacement may be necessary. A quick field fix cannot restore confidence that a compromised vessel will contain pressure safely.
If the compressor loses pressure or takes too long to recover, do not keep forcing the work. Possible causes include a leak, a clogged intake filter, a tool drawing more air than the unit supplies, restrictive hoses, or a service issue. On a siding job, a loose coupling may sound like a steady hiss; shut down and inspect safely rather than tightening a pressurized connection. Continuing to run an overloaded or leaking setup can waste time, increase wear, and leave tools short of the pressure they need.
Use qualified professionals where the repair or work involves hazards beyond your competence. For electrical work, isolate power and follow site safety procedures; licensed professionals should handle work that requires them under local rules. Gas, structural, and roof work also require the appropriate licensed trades and permits where applicable. These boundaries protect workers and help ensure the repair meets the rules for the site. Never treat a compressor as a shortcut around code or job-site requirements.
Choose the right setup for a real job, not the label on the tank
The right compressor setup depends on the tool’s airflow and pressure needs, how long it runs, what else shares the air supply, and the conditions on site. Compare the delivered airflow at the required pressure, then consider portability, power or fuel access, noise limits, and the time available for recovery. A single PSI figure or “portable” label cannot answer all of those questions because neither tells you how the machine will perform across the actual workday.
Consider a small crew installing baseboards in a finished home. One nailer used in short bursts may suit a compact electric compressor, placed where its hose does not cross a doorway. The pauses between shots give the pump time to recover, and electric power avoids handling fuel indoors. The same crew using two sanders continuously could outpace that machine: the pump may cycle constantly, tool performance may drop, and work may slow. The task changed from intermittent to sustained demand, so the equipment decision should change with it.
On a larger framing site, a pro-grade unit may make sense when several tools need steady supply through long shifts, although its extra capacity can come with more weight, noise, or operating cost. If the project lasts only a day, compare rental cost and availability against purchase, transport, and maintenance. A battery unit may fit punch-list work where cord management is awkward, while limited runtime and recharge time can make it a poor match for sustained air demand. Each option trades convenience against the capacity and operating time the job requires.
Before the job begins, write down the tools, their specified pressure and airflow, expected simultaneous use, and likely hose runs. Then check the compressor manual and site rules. This planning makes mismatches visible before the crew is committed to the setup, and helps the operator place the machine where controls remain accessible while hoses and cords stay out of traffic. If the numbers or work pattern do not fit, choosing a larger unit or renting one can be more efficient than trying to work around a machine that cannot keep up.
Frequently Asked Questions
What should I inspect before starting a portable air compressor?
Check the tank, hoses, fittings, couplings, guards, wheels, controls, and safety devices for damage, corrosion, leaks, or loose parts. Set the unit on stable ground and follow the model’s pre-use checklist. Do not use equipment with a damaged tank or safety control.
How often should I drain the compressor tank?
Use the manufacturer’s schedule and procedure. Moisture buildup depends on the compressor, humidity, and operating conditions, so a universal interval can be wrong for your machine. Control pressure and discharge direction, and keep people clear of the drain outlet.
Can I use compressed air to clean dust off myself or a coworker?
No. Compressed air can drive particles into eyes or skin and cause serious injury. Use a suitable vacuum or the site’s approved cleanup method, and never point an air line at a person or use it on clothing.
Can I run a gas-powered compressor indoors?
No. Run an engine-powered compressor outdoors where exhaust can disperse, never in an enclosed or poorly ventilated space. Its exhaust can contain carbon monoxide, which has no smell and can be fatal.
What pressure should I set for a pneumatic tool?
Set pressure to the tool manufacturer’s specified operating pressure. Check that the compressor, hose, fittings, and attachments are rated for the application, and do not exceed any component’s limit. Tank maximum pressure is not the correct setting for every tool.
Why does my compressor lose pressure or take too long to recover?
Possible causes include an air leak, clogged intake filter, restrictive or undersized hose, or a tool that needs more airflow than the compressor can deliver. Shut down and inspect safely; do not tighten or disconnect a pressurized fitting. If the cause is unclear or the machine behaves unusually, arrange qualified service.
Is an oil-free portable compressor maintenance-free?
No. Oil-free models may not need oil changes, but they still need inspections, filter care, condensate management, and any other maintenance specified in the manual. Identify the exact model before servicing.
Conclusion
Before the next tool starts, match the compressor to the work, inspect the pressure system, and set up the power source and hose route safely. Follow the manual for operation and maintenance, and pull damaged equipment from service instead of trying to nurse it through one more shift.
A well-kept compressor should sound like steady work in the background, not a warning you learn to ignore.