
TL;DR

Get business pricing on tools and workshop supplies
- Business-only prices and quantity discounts
- Tax-exempt purchasing
- Multiple users, one account, clear invoices
Power tool accessories last longer and work more safely when you match them to the tool, material, and rated speed, install them correctly, and let them cut without excessive pressure. Inspect and clean each accessory using its manufacturer’s guidance, then store it dry and protected; replace cracked, bent, chipped, or badly worn parts instead of risking a failure.
A drill bit that skates across steel or a blade that burns a board often gives you a warning before it fails: heat, noise, rough cuts, or a sudden loss of speed. Those signs can turn a quick repair into a ruined workpiece—or a safety problem. The accessory is doing the cutting, grinding, or sanding, so how you choose and care for it shapes both the result and the risk.
This guide gives you practical tips for properly using and storing power tool accessories, from drill bits and saw blades to sanding discs and abrasive wheels. You’ll learn how to match an accessory to the job, spot wear, keep dust under control, and store sharp or fragile parts so they’re ready for the next project.
A sturdy case and a few seconds of inspection can save money, but care has limits. A cracked wheel or bent bit belongs out of service. Treat the accessory label and manufacturer’s instructions as the authority, especially for speed limits, mounting, cleaning, sharpening, and storage.
Match each accessory to the material, task, tool interface, and rated speed before use.
Disconnect power or remove the battery before changing an accessory, then seat and secure it as the tool maker directs.
Excessive pressure creates heat and wear; stop when a bit or blade slows, burns, vibrates, or performs poorly.
Clean and sharpen only by methods the accessory’s manufacturer allows, and protect parts from moisture and impacts in storage.
Replace cracked, bent, chipped, or unsafe accessories; no universal expiration period applies to every type.
Workshop Field Guide · Use & Storage
Make Every Accessory Last Longer
Choose the right bit, blade, disc, or wheel. Fit it correctly, work within its limits, and protect it between jobs.
Match the accessory to the job
Compatibility is more than a snug fit. Check the material, task, mounting interface, and speed rating against both manuals and the accessory markings.
Use the right edge
A wood bit can overheat in metal or masonry. Pick a bit, blade, disc, or wheel designed for the work.
Check the limits
Confirm shank or mounting compatibility, size, and maximum RPM. Never exceed the accessory’s rated speed.
Quick change still needs a check
Higher speed and torque in cordless tools can place greater demands on accessories. A fast interface does not prove compatibility.
- 1Read tool and accessory instructions before starting.
- 2Check for cracks, chips, bends, missing teeth, or coating damage.
- 3Keep guards in place; never force an incompatible setup to fit.
- 4When the material or rating is unclear, pause and verify with the manufacturer.
Let the accessory do the work
Correct installation and steady, controlled pressure help reduce heat, wear, and the chance of sudden failure.
Unplug the tool or remove its battery before changing parts.
Seat it straight; follow mounting and guard instructions.
Choose suitable speed, feed, and stable work support.
Keep a controlled grip and let the edge cut without forcing.
Check for heat, clogging, dullness, damage, or mismatch.
Slow down before you push harder
Forcing a bit or blade can create heat, bending, premature wear, or breakage. Ease up if it squeals, stalls, burns, vibrates, or cuts poorly.
Control the work and the dust
Wear eye protection; add hearing or respiratory protection when needed. Secure the workpiece, keep hands clear, and use suitable dust extraction for hazardous materials.
Read the signs before the next cut
Inspect before and after use. Stop when performance changes, then identify whether the accessory needs approved cleaning, service, or replacement.
Inspect for damage
- StopCracks, chips, bends, missing teeth — take the accessory out of service.
- InvestigateHeat, vibration, noise, rough cuts — check setup, clogging, and wear.
- Look closeDamaged coatings or heavy wear — compare with the maker’s service limits.
Clean only as directed
- Match methodRemove resin, dust, and filings using guidance for that accessory.
- Avoid guessworkUnapproved solvents or wire brushes can damage coatings or bonded abrasives.
- Sharpen if allowedService only accessories designed to be sharpened, using approved methods.
A cracked abrasive wheel is unsafe regardless of remaining work. Do not repair damage beyond an approved service limit; replace unsafe parts.
Keep edges dry, separate, and protected
A case, rack, sleeve, or labeled compartment makes the right accessory easy to find and helps prevent rust, impact damage, and bent edges.
Build a simple storage routine
Wipe away moisture and let parts dry before putting them away. Keep precision bits and blades from rubbing together or striking hard surfaces. Protect sharp edges and avoid stacking heavy items on top.
Store abrasive wheels as their manufacturer directs; some types are especially vulnerable to impact, moisture, or improper support.
When in doubt, take it out of service
Service life depends on accessory type, use, storage, and manufacturer guidance. There is no single expiration period for every bit, blade, disc, or wheel. If damage, unsafe wear, overheating despite correct use, or poor results remain, replace it.
Choose the right accessory before you pull the trigger
To make power tool accessories last longer, match each one to the tool, material, and task, then check its size, interface, and speed rating. A wood bit pushed into masonry may overheat or dull quickly, while an accessory that fits the chuck but exceeds its rated RPM can fail at speed. Read both the tool manual and the accessory markings before you start.
That check matters even more with modern cordless tools. Some pack plenty of speed and torque into a compact body, and a quick-change interface only makes installation faster; it does not prove that the accessory is rated for the tool. If the accessory lists a maximum speed, keep the tool at or below it. Never remove a guard to make an incompatible setup fit.
For example, a homeowner drilling a few holes for a shelf might reach for the nearest bit. If the wall is masonry, a wood bit will rub and heat instead of cutting cleanly. Choosing a suitable masonry bit and using the drill’s hammer setting only when the tool and bit allow it saves time and avoids abusing the wrong edge.
- Check material and task: Use a bit, blade, disc, or wheel designed for the work.
- Check fit and speed: Confirm shank or mounting compatibility and the accessory’s rated RPM.
- Check condition: Look for cracks, chips, bends, missing teeth, or damaged coatings before fitting it.
Specialized tooth shapes, coatings, and abrasive formulations can improve results when you use them as intended. They also make the label more useful than guesswork. When the material or rating is unclear, pause and check the manufacturer’s guidance; the cheapest accessory can cost more if it wrecks the finish or the tool.
Popular right now

Roborock F25 GT Set Cordless Wet Dry Vacuum Cleaner and Mop with 2 Brushes

Breville Bambino Espresso Machine, Brushed Stainless Steel (BES450BSS)

Bose QuietComfort Wireless Noise-Cancelling Over-Ear Headphones, Black
As an affiliate, we earn on qualifying purchases.
Install accessories safely and let them do the cutting
Correct installation and light, controlled pressure help accessories last longer and reduce the chance of a sudden failure. Disconnect corded tools from power or remove the battery before changing an accessory, then seat it straight and secure it as the tool maker directs. Follow instructions for guards and locking mechanisms; a part that looks centered may still be loose.
- Make the tool safe: Unplug it or remove its battery before changing accessories.
- Fit and secure the part: Use the specified interface, mounting method, and guard.
- Set up for the material: Choose an appropriate speed and stable work support.
- Start steadily: Keep your grip and stance controlled, and avoid forcing the cut.
- Stop if performance changes: Check for dullness, clogging, heat, damage, or a setup mismatch.
Imagine cutting plywood with a circular saw. If you lean hard on the saw because it is moving slowly, the blade can heat up and leave a scorched edge. A slower, steady feed gives the teeth room to clear chips. The same principle applies to drilling: let the bit bite, and ease up if it squeals or stalls.
Wear eye protection, and add hearing or respiratory protection when the task calls for it. Keep hands clear of moving parts and secure the workpiece. Cutting and sanding can release hazardous dust, especially from masonry, engineered stone, and some treated products, so use suitable extraction and follow current local safety requirements. If a project involves electrical, gas, structural, or roof work, use a licensed professional; do not treat accessory skill as a substitute for permits or code compliance.
Catch wear early with a quick inspection and clean
Inspect each accessory before and after use, and clean away buildup with a method approved for that specific part. Cracks, chips, bent shanks, missing teeth, damaged coatings, heavy wear, or signs of overheating can point to unsafe operation or a poor finish. Stop and investigate unusual vibration, burning, or declining performance instead of pushing through.
Cleaning is not one-size-fits-all. Resin on a saw blade, metal filings around a bit, and dust on a sanding disc call for care suited to their materials and construction. Follow the manufacturer’s instructions; an unapproved solvent or wire brush can damage a coating or bonded abrasive. A quick wipe after a dusty cut may be all a particular accessory needs, while another requires a specified cleaning method.
Say you’ve been cutting pine trim and the blade teeth look gummy. That buildup can make the saw work harder and leave a rough or burned cut. Stop, isolate the tool, and clean the blade only as directed. If the edge is chipped or the blade remains poor after suitable cleaning, replace it rather than blaming the saw.
Keep cutting edges sharp only when the accessory is designed to be sharpened and the manufacturer permits it. Some bits and blades can be serviced; others should be replaced. A drill bit that has gone dull may produce more heat, while a cracked abrasive wheel is unsafe regardless of how much work remains. Don’t try to repair damage beyond an approved service limit.
Stop using an accessory with a crack, chip, bend, missing tooth, or unsafe wear. A damaged part can worsen under load, hurt the workpiece, damage the tool, or fail while spinning.
Store bits, blades, and wheels where they cannot get hurt
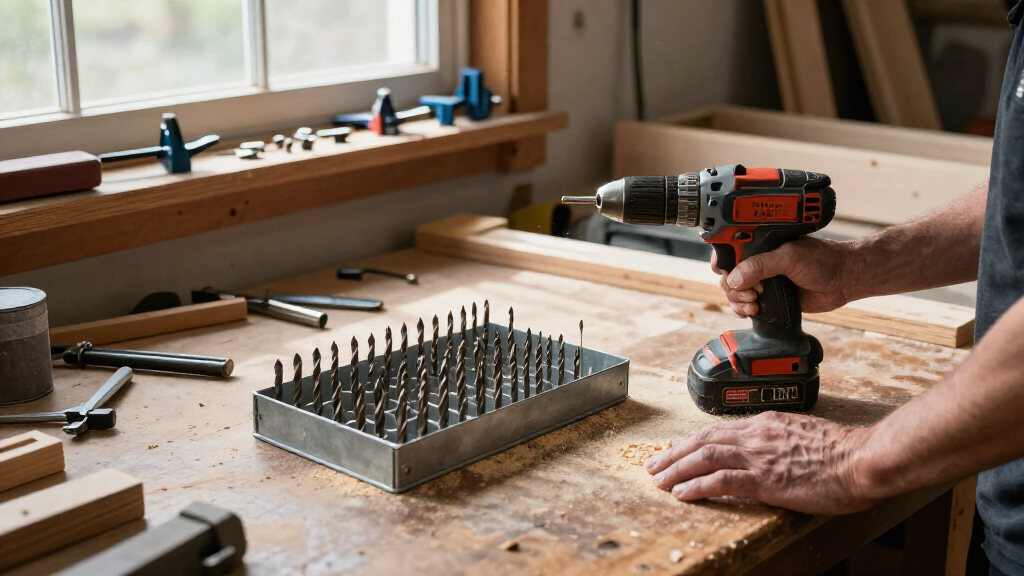
Store accessories in clean, dry conditions with their working edges protected from impact, rubbing, moisture, corrosive chemicals, and extreme heat. Cases, racks, sleeves, and labeled compartments keep bits from tangling and blades from knocking against hard surfaces. A little organization also helps you find the correct size before you begin.
Small steel bits can rust if they go back into a damp case after a wet or cold job. Wipe away moisture and let them dry before putting them away. If you use corrosion protection, choose only a method compatible with the accessory and its manufacturer’s instructions; oil is not automatically suitable for every coating, bond, or material.
Keep precision bits in individual slots, protect saw teeth with a sleeve or case, and avoid stacking heavy toolboxes on top of thin blades. Abrasive wheels need special care: store them and support them as their maker directs because some types can be damaged by impact, moisture, or improper support. If a wheel has taken a hard knock, inspect it according to its instructions before use, and discard it if damaged.
For instance, a contractor who drops loose spade bits into a coffee tin may save seconds during cleanup, then spend longer hunting for the right size and dealing with dented cutting edges. A labeled case turns that jumble into a simple visual check. Organized storage helps accessories last longer and makes missing or damaged parts easier to spot.
- Keep accessories dry and away from corrosive chemicals and extreme heat.
- Use separate slots or sleeves to prevent edges from rubbing or bending.
- Store wheels only as their manufacturer directs.
- Label by type and size so you can inspect and select the right part quickly.
Replace an accessory when performance or safety slips
Replace an accessory when it is cracked, bent, chipped, badly worn, or unsafe to repair, or when it overheats or performs poorly despite correct setup and use. Age alone does not set a universal expiration date. Its service life depends on accessory type, how hard you use it, its storage conditions, and any shelf-life or service limit given by the manufacturer.
Watch the result as well as the part. A saw blade that leaves a rough edge or burns wood, a bit that wanders or drills poorly, and a sanding disc that clogs too quickly may be telling you to stop and inspect. First check for a wrong accessory, excessive pressure, incorrect speed, or dust and chip buildup. If the cause is wear or damage, replace it.
That saves more than the accessory’s purchase price. A worn bit can damage a fastener or workpiece; a damaged blade can leave a cut you cannot use. For a one-off job that needs a specialist accessory or a tool you’ll rarely use, renting may make more sense than buying and storing something that sits for years. Still, inspect rented accessories before use and follow the rental provider’s and maker’s instructions.
Do not sharpen or repair a part just because it seems wasteful to discard it. Sharpening is appropriate only when the accessory is designed for it and the manufacturer permits it. If you cannot confidently confirm that a damaged part can be serviced safely, take it out of the case and replace it. The cost of a new bit is small beside an injury or a ruined workpiece.
Use these habits to cut waste without cutting corners
A short routine at the start and end of a job protects your accessories, your finish, and your time. The aim is not to baby every bit; it is to catch mismatches, heat, dust, and damage before they turn into a stuck cut or a broken part. Good habits also make it easier to tell when an accessory has reached the end of its useful life.
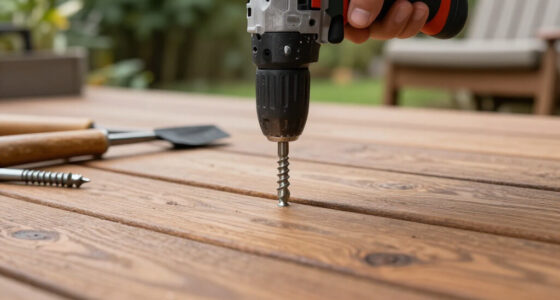
Consider a Saturday deck repair with a cordless drill, a few driver bits, and a saw. Put the battery aside before swapping accessories, check that each bit matches the fastener, and keep the workpiece stable. If a driver bit starts camming out or a saw blade begins to burn the wood, stop and inspect rather than leaning harder on the trigger.
- Before work: Check the accessory label, fit, rating, condition, guard, and work setup.
- During work: Use suitable speed and steady feed; let the accessory work instead of forcing it.
- When results change: Stop, isolate the tool, and check for wear, clogging, heat, damage, or mismatch.
- After work: Clean as directed, let parts dry when needed, and store them in protected, labeled spaces.
Dust control belongs in that routine. Extraction and suitable respiratory protection matter when cutting or sanding materials that create hazardous dust; a tidy bench alone does not protect your lungs. Modern accessories and quick-change systems can make work faster, but they do not cancel the need to check compatibility, ratings, guards, and secure installation. Follow current local safety requirements and the manufacturer’s guidance for the material you’re handling.
These simple checks are especially useful when you switch between DIY-grade and pro-grade work. A light-duty bit set may serve occasional furniture assembly well, while repeated drilling through tough materials can call for an accessory designed for heavier use. Match the tool and accessory to the work you actually do, and rent specialist gear when a rare job does not justify buying it.
Frequently Asked Questions
How should I store drill bits and saw blades?
Keep them dry and organized in a case, rack, or individual slots. Protect cutting edges from impacts and avoid letting accessories rub against one another; a sleeve or fitted compartment can prevent dents and dull spots.
Can I use one bit or blade for different materials?
Only use it across materials when the accessory is designed and rated for them. Check its markings and manufacturer’s instructions; the wrong accessory can overheat, produce a poor result, or get damaged.
How do I know when a power tool accessory is worn out?
Look for dull or damaged edges, cracks, chips, bending, missing teeth, unusual vibration, burning, or poor results. Stop and inspect when performance drops; replace the accessory if it is damaged or unsafe to repair.
Can I sharpen drill bits and saw blades?
Some bits and blades can be sharpened, but others cannot. Sharpen only when the accessory is designed for it and the manufacturer permits the method; replace anything with damage beyond an approved repair limit.
Why does a drill bit or blade overheat?
Common causes include a dull or unsuitable accessory, too much pressure, the wrong speed, poor chip or dust removal, or incorrect setup. Stop and let it cool, then check the material match, condition, and tool settings before continuing.
Is it safe to keep using a chipped or cracked accessory?
No. Stop using it and replace it. Damage can worsen during operation, and a part under load can fail and injure you or damage the workpiece.
Do power tool accessories expire?
There is no single expiration period for all accessories. Service life depends on the part, use, storage conditions, and manufacturer guidance, so inspect before each use and follow any shelf-life or date marking.
Conclusion
Remember this: match the accessory, use it gently, inspect it honestly, and store it dry and protected. Those habits help bits, blades, discs, and wheels last longer while keeping cuts cleaner and work safer. When a part is cracked, bent, chipped, or badly worn, replace it; saving one accessory is not worth risking a failure.
Before your next project, open the case and take a moment to check the part you plan to use. A sharp edge, a clean fit, and a steady tool make a much better sound than a bit squealing through the wrong material.