TL;DR

Get business pricing on tools and workshop supplies
- Business-only prices and quantity discounts
- Tax-exempt purchasing
- Multiple users, one account, clear invoices
In humid environments, drywall finishing demands moisture-resistant materials, environmental control, and precise application. Using mold-resistant drywall and managing humidity ensures a lasting, mold-free finish.
Imagine stepping into a bathroom after a hot shower. The steamy air lingers, the mirror fogs up, and the walls seem to breathe with moisture. In spaces like these, drywall isn’t just a wall; it’s a battleground against mold, warping, and deterioration. If you’re tackling a renovation in a basement or kitchen, you know the challenge: how to finish drywall that stands up to relentless humidity without falling apart or fostering mold.
Getting drywall right in these conditions isn’t about guessing or rushing. It’s about understanding the science of moisture, selecting the right materials, and applying proven techniques. Whether you’re a DIYer or a seasoned contractor, this guide will walk you through best practices that turn damp, tricky spaces into durable, mold-free zones. You’ll learn what works, what doesn’t, and how to stay ahead of moisture’s sneaky ways. Ready to make your drywall finish last in even the most humid environments? Let’s dive in.
Always choose moisture-resistant drywall and mold-resistant joint compounds for humid spaces to prevent mold growth and warping.
Control environmental humidity during finishing—use dehumidifiers and ventilation to keep it below 60%.
Apply joint compound in thin, multiple coats, allowing ample drying time between layers to prevent bubbling and cracking.
Finish with moisture-resistant primers and paints to create a durable, mold-free surface.
Stay informed about new materials and smart ventilation solutions that enhance drywall longevity in high-humidity environments.
Choose the Right Drywall: Moisture-Resistant Options Save Your Finish
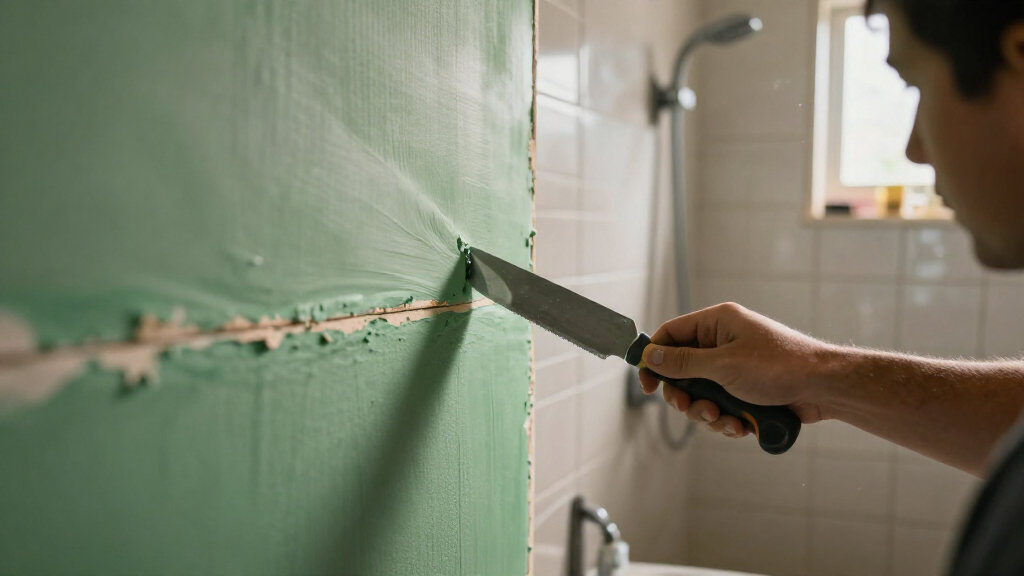
In high-humidity environments, standard drywall is a recipe for disaster. It absorbs moisture, swells, and invites mold. Instead, opt for moisture-resistant drywall—commonly called greenboard or cement board—designed specifically for these spaces. Greenboard has a special water-resistant core wrapped in a moisture-repelling paper, making it ideal for bathrooms and kitchens. Cement board, often used in showers, is even more resistant but heavier and more expensive.
For example, in a basement with frequent dampness, installing cement board behind tile or as a base for drywall can prevent warping and mold growth. The key is to match the drywall type to the environment’s severity. For moderate humidity, greenboard suffices; for high moisture zones, cement board or even specialized mold-resistant drywall offers peace of mind.
Choosing the right drywall isn’t just about immediate protection—it’s about understanding the long-term implications. Regular drywall in a humid space can absorb moisture over time, leading to swelling, warping, and eventually structural failure. Mold spores thrive in these moist environments, posing health risks and requiring costly remediation. Moisture-resistant drywall acts as a barrier, reducing water infiltration, but it’s essential to understand that no drywall is completely waterproof. Therefore, pairing it with proper sealing and environmental controls is crucial. The tradeoff often involves increased material costs and slightly more complex installation, but these are minor compared to the cost of repairing mold damage or replacing failed drywall later. Investing in the correct drywall type ultimately saves money and hassle, and ensures your walls stay durable and safe for years to come.
Popular right now

Vitamix Propel Series 750 Professional-Grade Blender, 4 Programs, Black

De’Longhi Classic Matte Black Espresso Machine with Milk Frother

Bose QuietComfort Wireless Noise-Cancelling Over-Ear Headphones, Black
As an affiliate, we earn on qualifying purchases.
Control the Environment During Finishing: Keep Humidity in Check
Controlling humidity during drywall finishing is as crucial as choosing the right material. High moisture levels in the air can extend drying times, cause joint compounds to bubble, and trap moisture inside the wall. The goal is to keep ambient humidity below 60%, ideally around 50%, during application and curing.
For example, in a basement renovation, running a dehumidifier during and after finishing can cut drying times in half and prevent issues like bubbling or cracking. Ventilation fans and open windows help, but in enclosed spaces, mechanical dehumidification is your best bet. Some contractors install portable dehumidifiers with built-in hygrometers to monitor conditions in real time.
Understanding why humidity control matters is key. Excess moisture in the air doesn’t just slow down drying; it actively influences the quality of the finish. When joint compounds dry too slowly or unevenly, they are more prone to cracking, bubbling, and mold development. These problems can be compounded if moisture gets trapped behind paint or sealants, creating an environment where mold spores can flourish. Conversely, maintaining optimal humidity levels ensures that the compounds cure evenly, resulting in a smooth, durable surface. The tradeoff with humidity control is energy use and initial investment in equipment, but the payoff is a significantly higher quality finish that resists mold and deterioration. Ignoring this step can compromise your entire project, leading to rework, delays, and potential health hazards down the line.
Apply Joint Compound Correctly: Thin Layers and Patience Are Key
In humid conditions, applying multiple thin coats of joint compound beats one thick layer. Thick coats trap moisture, slow drying, and increase the risk of cracking or bubbling. The best practice is to spread a thin, even layer, let it dry completely—preferably 24 hours or more—and sand lightly before adding the next coat.
For instance, in a bathroom renovation, you might apply three coats of compound, each no thicker than a quarter-inch. Between coats, wait at least 24 hours—longer if the room stays humid. Using fans or dehumidifiers during drying speeds up the process and reduces the chance of moisture entrapment. It’s important to recognize that thicker coats don’t just take longer to dry—they also tend to cure unevenly, leading to surface imperfections and potential mold pockets if moisture remains trapped. The tradeoff here is patience; rushing to finish with thick layers might save time upfront but risks costly repairs later. Proper layering ensures the drywall surface remains smooth and free of cracks, and it significantly reduces mold risk by allowing the joint compound to cure evenly in a controlled moisture environment. This meticulous approach ultimately results in a resilient, long-lasting finish that withstands high humidity conditions.
Seal and Paint with Moisture-Resistant Products for Lasting Protection
Finishing drywall in humid spaces doesn’t end with applying joint compound. Proper sealing and painting are essential. Use high-quality, moisture-resistant primers designed for high-humidity environments. These primers block residual moisture and prevent mold spores from settling.
For example, in a kitchen remodel, after sanding the final coat, you might apply a mold-resistant primer followed by a semi-gloss, moisture-resistant paint. This layer acts as a barrier, preventing moisture from penetrating the drywall and inhibiting mold growth.
Think of sealing and painting as the final armor for your drywall. The primer penetrates and seals tiny pores and surface imperfections that could trap moisture, while the paint provides a protective, water-resistant surface. Skipping this step leaves the drywall vulnerable to residual moisture and mold spores that may have settled during finishing. Some contractors recommend using vapor barriers or sealants directly over the drywall before painting, especially in areas with persistent moisture—these act as an extra line of defense. The tradeoff involves additional cost and effort, but the long-term benefits include a significant reduction in mold risk, fewer repairs, and a healthier indoor environment. Proper sealing and painting are the final, crucial steps in ensuring your drywall remains intact and mold-free over time, especially in challenging, humid conditions.
Stay Ahead with New Materials and Tech: What’s Changing in Drywall Finishing
The drywall finishing game is evolving fast, especially for humid environments. Recent advances include moisture-resistant drywall with enhanced mold inhibitors, and joint compounds with improved water-repelling properties. These products are more effective and easier to work with than older options.
For example, some new joint compounds incorporate biocides that actively inhibit mold growth, extending the lifespan of your finish. Additionally, vapor-permeable sealants allow moisture to escape without trapping it inside the wall cavity, reducing mold risk.
Smart ventilation systems are also gaining popularity. Automated dehumidifiers and humidity sensors can be integrated into your renovation plan, ensuring consistent moisture levels during and after finishing. Eco-friendly options, such as low-VOC paints and sealants, are now available, making it safer for homeowners and contractors alike.
Staying updated on these innovations can significantly improve your results, especially in challenging environments. It’s like upgrading from a bicycle to a motorcycle—more power, better control, and longer-lasting results.
Frequently Asked Questions
What type of drywall is best for high-humidity areas?
Moisture-resistant drywall, such as greenboard or cement board, is best suited. Greenboard works well in bathrooms and kitchens, while cement board is ideal for showers and basements with persistent moisture. These materials slow water absorption and resist mold growth.
How can I prevent mold growth on drywall in humid environments?
Use mold-resistant drywall and joint compounds, maintain low indoor humidity (below 60%), and ensure proper ventilation. Applying a mold-resistant primer and moisture barrier before painting also helps keep mold spores at bay.
What are the best finishing techniques for humid conditions?
Apply multiple thin coats of joint compound, allow each to dry thoroughly—preferably 24 hours or more—and sand lightly between coats. Finish with moisture-resistant primer and paint to seal the surface and prevent moisture ingress.
Can I use regular drywall in a bathroom or basement?
No, standard drywall absorbs moisture quickly, leading to warping and mold. Use moisture-resistant drywall designed for high-humidity areas to ensure durability and mold prevention.
How do I control humidity during drywall finishing?
Use dehumidifiers, run ventilation fans, and open windows when possible. In enclosed spaces, mechanical dehumidification and humidity sensors help maintain optimal levels, ensuring proper curing and preventing issues like bubbling or mold.
Conclusion
Finishing drywall in high-humidity environments isn’t just about aesthetics; it’s about building walls that last. Using the right materials, managing moisture levels, and applying techniques with patience make all the difference. Think of it as giving your walls a raincoat—protection that keeps mold and warping at bay for years.
Don’t cut corners or rush the process. Invest in quality products and control your environment. Your walls will thank you with a smooth, durable finish that withstands the dampest conditions. When humidity rises, your drywall should stand firm, not falter. Now, go build walls that breathe easy and stay strong—rain or shine.