
TL;DR

Get business pricing on tools and workshop supplies
- Business-only prices and quantity discounts
- Tax-exempt purchasing
- Multiple users, one account, clear invoices
Drywall sanding creates fine gypsum and sometimes silica-containing dust that spreads through an entire home in minutes. The most effective dust control strategy is capturing dust at the source with a vacuum-assisted sander and HEPA extractor, then isolating the work area and finishing with HEPA vacuuming and damp wiping. Ventilation and air purifiers help, but nothing replaces source capture and a properly fitted N95 respirator.
I once spent a full weekend cleaning a kitchen after a “quick” drywall patch. The homeowner sanded a two-square-foot repair with a pole sander and no vacuum. When I walked in Monday morning, there was a fine white film on the inside of the kitchen cabinets — doors closed. That’s the thing about drywall dust: it doesn’t stay where you put it.
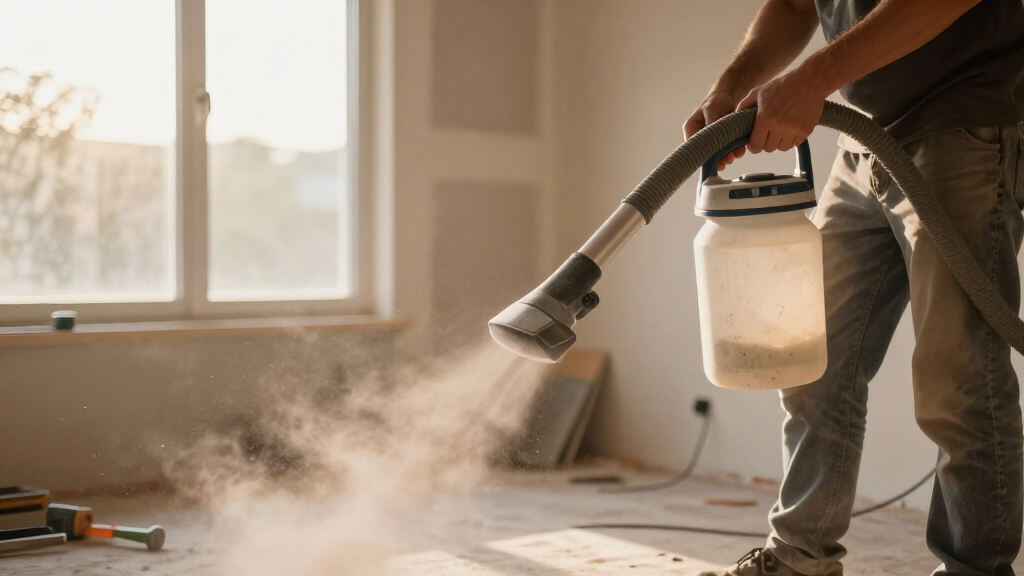
Drywall sanding creates fine gypsum dust — and sometimes respirable crystalline silica — that can hang in the air for hours and travel through HVAC ducts into every room of the house. It irritates lungs, kills vacuum cleaners, and ruins finished floors. But it’s also very controllable if you work the problem in the right order.
In this guide, you’ll get the same dust-control system I used on job sites for twenty years: capture at the source, contain the space, protect yourself, and clean without re-launching the dust. I’ll also be honest about what’s DIY-grade versus pro-grade, and when renting a tool beats buying one.
Capture dust at the source with a vacuum-assisted sander and sealed HEPA extractor — this does more than all your cleanup combined.
A conventional shop vacuum can exhaust fine gypsum dust back into the room; only a sealed HEPA-rated system actually removes it.
Turn off or isolate the HVAC system during sanding — return ducts distribute drywall dust to every room in the house.
Wear a properly fitted N95 or higher respirator, do a seal check every time, and check the SDS for crystalline silica before sanding unknown or older materials.
Clean in order: let dust settle, HEPA-vacuum top to bottom, damp-wipe, then carefully remove containment — never dry sweep or use compressed air.
Effective Dust Control Strategies for Drywall Sanding
Drywall sanding produces fine gypsum dust — and sometimes respirable crystalline silica — that hangs in the air for hours and rides HVAC ducts into every room of the house. The fix is a system, not a single tool: capture at the source, contain the space, protect your lungs, and clean without re-launching the dust.
A vacuum-assisted sander with a sealed HEPA extractor does more than all your cleanup combined.
One uncontrolled patch left a white film inside closed cabinets — drywall dust doesn’t stay where you put it.
Why Drywall Dust Deserves More Respect
Sanding particles are extremely fine. The smallest fraction stays airborne for hours, riding every air current — footsteps, open doors, HVAC airflow — to the far end of the house. Here’s what’s actually at stake.
Lung & Airway Irritant
Short term, dust irritates eyes, skin, nose, throat, and lungs. The long game is worse: some products and older materials contain respirable crystalline silica, associated with serious lung disease. Occupational guidance calls for protection beyond a basic dust mask.
Building-Wide Spread
Dust entering return ducts coats filters and distributes to every room — forcing HVAC filter replacements you didn’t budget for. Fine film settles inside closed cabinets and on finished floors.
Vacuum Killer
Fine gypsum loads filters fast. Contractors have burned out three shop vacuums in a single week on a big sanding job — and a standard shop vac can exhaust fine particles straight back into the room.
“A dust mask is not automatically adequate. Fit matters more than rating — a poorly sealed mask leaks the same fine dust straight into your lungs.”
Field Note · Respiratory ProtectionCatch It at the Surface, Not in the Air
A vacuum-assisted pole sander — perforated head, hose to a HEPA extractor — pulls air through the abrasives and swallows dust the instant it’s created. On a 12×14 bedroom skim-coat, white curtains three feet away stayed white. But the extractor has to be the right one.
| Tool | Removes fine dust | Holds suction all day | Verdict |
|---|---|---|---|
| Sealed HEPA dust extractor | ✓ Certified & sealed | ✓ Auto filter-cleaning pulse | The only real choice |
| Shop vac + HEPA kit (configured for fine dust) | ~ If sealed correctly | ✗ Filter loads fast | Conditional — check specs |
| Standard shop vacuum | ✗ Exhausts dust back into room | ✗ Loses airflow in minutes | Like bailing with a colander |
| Household vacuum | ✗ Recirculates fine particles | ✗ Motor damage risk | Never — you’re misting the air with gypsum |
What Actually Moves the Needle
Estimated contribution to overall dust control, based on jobsite results. Ventilation and air purifiers support the system — they never replace source capture.
Work the Problem in the Right Order
The same dust-control sequence used on job sites for twenty years. Skipping a step — or doing them out of order — puts dust back into the air.
Capture at Source
Vacuum-assisted sander on a sealed HEPA extractor. Nozzle close to the surface, compatible hose and abrasives.
Contain the Space
Plastic sheeting on doors and gaps, vents sealed, HVAC off or returns isolated, drop cloths on floors.
Protect Yourself
Fitted N95 or higher, seal check every time. Check the SDS for crystalline silica on unknown or older materials.
Clean Without Re-Launching
Let dust settle → HEPA-vacuum top to bottom → damp-wipe → then carefully remove containment. Never dry sweep.
Low-Dust Methods That Lighten the Load
The cheapest dust control is generating less dust. These aren’t gimmicks — several are standard practice on occupied-home renovations.
Low-Dust Joint Compound
Formulated so particles clump and fall faster instead of staying suspended. It doesn’t eliminate dust — never let a label tell you that — but it reduces the airborne fraction. On a nursery patch job, dust landed in heavy crumbs on the drop cloth instead of drifting toward the crib.
Wet Sanding
A damp sponge instead of abrasive paper — essentially no airborne dust, ideal for final smoothing in a lived-in home. Slower, and too much water softens compound or damages paper facing. Keep the sponge barely damp and rinse constantly: wiping a chalkboard with a wet rag, not erasing it dry.
When Renting Beats Buying — Honestly
A full vacuum-assisted sander plus extractor runs $400–$900 for decent gear. Where your project falls on the scale decides the answer.
~4×8 ft · RENT
<$150 rented
repeat work · BUY
The Mistakes That Ruin Good Intentions
- Sanding without source extraction — you’re chasing dust instead of catching it.
- Using a regular vacuum instead of a HEPA-rated sealed system.
- Relying on ventilation alone — it supports capture, never replaces it.
- Removing containment too early — clean nearby surfaces first.
- Dry sweeping or compressed air — never, on any surface, tool, or clothing.
- Poor respirator seal — facial hair and bad fit leak dust straight in.
- Ignoring HVAC ducts — dust in returns spreads building-wide.
- Trusting “low-dust” labels — reduced isn’t the same as dust-free.
Why Drywall Dust Deserves More Respect Than You’re Giving It
Drywall dust is more than a nuisance — it’s a legitimate respiratory hazard and a building-wide contaminant. The particles sanding produces are extremely fine; the smallest fraction stays airborne for hours, riding every air current from footsteps to HVAC airflow. Open a door, and you’ve shipped dust to the far end of the house.
Short-term, the dust irritates eyes, skin, nose, throat, and lungs. The bigger concern is the long game. Most joint compound is primarily gypsum, but some products — and especially older materials, concrete, mortar, or masonry you might be working near — contain respirable crystalline silica, which is associated with serious lung disease. According to occupational safety guidance, silica exposure calls for higher levels of protection than a basic dust mask provides.
Then there’s the property damage angle. Drywall dust that enters return ducts coats filters, spreads through the building, and can force an HVAC filter replacement you didn’t budget for. It also wrecks tools — I’ve seen contractors burn out three shop vacuums in one week on a big sanding job because fine gypsum loads filters fast.
A dust mask is not automatically adequate for drywall sanding. Fit matters more than rating — a poorly sealed mask leaks the same fine dust straight into your lungs.
So no, you’re not being paranoid if you’re worried about a sanding project. You’re being realistic. Now let’s build the system that fixes it.
Popular right now

eufy E25 Robot Vacuum and Mop Combo with HydroJet Roller Mop

Dyson Ball Animal 3 Corded Upright Vacuum

Shark Navigator Robot Vacuum with 30-Day Self-Emptying Base, White (AV2110S)
As an affiliate, we earn on qualifying purchases.
Capture Dust at the Source — The One Strategy That Does 80% of the Work
Effective dust control for drywall sanding starts with source capture — pulling dust into a vacuum the instant it’s created, before it becomes airborne. This single strategy outperforms every cleanup method combined, because once fine gypsum dust goes airborne, you’re chasing it instead of catching it. Think of it as catching sparks at the grinder instead of mopping up the fire later.
The setup is a vacuum-assisted drywall sander — a pole sander with a perforated head connected by hose to a HEPA-filtered dust extractor. The head rides flat against the wall; the vacuum pulls air through the abrasives and swallows the dust right at the surface. Done right, you can sand an entire room and see almost no visible cloud.
Concrete example: on a recent 12×14 bedroom skim-coat, we ran a vacuum-assisted pole sander on a HEPA extractor for a full afternoon. At the end of the day, the homeowner’s white curtains three feet from the wall were still white. The only visible dust was a light film on the floor inside the containment — a five-minute HEPA vacuum job. Compare that to the kitchen-patch story from the intro, where two square feet without extraction contaminated an entire room plus the inside of closed cabinets.
What makes a vacuum actually work for this
- Sealed HEPA system — the filter is certified and the housing doesn’t leak fine dust around the seal
- Strong sustained suction — fine dust loads filters fast; cheap vacuums lose airflow within minutes
- Automatic filter cleaning — pulses the filter clean so suction holds through a full day
- Correct hose and abrasive — manufacturers publish compatibility lists; mismatched gear leaks
Here’s the mistake I see constantly: grabbing a household vacuum or a standard shop vac. A conventional shop vacuum may recirculate fine particles straight through its filter and back into the room — you’re literally misting the air with gypsum. It’s like trying to bail a boat with a colander: you move a lot of water, but most of it ends up right back where you found it. Only use a shop vac if it’s explicitly configured for fine dust with an effective HEPA filtration system.
DIY vs. pro, honestly: a full vacuum-assisted sander plus extractor runs $400–$900 for decent gear. If you’re doing one patch — say, repairing a 4×8 section after a plumbing leak — that’s rental territory; many tool rental yards carry them for roughly $40–$70 a day, so a weekend project costs under $150 instead of $900. If you’re finishing a whole basement or you patch drywall a few times a year, buy once.
Low-Dust Methods That Cut the Problem Before It Starts
The cheapest dust control is generating less dust in the first place. Low-dust sanding methods reduce airborne particles at the point of creation, which means your extractor and containment have less work to do. These aren’t gimmicks — several are standard practice on occupied-home renovation jobs.
Low-dust joint compound is formulated so particles clump and fall faster instead of staying suspended. It doesn’t eliminate dust — never let a label tell you that — but it noticeably reduces the airborne fraction and makes cleanup easier. Worth it for occupied spaces. Example: on a patch job in a nursery, we switched to a low-dust compound, and the dust that did fall landed in heavy little crumbs on the drop cloth instead of drifting across the room to the crib.
Wet sanding uses a damp sponge instead of abrasive paper. It works beautifully for small repairs and final smoothing, especially inside a lived-in home, because there’s essentially no airborne dust. The catch: it’s slower, and too much water softens the compound or damages the paper facing on the drywall. Keep the sponge barely damp, rinse it constantly, and never saturate the surface. Think of the difference between wiping a chalkboard with a wet rag versus erasing it dry — one removes the material, the other launches a cloud.
Sanding sponges and mesh abrasives designed for dust reduction clog less and let the vacuum pull dust through the abrasive — a meaningful upgrade over cheap paper on a flat block.
Technique matters as much as tools
- Use light, controlled pressure — bearing down creates more airborne particles and gouges the compound
- Keep the sander head flat; tipping it digs edges and sprays dust
- Work top to bottom so falling dust doesn’t land on areas you’ve already cleaned
- Let coats dry fully — sanding soft compound creates paste, not dust, and ruins the finish
Aggressive sanding is the hidden dust multiplier. A pro I worked with called it “sanding twice for the price of three times” — you make more dust, then you spend longer cleaning it.
Isolate the Room Like a Containment Pro (Plastic, Tape, and Negative Air)
Room isolation stops the dust that escapes your extractor from spreading throughout the house. Even with great source capture, some fine gypsum dust gets away — containment is your second line of defense. On any occupied-home job, this step is non-negotiable.
Start with 6-mil plastic sheeting taped over doorways — and tape it properly, full perimeter, with quality painter’s tape or zip-pole systems. Zipper doorway kits run about $15 and let you walk in and out without peeling the whole curtain. Cover floors and furnishings with heavy-duty plastic or canvas drop cloths, and seal cabinets, vents, doorways, and electrical openings. Remove everything you can from the room first — every lamp and picture frame you leave is a cleaning job.
Picture the setup on a typical bedroom job: plastic on the doorway with a zipper strip down the middle, drop cloths taped to the baseboards, a register vent covered with tape and plastic, and the closet emptied into the hallway. Twenty minutes of work that saves an entire weekend of dust-chasing upstairs.
Turn off the central HVAC system during sanding, or isolate and protect returns and registers. This is the step people skip, and it’s why dust shows up in bedrooms two floors away. Fine dust pulled into a return gets distributed to every supply register in the house — like a sprinkler system for gypsum.
How the isolation methods compare
| Method | Cost | Best for | Limitation |
|---|---|---|---|
| Plastic sheeting + tape | $20–$50 | Any DIY job | Dust still accumulates inside containment |
| Negative air machine / air scrubber (HEPA) | $40–$90/day rental | Whole-room finishing, occupied homes | Overkill for small patches |
| Portable HEPA air purifier | $100–$300 | Residual airborne dust | Supplements — never replaces — source capture |
Negative air pressure means using a HEPA air scrubber to pull air out of the contained room so any leaks flow inward, not outward. Think of a bathroom exhaust fan: crack the door and air comes in, not out. A negative-air setup does the same for your containment — dust-laden leakage gets sucked back through the HEPA scrubber instead of escaping under the plastic. Exhaust filtered air outdoors only where it’s safe and permitted. Ventilation should support source capture, not replace it — opening a window with a box fan blowing out helps, but it won’t catch what your extractor should have.
Protect Your Lungs: Respirators, Silica, and the Mask Mistake Everyone Makes
Respiratory protection is your last line of defense, and it only works if it fits. For drywall sanding, use at least a properly fitted N95 respirator whenever dry sanding creates visible or persistent dust. The rating filters 95% of airborne particles — but only if the seal against your face is airtight.
Here’s the mistake: a two-strap disposable with a beard, or one hanging loose below the nose, protects you almost not at all. Facial hair breaks the seal. Picture a garden hose with the washer missing — water still flows, but it sprays everywhere except where you aim it. A mask with a broken seal is the same: air (and dust) rushes in around the gaps, bypassing the filter entirely. Do the user seal check every time — cover the exhalation valve, exhale gently, and feel for leaks. If the respirator is damaged, dirty, or hard to breathe through, replace it.
Real-world example: I watched a helper sand half a ceiling wearing an N95 with a goatee. At the end of the day, his blow-his-nose test told the story — everything the mask missed, he inhaled. He shaved that night. If you can’t or won’t shave, use a powered air-purifying respirator (PAPR) with a loose-fitting hood, which doesn’t rely on a face seal.
Silica changes the math. Most joint compound is primarily gypsum, but some products, substrates, or surrounding renovation materials — concrete, mortar, tile, stone — contain respirable crystalline silica. Check the product label and safety data sheet (SDS) before you sand. If the material is old or unidentified, treat it cautiously, as potentially silica-containing until assessed. Silica calls for higher protection levels and, on professional jobs, a formal respiratory-protection program with fit testing.
Never use compressed air to blow dust off clothing, tools, or surfaces. It takes settled dust and aerosolizes it directly into your breathing zone — it’s banned on regulated job sites for a reason.
Wear eye protection too; gypsum dust in the eye is genuinely painful. And wash work clothing separately if it’s heavily contaminated — don’t shake it out in the laundry room and re-dust the house you just cleaned.
Clean Up Without Re-Launching the Dust You Just Contained
Safe cleanup means removing settled dust without putting it back into the air. Dry sweeping and compressed air are the two worst things you can do — both take dust that had safely landed and turn it airborne again, where the finest particles stay suspended for hours. Cleaning in the right order is the difference between a clean room and a recontaminated one.
Start by letting the dust settle. Give it 30–60 minutes after sanding, longer if you used fans. Disturbing the room immediately stirs everything back up.
The cleanup sequence that actually works
- Let dust settle — 30–60 minutes minimum after sanding stops
- HEPA-vacuum floors, ledges, window sills, and equipment — top to bottom
- Damp-wipe or mop all remaining surfaces; a barely damp microfiber cloth grabs what vacuums miss
- Clean nearby surfaces before removing containment plastic, so you don’t drag dust out with it
- Remove containment carefully — fold plastic inward on itself, tape-side in, and bag it
- Inspect adjacent rooms and HVAC filters — replace any filter that’s visibly loaded
Think of settled dust like flour spilled on a counter: wipe it with a damp cloth and it’s gone in one pass; blow on it or attack it with a dry broom and it’s on every surface in the kitchen. The same physics applies to gypsum dust, except the particles are far finer and stay airborne far longer.
Empty the vacuum container carefully and follow the manufacturer’s instructions — dumping a dry HEPA vacuum outside, downwind, away from open windows. And check those filters during the job, not just after. Clogged filters strangle suction, and a vacuum that’s lost airflow stops capturing dust at the head. That’s how a “dustless” setup quietly becomes a regular dusty one.
If dust migrated widely, got into ductwork, or involved unknown older materials — or someone in the house has serious respiratory sensitivities — that’s the point where I’d call in a professional remediation crew. Knowing that line is part of the job.
The Mistakes That Undo Good Dust Control (And How to Dodge Them)
Most dust-control failures come from a handful of repeated mistakes, not bad tools. I’ve made half of these myself over the years, usually on a Friday afternoon when I wanted to go home. Here’s the list so you don’t have to learn the expensive way.
- Sanding with no source extraction — everything downstream gets harder
- Using a regular vacuum instead of a HEPA-rated sealed system
- Relying on ventilation alone — an open window doesn’t catch dust, it just relocates it
- Pulling containment barriers too early — before HEPA vacuuming and damp wiping
- Dry sweeping or blowing dust with compressed air
- Wearing a respirator with a poor facial seal — beard, wrong size, loose straps
- Ignoring ducts — dust in returns spreads house-wide
- Trusting “low-dust” compound to be dust-free — it reduces, never eliminates
- Sanding aggressively and manufacturing airborne particles you didn’t need to create
- Skipping filter checks — clogged filters kill suction mid-job
Every one of these has a matching war story. The guy who dry-swept a finished basement and had to re-clean the upstairs nursery twice. The homeowner who pulled the plastic while dust was still drifting, then wondered why the hallway TV screen had a white haze. The crew that trusted a window fan in January — in a house with no AC — and found dust in a closet that had never been opened during the job. Same root cause every time.
The pattern behind all of them: treating dust control as one product instead of a system. Industry practice has moved firmly toward integrated controls — source capture, containment, filtration, work practices, and respiratory protection used together. Manufacturers now publish detailed compatibility guidance for vacuums, filters, hoses, and consumables precisely because mismatches leak.
Print a checklist, tape it to the doorframe, and run it every time. The best dust-control equipment in the world fails the day you skip the ten-minute setup because “it’s just a small patch.” That small patch is exactly the job that coats the kitchen cabinets.
Frequently Asked Questions
Is drywall dust dangerous to breathe?
Short-term exposure irritates the eyes, skin, nose, throat, and lungs. Repeated or heavy exposure is a bigger concern, particularly if respirable crystalline silica is present in the joint compound or surrounding materials. Check the product’s safety data sheet, and wear a fitted N95 or higher respirator when dry sanding.
Do dustless drywall sanders really eliminate dust?
No. They substantially reduce airborne dust when paired with a properly functioning HEPA extractor, but some dust still escapes — especially at edges, corners, and if the filter is clogged. They’re a major improvement, not a magic wand. Containment and a respirator still matter.
Can I use my shop vacuum for drywall dust?
Only if it’s designed and configured for fine dust with an effective HEPA filtration system. A conventional shop vacuum can pass fine gypsum particles straight through its filter and exhaust them back into the room, making air quality worse. Check filters frequently — clogged filters kill suction.
How long does drywall dust stay in the air?
The finest particles can remain suspended for hours, especially when disturbed by fans, footsteps, or HVAC airflow. Larger particles settle much sooner. Let dust settle for 30–60 minutes after sanding before final cleanup, and keep the HVAC off to limit circulation.
Is wet sanding better than dry sanding?
Wet sanding produces almost no airborne dust and works well for small repairs and final smoothing in occupied homes. It’s slower, though, and too much water softens the compound or damages the drywall’s paper facing. Keep the sponge barely damp and rinse it often.
Can I sand drywall while living in the house?
Yes, with care. Isolate the area with plastic sheeting, use a vacuum-assisted sander with a HEPA extractor, shut down the HVAC, wear a fitted respirator, and finish with HEPA vacuuming and damp wiping. Keep children, pets, and anyone with respiratory conditions well away from the work area.
Conclusion
If you remember one thing from this article, make it this: source capture first, everything else second. A vacuum-assisted sander on a HEPA extractor does more for air quality than any amount of plastic sheeting, ventilation, or cleanup after the fact. Build the rest of the system around it — containment, an N95 that actually seals, and a cleanup that never re-aerosolizes what’s already settled.
That kitchen I mentioned? We sealed the cabinets, set up an extractor, and re-did the adjacent patch. Total airborne dust: essentially none. Total time setting up: forty minutes. The cheapest dust control is the dust you never create — but the second cheapest is the forty minutes you spend before you sand.