
TL;DR

Get business pricing on tools and workshop supplies
- Business-only prices and quantity discounts
- Tax-exempt purchasing
- Multiple users, one account, clear invoices
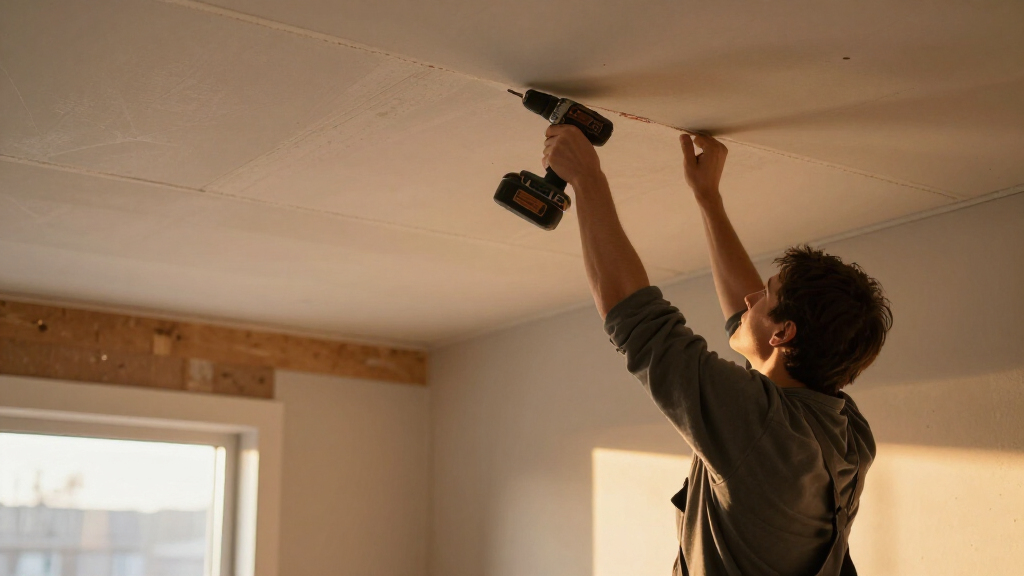
Installing ceiling drywall is physically demanding, but achievable for experienced DIYers with a panel lift, a helper, sound framing, and a layout that places every edge on solid backing. Hang the largest practical sheets, set screws without tearing the paper, build joints with several thin coats, control the dust, and prime the entire ceiling before painting.
A drywall ceiling can look flawless from the floor while hiding loose edges, overdriven screws, and a joint layout that will crack after the first heating season. Overhead work magnifies every small mistake: a heavy sheet bows, the lift rolls half an inch, and suddenly a neat seam becomes a ragged gap.
This guide shows you how to handle framing checks, panel selection, layout, fastening, taping, sanding, and priming in the order that produces reliable work. You will also see where local code, tested fire assemblies, electrical clearances, and structural support set firm limits on what belongs in a DIY project.
Installing ceiling drywall is physically demanding, but achievable for experienced DIYers with a lift, safe work platforms, and at least one helper. If you find rotten joists, suspected asbestos, complicated wiring, or fire-separation requirements, bring in the appropriate licensed professional before covering anything. The goal is not merely a white surface overhead; it is a flat, secure ceiling that stays quiet and smooth.
Flatten and repair the framing before hanging panels; drywall will copy every dip, twist, and moving joint beneath it.
Choose thickness and panel type from the span rating, room conditions, tested assembly, manufacturer instructions, and local code—not weight or price alone.
Use a drywall lift, stable work platforms, and a helper; a full ceiling sheet is too awkward to control safely by hand.
Drive screw heads just below the paper without tearing it, and follow the specified fastening schedule rather than a universal spacing guess.
Build broad joints with several thin coats, inspect under raking light, control sanding dust, and prime the entire ceiling before paint.
Install a Drywall Ceiling That Stays Flat
A step-by-step guide to structural checks, panel selection, safe lifting, fastening, joint finishing, dust control, priming, and the limits of responsible DIY work.
Unsupported seams and moving framing create cracks that finishing compound cannot permanently hide.
Use it with stable platforms and at least one helper for controlled overhead placement.
Build width gradually, inspect with raking light, then prime the entire ceiling.
Start with a flat, dry structure
Drywall copies the ceiling beneath it. Repair movement, moisture, sagging, and missing support before a single panel goes overhead.
Find movement and damage
Inspect joists for rot, insects, loose blocking, cracks, sagging, and weak connections. Structural damage belongs with a qualified contractor or engineer.
Map every high and low point
Use a long straightedge, string, or laser. Shim low framing or install an approved furring system before the board reproduces every irregularity.
Finish concealed work first
Complete permitted electrical, plumbing, HVAC, insulation, and fire-blocking work. Keep junction boxes accessible and photograph hidden services.
Choose the board for the system—not the price
Confirm thickness, span rating, orientation, screw length, edge support, fastening schedule, room conditions, and local code before purchasing.
| Panel option | Where it often fits | Primary advantage | Main limitation | Decision |
|---|---|---|---|---|
| 1/2-inch drywall | Standard residential ceilings where spacing and code permit | Lighter overhead handling | Not approved for every span or assembly | Verify span |
| 5/8-inch drywall | Wider framing spacing, sound control, or specified systems | Stiffer and more sag-resistant | Substantially heavier to lift | System fit |
| Type X | Complete tested fire-resistant assemblies | Designed for listed assemblies | The panel alone provides no assembly rating | No shortcuts |
| Moisture-resistant | Approved humid locations with effective ventilation | Improved moisture resistance | Not waterproof or a wet-zone backer | Check location |
| Lightweight ceiling panel | Projects requiring easier handling and rated sag resistance | Reduced lifting load | Specifications and availability vary | Check data |
Six controlled stages from framing to paint
Each stage protects the next. A rushed layout becomes a difficult seam; a damaged paper face becomes a weak fastener; poor sanding preparation becomes visible after paint.
Inspect
Dry, sound, flat framing with completed services.
Map
Full sheets, supported edges, staggered butt joints.
Cut
Score, snap, trim, rasp, and locate penetrations.
Lift
Use a panel lift, helper, and stable work platforms.
Finish
Embed tape and build broad joints in thin coats.
Prime
Inspect, control dust, and seal the entire surface.
Plan every seam before lifting
Use the largest practical sheets, join factory-tapered edges, stagger butt joints, and keep seams away from penetrations and other stress-prone areas.
Layout rules that reduce finishing
- Run panels perpendicular to joists unless the approved system specifies another orientation.
- Measure at several points because older walls are rarely parallel or square.
- Place every edge on framing or approved backing—never leave a seam floating.
- Stagger butt joints so four panel corners never meet at one point.
- Leave only the perimeter clearance recommended by the chosen system.
Conceptual ceiling map
Long sheets reduce seams. Offset butt joints and align every perimeter with a joist, channel, or approved backing member.
Protect the paper face and follow the schedule
Lift each panel into position without crushing its edges. Fastener spacing is system-specific; use current manufacturer documentation and locally adopted requirements.
An overdriven screw loses holding value. Add a correctly set fastener nearby rather than depending on damaged paper. Never substitute a universal spacing guess for the specified fastening schedule.
Build broad joints—not mountains of compound
Fully embed the tape, allow each coat to dry, widen the joint gradually, and remove ridges between applications. Flatness matters more than thickness.
Embed the tape
Apply enough compound for full contact, press out excess, and avoid dry pockets or bubbles.
Build the joint
Cover the tape and feather the transition farther across the panel face.
Widen and refine
Use a thin finishing coat to soften edges and correct shallow imperfections.
Light, dust, prime
Inspect with raking light, sand lightly with dust control, clean, and prime the whole ceiling.
Know when the ceiling stops being a DIY job
A neat surface is not proof of a safe assembly. Hidden structural, electrical, environmental, and fire-separation conditions require appropriate expertise.
Type X is only one component
A rated ceiling must match a complete tested assembly: framing, panel type and orientation, layers, fastener pattern, joints, insulation, penetrations, and perimeter details. Changing one component can invalidate the rating.
Firm project limits
The quality chain
Start With a Flat, Dry Structure That Will Hold
The Step-by-Step Guide to Installing a New Ceiling with Drywall and Finishing Tips starts with one non-negotiable rule: close the ceiling only after the framing is sound, dry, flat, and fully prepared. Drywall cannot straighten moving joists, stop an active leak, or safely carry a fan that lacks structural support.
Run a long straightedge, taut string, or laser across the joists. A low joist can leave a broad shadow after painting, while one proud edge can produce a visible ridge. For example, a 1/4-inch dip across a small bedroom may seem harmless until afternoon sunlight skims the finished surface and draws a gray stripe from wall to wall.
Repair roof or plumbing leaks and let damp framing dry before work continues. Check for rot, insect damage, sagging, loose blocking, and movement at framing connections. Structural damage calls for a qualified contractor or engineer; do not hide a soft joist behind fresh board and hope the screws will hold it together.
- Finish permitted electrical, plumbing, HVAC, insulation, and fire-blocking work before hanging panels.
- Turn off relevant circuits, verify them dead with a suitable tester, and keep junction boxes accessible.
- Add backing at panel edges, access openings, curtain tracks, and fixture locations.
- Mark joist centers on the walls and photograph concealed pipes and cables.
- Use shims or an approved furring system where framing needs flattening.
An older popcorn coating or brittle joint compound deserves extra caution. Materials in older buildings can contain asbestos or lead, and scraping them can fill the room with fine, hazardous grit. Stop work, isolate the area, and arrange professional testing before disturbing a suspect ceiling.
Safety rule: Drywall supports finish materials, not moving or heavy fixtures. Fans, chandeliers, and ceiling-mounted equipment need approved boxes and structural bracing attached to framing.
Popular right now

Shark Navigator Lift-Away Upright Vacuum (NV360)

Apple AirPods Pro 3 Wireless Earbuds with Active Noise Cancellation

KitchenAid Classic Series 4.5 Quart Tilt-Head Stand Mixer K45SS, Onyx Black
As an affiliate, we earn on qualifying purchases.
Choose the Board That Matches the Span and Room
The Step-by-Step Guide to Installing a New Ceiling with Drywall and Finishing Tips calls for drywall chosen by span rating, assembly requirements, humidity, and framing spacing—not by whichever stack costs least. Panel weight matters overhead, but it never overrides the manufacturer’s instructions or local building code.
| Panel option | Where it often fits | Main tradeoff |
|---|---|---|
| 1/2-inch drywall | Standard residential ceilings where spacing and code permit | Lighter, but not approved for every span or assembly |
| 5/8-inch drywall | Wider framing spacing, improved sound control, or some rated systems | Stiffer and more sag-resistant, but much heavier |
| Type X | Tested fire-resistant assemblies | The panel alone does not create the rating |
| Moisture-resistant panel | Approved humid locations with good ventilation | Resists moisture better but is not waterproof |
| Lightweight ceiling panel | Projects needing easier handling and rated sag resistance | Availability, span limits, and specifications vary |
A full sheet becomes an awkward lever when it is eight feet above the floor. In a two-car garage, moving from conventional board to an approved lightweight, sag-resistant panel can reduce fatigue, yet the garage may also require a specific fire-separation assembly. Check both facts before loading the truck.
According to the Gypsum Association’s GA-216 application standard, panel application details depend on the supporting system and installation method [1]. Verify thickness, orientation, screw type, screw length, edge support, and fastening schedule against current panel documentation and the locally adopted code.
Bathrooms add another wrinkle. A moisture-resistant board may suit an approved ceiling outside direct spray, but it cannot replace waterproof tile backer in a wet zone. Pair the specified material with effective exhaust ventilation; otherwise, warm steam can settle on the paint like dew and feed stains or mold growth.
Plan the Layout Now and Save Hours of Finishing
The Step-by-Step Guide to Installing a New Ceiling with Drywall and Finishing Tips gets easier when you map every sheet before lifting one. Run panels perpendicular to joists unless an approved system says otherwise, join factory-tapered edges, stagger butt joints, and place every panel edge on framing or approved backing.
Why spend twenty minutes drawing lines on paper? Because a poorly placed seam can demand hours of feathering. In a 12-by-16-foot room, a thoughtful layout may replace several short scraps and unsupported joints with long sheets and a smaller number of clean seams.
- Measure the room at several points because old walls are rarely perfectly parallel.
- Mark joist centers on opposite walls with pencil or painter’s tape.
- Sketch full panels first, using the largest sheets you and the lift can handle safely.
- Stagger butt joints so four corners never meet at one spot.
- Keep unsupported joints away from recessed lights, access panels, and other weak areas.
- Plan the manufacturer’s recommended perimeter clearance instead of jamming sheets against masonry or uneven walls.
Cut panels while they lie flat and fully supported. Measure from a consistent reference edge, score the face paper against a T-square, snap the core with a crisp crack, cut the backing paper, and smooth crumbs with a rasp. Dry-fit unusual pieces before the lift carries them overhead.
Mark penetrations from two fixed edges, and check your numbers twice. A neat cutout around a four-inch light box is easy to seal and finish; an opening an inch too wide leaves weak paper, visible gaps, and possible air- or fire-sealing trouble. Electrical boxes must remain accessible, and box extensions may be required when layers change the finished depth.
Lift and Fasten Each Sheet Without Wrecking Its Face
Safe installation means using a drywall lift, stable platforms, and a helper to place each panel without crushing its edges. Raise the sheet gently, align it with your marks, install holding screws, and complete the approved fastening pattern before releasing the lift.
A lift is worth renting even for a one-room job. A 5/8-inch sheet held overhead by hand can twist without warning, dragging you off balance or pinching fingers against a joist. With a tilting lift, the panel rolls into place under control and stays still while you check the seam.
- Load the sheet with the finished face downward on the lift platform.
- Center the load and raise it slowly, watching cables, walls, and cutouts.
- Seat the panel against the framing without forcing or grinding the edges.
- Align the sheet with wall marks and neighboring factory edges.
- Drive several holding screws across the field, then complete the specified pattern.
- Lower the lift only after the panel is securely attached.
Set every screw head just below the face without breaking the paper. You want a shallow dimple, not a crater. When the depth setter goes click-whirr and leaves the paper intact, the screw head is ready for compound; when it punches through brown paper, its holding value drops.
Place a correctly driven screw near any overdriven fastener rather than trusting the damaged spot. Use approved drywall screws, not general-purpose deck screws, and do not guess at spacing. Fastener schedules change with framing material, board thickness, adhesive use, ceiling orientation, and fire rating.
Wear eye protection, gloves, hearing protection, and suitable footwear. If the ceiling is high enough to require improvised ladders or awkward reaching, rent proper scaffolding or hire a drywall crew. Saving a rental fee is a poor bargain if a sheet knocks you from a ladder.
Build Flat Joints With Thin Coats, Not Mountains of Mud
A flat drywall finish comes from fully embedded tape and several controlled coats that spread each joint over a wider area. Prefill meaningful gaps, bed the tape in a thin layer, cover fasteners, let the compound harden or dry, and feather later coats far beyond the seam.
Start by trimming loose paper and scraping high gypsum crumbs. Prefill damaged edges or wider gaps with an appropriate setting-type compound, following its mixing and timing directions. If a butt joint resembles a shallow speed bump, spreading compound broadly makes the slope too gentle for your eye to catch.
- Apply a thin, even bed of compound along the joint.
- Center paper tape or approved mesh tape over the seam.
- Press the tape firmly and remove excess compound without leaving dry patches.
- Cover screw dimples and let the coat set or dry fully.
- Apply a wider second coat with a broader knife.
- Add a thin finish coat, feathering the edges smoothly into the panel face.
Paper tape creates a strong, thin joint and folds cleanly into inside corners. Self-adhesive mesh feels quicker because it stays put, but it commonly needs the setting compound specified by its manufacturer. Mixing an unapproved tape-and-compound combination can leave a ceiling webbed with hairline cracks.
Keep your knife edges and bucket clean. One dried pebble in the mud makes a long scritch across a fresh coat, leaving a groove you must fill later. Add water to premixed compound only when its instructions permit it; soupy mud shrinks more and can weaken the finish.
Most painted residential ceilings receive a taping coat and two finish coats, though butt joints or demanding light may need more attention. Cool, humid rooms slow drying-type compound, sometimes beyond 24 hours. A setting compound may become hard sooner, yet retained moisture can still delay sanding and painting.
Use Raking Light to Find Flaws Before Paint Finds Them
The fastest route to a polished ceiling is to inspect each dry coat with a bright light held at a low angle, scrape ridges, sand lightly, and refill hollows. Sanding removes small surface marks; it cannot turn a thick, misshapen joint into a flat one without damaging tape or paper.
Switch off the room lights and sweep a work lamp sideways across the ceiling. Shadows will stretch behind every ridge, pinhole, and knife edge. A seam that looked perfect under a bare bulb can suddenly resemble a low wave when raking light washes across it.
- Scrape raised lines before sanding so you create less dust.
- Use a fine abrasive and light pressure near tape and fasteners.
- Fill low spots with another thin coat instead of grinding down the surrounding paper.
- Connect a compatible sander to a HEPA-rated extractor when the equipment allows it.
- Seal doorways, cover returns, and keep dust out of operating HVAC equipment.
Drywall dust is pale, silky, and relentless. It slips under doors, dulls tool bearings, and settles inside cabinets far beyond the room. Follow the compound maker’s safety directions and OSHA construction dust guidance [2], and wear a properly selected respirator rather than relying on a loose nuisance mask.
After sanding, remove dust gently without soaking the paper. Coat the whole surface with a primer made for new drywall; primer balances the different porosity of face paper and joint compound. Painting bare board can create flashing, where seams and field areas reflect light with different sheen.
Inspect the primed ceiling under the same side light, repair remaining defects, and spot-prime those patches. Strong daylight, dark paint, or glossy finishes may justify a Level 5 skim coat and a specialized primer. In a room with floor-to-ceiling windows, that extra work often separates a calm surface from one striped with visible joints.
Know When Code or Risk Moves the Job Beyond DIY
A drywall ceiling belongs in DIY territory only when the framing is sound, hazards have been ruled out, the assembly is understood, and you can handle sheets safely. Bring in licensed professionals for structural repairs, complex electrical work, suspected hazardous materials, or rated assemblies you cannot document.
Think about an attached garage below a bedroom. Hanging Type X board may look like the answer, but a tested fire-resistant assembly also governs layers, joints, fasteners, framing, penetrations, and fixtures. One unprotected opening or incorrect screw schedule can break the assembly’s continuity.
Turn off and verify power before working near cables or boxes. Electrical relocation and new circuits should follow local permit rules and be completed by a licensed electrician where required. Recessed lights must carry ratings compatible with insulation and the assembly around them; do not pack insulation against a fixture that requires clearance.
Roof leaks, spreading cracks, rotten joists, or a sag that returns after drying point beyond surface repair. Ask a qualified roofer, plumber, structural contractor, or engineer to correct the cause. Fresh compound over moving framing often produces a sharp tick months later, followed by the same brown stain or crooked crack.
This is also where renting beats buying. A panel lift, rolling scaffold, collated screw gun, or vacuum-assisted sander can turn an exhausting weekend into controlled work, yet buying pro-grade equipment makes little sense for one bedroom. Rent clean, inspected gear, read its operating instructions, and test its locks before loading a sheet.
Stop-work warning: If you uncover questionable insulation, textured coating, mold, live wiring, damaged framing, or an undocumented fire barrier, leave it exposed and call the right professional. A hidden problem does not become safer because fresh drywall covers it.
Put the Whole Ceiling Job Into a Practical Work Order
A reliable step guide to installing a new ceiling follows a strict order: repair the structure, finish hidden services, map the sheets, install panels, finish joints, control dust, prime, and paint. Each stage protects the next, so skipping ahead usually sends you backward with a knife, patch, or vacuum.
Consider a typical 10-by-12-foot bedroom. You find one low joist, add approved shimming, photograph a cable crossing, mark joist centers, and plan sheets so the butt joint lands away from the ceiling light. That hour of setup can save an afternoon of fighting a bowed seam.
- Inspect and repair: Resolve leaks, movement, damaged framing, hazards, and permit questions.
- Finish concealed work: Complete inspected wiring, plumbing, ventilation, insulation, blocking, and air sealing.
- Plan and cut: Map full sheets, stagger butt joints, support edges, and make close-fitting penetrations.
- Lift and attach: Use a lift, seat panels gently, and follow the specified screw pattern.
- Tape and coat: Prefill gaps, embed tape, then build broad joints with thin layers.
- Inspect and sand: Use raking light, scrape ridges, sand lightly, and control dust.
- Prime and paint: Seal the full ceiling, repair defects revealed by primer, spot-prime, and apply the finish.
Installing a new drywall ceiling is less about speed than maintaining control. Panels should meet with a quiet, tight line; screws should dimple without tearing; compound should glide from the knife in thin ribbons. If you hear grinding edges or feel your shoulders shaking, lower the lift and reset.
Allow real time for drying, inspection, and cleanup. A hurried three-day job in a cold, damp room can trap moisture and produce soft compound beneath paint. Give the material the temperature, airflow, and drying period listed by its maker, then let light—not impatience decide whether the surface is ready.
Frequently Asked Questions
Can one person install drywall on a ceiling?
One experienced person can install ceiling drywall with a proper panel lift, but having a helper makes loading, alignment, and safety checks much easier. Never balance a full sheet on your head or one hand while climbing a ladder; the board can fold, slide, or pull you off balance in seconds.
Should I install ceiling drywall before wall drywall?
Ceiling drywall usually goes up before the wall panels, which lets the upper wall sheets help support ceiling edges at the perimeter. Follow the sequence specified for any tested fire or sound assembly, since its required order can control the job.
What thickness of drywall should I use on a ceiling?
Half-inch and 5/8-inch panels are common, but the right choice depends on joist spacing, panel span rating, humidity, fire requirements, and local code. Check current manufacturer instructions before buying; a lighter sheet is not automatically approved for your framing.
How far apart should ceiling drywall screws be?
There is no single safe spacing for every ceiling. The required fastening pattern changes with board thickness, framing material, panel orientation, adhesive use, and rated assemblies, so follow the panel documentation and local code. If a screw tears the face paper, add a correctly driven screw nearby.
Can I hang new drywall over an existing ceiling?
You can sometimes cover an existing ceiling when it is secure, dry, reasonably flat, and able to carry the added load. Fasteners must reach structural framing, boxes may need approved extensions, and the extra layer can change fixture clearances or fire performance. Have questionable framing, old textured coatings, and rated assemblies checked before work begins.
How many coats of joint compound does a ceiling need?
Most painted ceilings need one taping coat plus two finish coats, with broader work at butt joints. Strong grazing light, damaged edges, or a Level 5 finish can add another skim coat. Let each layer dry or set as directed; heavy wet coats shrink, crack, and create far more sanding.
Conclusion
Your ceiling will only be as good as the work hidden above the paint. Put your effort into sound framing, a planned layout, safe lifting, correct fastening, and thin finish coats; those choices do more for a flat result than hours of frantic sanding at the end.
Before you raise the first sheet, mark every joist, check every box, and set a panel lift on a clean, level floor. Then work patiently enough to hear each screw seat with a soft click and watch the final primer dry into one calm, unbroken plane overhead.