
TL;DR

Get business pricing on tools and workshop supplies
- Business-only prices and quantity discounts
- Tax-exempt purchasing
- Multiple users, one account, clear invoices
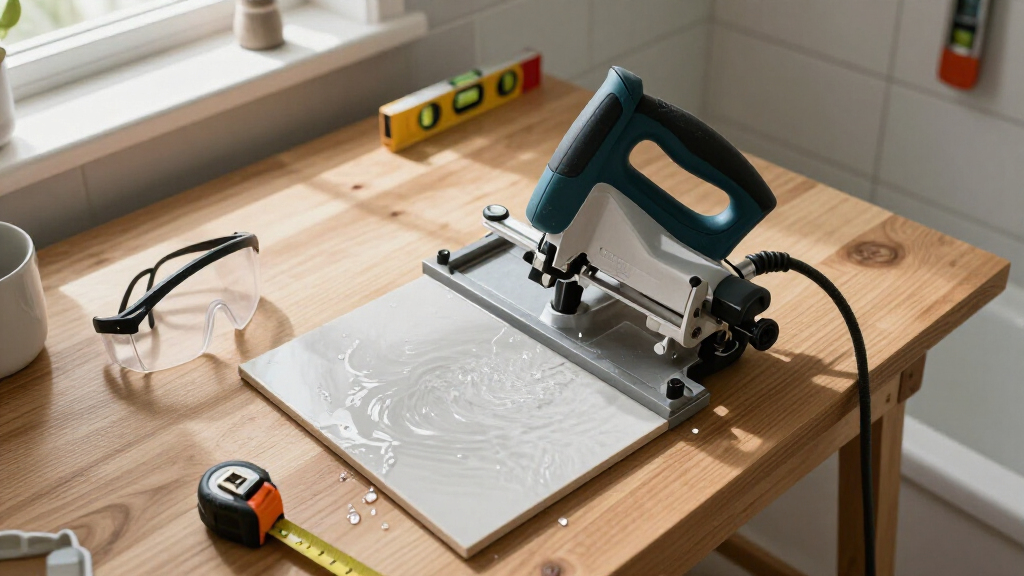
For a typical bathroom remodel, a 7-inch wet tile saw with at least a 24-inch rip capacity and a continuous-rim diamond blade handles ceramic, porcelain, and most stone cleanly. Rent one for $40–$80 a day if this is your only tile project; buy a $150–$400 DIY-grade saw only if you’ll reuse it. Always cut wet, wear eye and hearing protection, and GFCI-protect every cord near water.
The most expensive mistake I see DIYers make in a bathroom remodel isn’t the tile they bought — it’s the saw they cut it with. A chipped edge on a $14 porcelain plank, multiplied across forty cuts, turns a showcase shower into a patchwork job. And no amount of grout fixes a crooked outlet cutout.
I spent fifteen years running renovation crews before moving behind the editor’s desk, and here’s the honest version: for one bathroom, you probably shouldn’t buy a tile saw at all. You should rent one. But whether you rent, buy, or borrow, you need to know what you’re looking at — wet vs. dry, blade diameter, rip capacity, and the safety stuff nobody tells you about mixing water and electricity.
This guide walks you through the saw types, the specs that actually matter for bathroom-scale tile, a straight comparison table, and a safety checklist I used on every jobsite. No product roundups, no affiliate nonsense — just what a contractor would tell you over the tailgate.
For one bathroom remodel, rent a 7-inch wet tile saw ($40–$80/day) instead of buying — buy only if a second tile project is already on the calendar.
A $30–$60 continuous-rim diamond blade improves cut quality on porcelain more than spending hundreds more on the saw itself.
Check rip capacity against your tile’s diagonal, not its short side — a 12×24 plank laid on a diagonal needs more than 24 inches of cut length.
Always cut wet and plug into a GFCI outlet: water suppresses hazardous silica dust and prevents blade glazing, and GFCI protection is non-negotiable around wet…
Cut curves with straight relief cuts plus nippers — never twist tile sideways against a spinning blade.
Top Tile Saws for Bathroom Remodels
A 7-inch wet tile saw with 24-inch rip capacity and a continuous-rim diamond blade handles ceramic, porcelain, and most stone cleanly. For one bathroom, rent — don’t buy. Fifteen years of jobsite experience, condensed into the specs that actually matter.
Four Specs That Decide If a Saw Can Handle Your Tile
Anything less and you’ll fight the tool; anything more and you’re paying for capacity a 40-square-foot bathroom will never use.
7-Inch Blade Diameter
Depth of cut is limited by blade radius minus arbor and guard, so a 7-inch blade gives roughly a 2-inch depth of cut — enough for any standard wall or floor tile. Compact 4-inch tabletop saws choke on thick stone and bog down on porcelain; a slowed blade stops grinding and starts hammering — that’s where chipping comes from.
24-Inch Rip Capacity
The longest straight cut in one pass — the spec DIYers get wrong most often. A 12×24 plank laid diagonally needs more than 24 inches: its diagonal is about 27 inches. A saw that’s an inch short forces a flipped cut, and a flipped cut leaves a visible step at the seam.
1-Inch Material Thickness
Most bathroom tile runs 5/16 to 1/2 inch, but stone slabs and porcelain pavers hit 3/4 inch or more. Buy margin: depth ratings assume a brand-new blade, and a blade that’s lost 1/4 inch of diameter may no longer clear your tile.
45° Bevel Capability
For a shower niche or curb without trim profiles, a 45-degree bevel gives clean mitered corners. Know the tradeoff: beveling consumes depth of cut, so a marginal saw may not get through thick tile in one pass.
What Each Saw Costs and Where It Falls Short
The best choice depends on your tile hardness and project scope. Here’s how the three main options stack up for bathroom-scale work.
| Saw Type | Typical Cost | Ceramic | Porcelain | Stone | Curves & Notches | Best For |
|---|---|---|---|---|---|---|
| 7″ Wet Tile Saw | $40–$80/day rental $150–$400 to buy |
✓ Clean | ✓ Excellent | ✓ Handles most | ✓ With relief cuts | The bathroom remodel default |
| Dry-Cut Saw / Grinder | $60–$150 | ~ Rough only | ✗ Glazes blade | ✗ Not advised | ~ Possible | Never indoors — dust plume |
| Manual Snap Cutter | $30–$60 | ✓ Fast, silent | ~ Under 3/8″ only | ✗ Too dense | ✗ Impossible | Straight cuts, soft ceramic |
Rip Capacity: Check the Diagonal, Not the Short Side
A saw that’s an inch short forces you to flip the tile mid-cut — and a flipped cut almost always leaves a visible step where the two passes meet.
A homeowner tried cutting large-format porcelain planks dry with an angle grinder. Six chipped planks and a dust cloud later, he’d burned $84 in ruined tile — more than a day’s wet saw rental. Tile has no repair path: a bad cut is a replacement, not a fix.
Cut Curves Without Cracking the Tile
Curved and irregular cuts are made with a series of straight relief cuts and a nibbler — never by twisting tile sideways against a spinning blade.
Mark the Curve
Transfer the outlet, flange, or vanity outline onto the tile face with a grease pencil.
Relief Cuts
Make a series of straight cuts up to the line, like teeth of a comb — never force the tile sideways.
Nibble to the Line
Use tile nippers to break off the fingers and refine the curve to the pencil mark.
Smooth the Edge
Knock down sharp edges with a rubbing stone or the smooth back of a spare tile fragment.
Water + Electricity: The Safety Nobody Tells You
The safety discipline I used on every jobsite — non-negotiable around a wet saw.
GFCI-Protect Every Cord
Plug into a GFCI outlet or use an inline GFCI adapter. Electricity near water is non-negotiable — no exceptions, ever.
Always Cut Wet
Water suppresses hazardous silica dust and prevents blade glazing. Keep the pump reservoir topped up and the flow on the cut zone.
Eye & Hearing Protection
Wet saws throw slurry and scream at cutting pitch. Safety glasses and hearing protection on every single cut.
Never Twist Tile Sideways
Forcing tile laterally against a spinning blade is how blades bind, kick, and crack tile. Relief cuts and nippers instead.
Wet or Dry? Pick the Right Saw Before You Cut a Single Tile
For bathroom remodels, a wet tile saw is the right call in almost every case. It pumps water over a diamond blade, which cools the cut, suppresses the gritty silica dust, and leaves a clean edge on ceramic, porcelain, and stone. A dry-cut saw — basically an angle grinder or chop saw with a diamond blade — works for rough cuts on soft ceramic, but it screams, throws a plume of dust across your bathroom, and glazes the blade edge on hard porcelain.
Here’s the physics in plain terms, because understanding it changes how you cut: diamond blades don’t slice tile, they grind it. Millions of diamond particles exposed on the rim each scrape away a tiny groove, and all that scraping builds friction heat fast. Heat is the enemy twice over — it thermally shocks the tile edge (that’s your chipping) and it polishes the diamonds smooth, a failure mode called glazing. Water kills the heat, and it does double duty by carrying away the grinding swarf so it doesn’t clog the rim. That’s why every professional tile setter I ever worked with used a wet saw, full stop. The tradeoff is real, though: water means slurry to manage, a pump to maintain, and electricity near liquid — which is why wet saws demand the safety discipline in the later section.
One more option people forget: the manual tile cutter, sometimes called a snap cutter. You score a line and snap the tile like glass. For a small floor of straightforward 12-inch ceramic with no notches, a $30 snap cutter handles 80% of your cuts in total silence. Then you rent a wet saw for the remaining 20% — the outlet holes, the toilet flange curves, the corner cuts around the vanity. This hybrid approach isn’t a compromise; it’s actually how pros work small jobs, because the snap cutter is faster than a saw for straight cuts and zero setup. Its hard limits: it can’t score porcelain reliably over about 3/8 inch (the material is too dense to break cleanly on a scored line), and it physically cannot do any interior cutout.
The real scenario: a homeowner I consulted for tried cutting large-format porcelain planks dry with an angle grinder. Six chipped planks and a cloud of dust later, he’d burned $84 in ruined tile — more than a day’s wet saw rental. The lesson isn’t just ‘buy the right tool’; it’s that hard materials punish shortcuts immediately and irreversibly. Tile is one of the few remodel materials with no repair path — a bad cut is a replacement, not a fix.
Popular right now

KitchenAid Artisan Series 5-Quart Tilt-Head Stand Mixer, Dried Rose (KSM150PS)

Vitamix Propel Series 510 Professional-Grade Blender, 3 Programs, Black

Dreame L50 Ultra Robot Vacuum and Mop
As an affiliate, we earn on qualifying purchases.
The Four Specs That Decide If a Saw Can Handle Your Bathroom Tile
The top tile saws for bathroom work share four specs: at least a 7-inch blade, a 24-inch rip capacity, the ability to cut at least 1-inch thick material, and a bevel feature for 45-degree edge cuts. Anything less and you’ll fight the tool; anything more and you’re paying for capacity a 40-square-foot bathroom will never use. Here’s why each one matters — and what going under spec actually costs you.
- Blade diameter: Depth of cut is limited by blade radius minus the arbor and guard, so a 7-inch blade gives roughly a 2-inch depth of cut — enough for any standard wall or floor tile. The compact 4-inch tabletop saws choke on thick stone and bog down on porcelain, and bogging matters more than you’d think: when the blade slows under load, it stops grinding cleanly and starts hammering the tile edge, which is where chipping comes from on an underpowered saw.
- Rip capacity (cut length): This is the longest straight cut the saw can make in one pass, and it’s the spec DIYers most often get wrong. A 12×24 porcelain plank laid diagonally needs more than 24 inches of diagonal cut length — the diagonal of a 12×24 is about 27 inches. Check that number, not just the tile’s short side, because a saw that’s an inch short forces you to flip the tile mid-cut, and a flipped cut almost always leaves a visible step at the seam where the two passes meet.
- Material thickness: Most bathroom tile runs 5/16 to 1/2 inch, but stone slabs and some porcelain pavers hit 3/4 inch or more. Buy margin, because depth-of-cut ratings assume a brand-new blade at full diameter — every blade wears down, and a blade that’s lost 1/4 inch of diameter may no longer clear the tile you planned around.
- Bevel capability: If you’re doing a shower niche or curb without trim profiles, a 45-degree bevel cut is how you get clean mitered corners. The tradeoff to know: bevel cutting effectively consumes depth of cut, since you’re presenting the tile at an angle to the blade. On a marginal saw, a bevel on thick tile may not make it through in one pass.
The motor matters less than you’d think for a bathroom, and here’s why: DIY cutting is intermittent — a pass, a reposition, another pass. Heat and strain build in continuous cutting, not in bursts, so corded 1 to 1.5 HP motors from trusted names like DEWALT, MK Diamond, QEP, and SKIL have plenty of torque for that duty cycle. Where the cheap saws actually fall short is the sliding table and fence — sloppy bearings mean cuts that wander a degree or two. That sounds trivial until you do the math: a degree of wander across 24 inches is nearly 3/8 inch of deviation at the far end of the cut, and on a visible grout line, that’s not a gap — it’s a defect you’ll see every morning.
Saw Types Side by Side: What Each One Costs and Where It Falls Short
For bathroom remodels, the best choice depends on your tile hardness and project count: a snap cutter suits small ceramic jobs, a compact 7-inch wet saw covers one full bathroom, and a sliding-table wet saw pays off only across multiple rooms. Here’s the honest comparison, including important aspects most buyers overlook until it’s too late.
| Saw Type | Typical Cost | Best For | Weakness |
|---|---|---|---|
| Manual snap cutter | $25–$80 | Straight cuts on ceramic ≤12 in. | No notches, curves, or porcelain |
| 4-inch tabletop wet saw | $90–$150 | Small repairs, mosaic, soft ceramic | Underpowered, short rip capacity |
| 7-inch wet tile saw | $150–$450 buy / $40–$80 per day rent | One full bathroom, ceramic or porcelain | Struggles with thick stone |
| 10-inch sliding-table wet saw | $700–$1,500+ | Large-format tile, stone, multiple projects | Overkill for one bathroom; heavy |
Notice the rental number hiding in that table, because it reframes the whole decision. A full-day wet saw rental from a big-box tool rental desk runs $40–$80, and the counter hands you a saw that’s already broken in — which means the blade’s past its glazing stage and the pump actually works. The hidden advantage of rental fleets is maintenance inversion: a rental saw that gets serviced between users is often in better mechanical shape than the $150 saw that sat in a homeowner’s damp garage for three years. My rule after two decades on jobsites: if the tool costs more than three rentals and you’ll use it once, rent it. Run that math on the table above and you’ll see why the 10-inch slider is almost never the homeowner’s answer — three rentals is $240 or less against a $700+ purchase, and resale on used tile saws is brutal.
Buy the $150–$400 seven-inch saw when you’ve got a bathroom now and a laundry room backsplash next spring — that’s the point where ownership crosses below rental cost per project. Buy the 10-inch slider only if tile work is going to become a habit, meaning two or more projects a year, because that saw’s advantages (deep cut, long sliders, stone capability) are exactly the capabilities a single bathroom never exercises. Paying for unused capacity isn’t just wasted money; it’s also added weight and setup time you’ll pay on every single job.
The Blade Is the Cut: Why a $40 Upgrade Beats a $300 Saw Upgrade
The single biggest jump in cut quality comes from the blade, not the saw — and understanding why explains most of what goes wrong in DIY tile cutting. A continuous-rim diamond blade between $30 and $60 produces noticeably cleaner edges on porcelain than the multipurpose blade that ships with most saws. The stock blade is a compromise engineered to cut everything acceptably and nothing well; a dedicated porcelain blade is a specialist. The reason the cheap blade chips your tile comes down to rim geometry: every gap, slot, or notch in a rim is an interruption in the grinding surface, and each time an interruption crosses the tile edge it takes a tiny bite of material with it instead of grinding it to dust. Fewer interruptions, fewer chips — that’s the whole story.
Blade anatomy in ten seconds, with the tradeoffs spelled out. A continuous rim has no gaps — smoothest cut, best for porcelain and glass, but it cuts slower and clears debris less aggressively, which is fine for tile and wrong for thick stone. A segmented rim has notched sections that cool fast and clear debris, cutting stone and concrete quicker — but every segment transition is a potential chip on thin or brittle tile. A turbo rim sits in between: a serrated continuous edge that’s fast-ish and smooth-ish, fine for general ceramic, master of neither. The implication for your project: match the rim to your hardest material, because the blade that’s ideal for your stone accent strip will disappoint on your porcelain field tile, and vice versa. If you can only buy one for a bathroom, buy continuous rim and accept slower stone cuts.
I’ve watched a crew member spend twenty minutes fighting chipped edges on glossy black porcelain, swearing at a rented saw. We swapped in a fresh continuous-rim blade — problem gone in one cut. Same saw, same tile, same operator. The blade was $38. That’s the lesson worth internalizing: when cut quality disappoints, the diagnosis is almost always the blade or the feed rate, almost never the saw body.
Two maintenance habits stretch blade life, and both exist because of how blades actually wear. Keep the water reservoir full — cutting even partially dry glazes the diamond rim permanently, because without water and swarf to abrade the matrix, heat polishes the exposed diamonds instead of wearing away the bond that reveals fresh ones underneath. That’s also why glazing is unrecoverable: the diamonds are still there, they’re just buried. Dress the blade occasionally by making a few passes through a soft cinder block or abrasive dressing stone, which re-exposes sharp diamonds by wearing the bond matrix faster than the diamonds. A glazed blade skates across tile instead of grinding — that’s your cue it’s cooked. Store blades flat and dry; a rusted arbor bore is a wobble waiting to happen, and a wobbling blade cuts a kerf wider than it should, which throws off every measurement you mark from the cut edge.
Water Plus Electricity: The Safety Steps I Never Skipped Onsite
Tile saws combine two things that don’t mix, so treat them with respect: plug into a GFCI outlet, wear sealed safety glasses and hearing protection, and never disable the blade guard. According to OSHA guidance on silica, wet cutting is also the primary control for respirable crystalline dust — which is why dry-cutting tile indoors is a hard no from me. The reason GFCI matters so specifically here: a tile saw’s pump and motor live in a spray zone, and insulation that’s fine on a dry jobsite can develop hairline cracks that only leak current when wet. A GFCI doesn’t prevent a fault — it detects the current imbalance a fault creates and kills power in milliseconds, faster than a breaker trips and far faster than your muscles let go.
Silica dust isn’t a theoretical worry, and the mechanism is worth understanding. Cutting tile dry can release respirable crystalline silica concentrations well above OSHA’s permissible exposure limit, and unlike coarse dust, these particles are small enough to reach the deepest parts of your lungs, where the body can’t clear them. Chronic exposure causes silicosis — a scarring lung disease with no cure, no reversal, and no treatment beyond managing symptoms. Water suppression at the blade cuts that exposure down by an order of magnitude because it captures the dust at the moment of creation rather than trying to filter it from the air afterward. That’s why wet cutting is the control hierarchy’s best answer: it eliminates the hazard at the source. If you ever must dry-cut, use a vacuum shroud on a HEPA-rated extractor and ventilate. But really: don’t — the extraction approach only works if every cut is shrouded and every pass is captured, and one lazy cut undoes the whole setup.
- Plug into GFCI only — bathroom outlets have it; garage circuits may not. Test the button before you start, because a GFCI that has tripped internally and never been reset protects nothing.
- Set up outside or in a garage with the door open. You’ll still track slurry inside; contain it with a tarp. Slurry is more than a mess — dried tile slurry contains the same silica, and sweeping it dry re-aerosolizes everything you worked to suppress.
- Check the pump and water flow before every session. A dry pass on porcelain glazes a blade in seconds, and a glazed blade is a consumable you now own — permanently.
- Wear sealed safety glasses, not shop glasses — tile chips fly sideways, and slurry splatter follows the blade rotation. Side shields matter more than lens rating here; the threat comes from the periphery, not straight ahead.
- Keep fingers behind the blade plane and use the miter guide or a push stick for narrow cuts. Kickback on a pinched thin strip is real, and it’s worth understanding why: a narrow strip can twist into the kerf, pinching the blade, and the blade transfers that energy straight back into the tile — and your hands.
- Lock the power off and unplug before clearing jams, changing blades, or cleaning the pump intake. This isn’t bureaucracy; water and a moment’s inattention is exactly the combination that makes stored-energy accidents happen.
One note on the surrounding project: if your bathroom remodel touches wiring for heated floors, moves plumbing, or alters waterproofing behind tile, pull the permit and use licensed trades for that scope. The reasoning is simple — those failures are hidden until they’re catastrophic, and a waterproofing mistake behind tile doesn’t show up until it has rotted the framing around it. The tile saw is the DIY-friendly part because its failures are immediate, visible, and cheap. The stuff behind the tile fails slowly, invisibly, and expensively — which is exactly the failure profile DIY work can’t absorb.
Cut Curves and Notches Without Cracking the Tile (The Part Beginners Break)
Curved and irregular cuts are made with a series of straight relief cuts and a nibbler, not by forcing the tile sideways through the blade. Twisting tile against a spinning blade is the number-one cause of cracked bathroom tile — and the number-one cause of pinched, kicking blades. The physics explains why: a blade is designed to cut along a straight line, and the kerf (the slot it cuts) is only slightly wider than the blade itself. Twist the tile and you’re asking the blade to cut sideways through material it already passed — the tile pinches the blade, the blade binds, and the binding force either snaps the tile at its weakest point or hurls it back at you.
The technique for a toilet flange or pipe hole: mark the circle on the tile face, then make a series of straight cuts from the edge toward the circle, like spokes on a wheel, spacing them about 1/4 inch apart. Snap out the wedges gently, then clean the curve with tile nippers or a carbide rasp. The reason this works is that every straight cut is a controlled relief — each spoke removes tension from the tile, so when you snap each wedge, the break follows a short, manageable line instead of running wild across the whole piece. For outlet cutouts in the middle of a tile, cut the rectangle as four relief-cut corners and nibble to the line — same principle, applied to four small breaks instead of one large one.
For gentle curves on porcelain, score the curve with an angle grinder and a diamond blade at shallow depth, then make your wet-saw passes to the scored line. The score gives the tile a controlled weak point instead of a random crack — you’re telling the break where to go rather than hoping. Finish edges with a rubbing stone — that beige brick that came in nobody’s toolbox but should be in yours — to knock down the sharp arris the saw leaves behind. This matters more than aesthetics: a sharp arris on a shower floor edge or bench is a genuine laceration hazard, and it also collects grout poorly, leaving a weak line in the joint.
Test on a scrap first, every time. New tile batch, new batch behavior. I’ve seen identical-looking porcelain from two boxes cut completely differently because one was fired harder — and firing temperature changes hardness, brittleness, and how the edge fractures. This is why testing isn’t paranoia; it’s calibration. Your feed rate, the pressure you lean on, and the number of passes you need all shift with the material, and the only way to know is to sacrifice a scrap. Ten seconds of test-cutting saves a $20 plank and your afternoon.
New Saw Features Worth Paying For (And the Ones That Aren’t)
The features that genuinely improve bathroom remodel cuts are better water management, cordless compatibility, and laser or digital cut guides. The features that aren’t worth a premium for a bathroom-scale job are oversized stand systems, massive rip tables, and fancy folding frames you’ll set up twice. The underlying test for any feature is simple: does it improve the cut, or does it improve the saw’s sales sheet? Bathroom work is a small number of careful cuts, not production volume — features that speed up repetition earn their cost in a shop, not on your driveway.
Cordless tile saws have matured fast — modern battery platforms now deliver enough runtime for a full bathroom’s cutting on one or two packs, and eliminating a cord near water is a legitimate safety gain, not a gimmick. If you already own a battery ecosystem, a cordless 7-inch model is worth a long look; if you don’t, the math changes, because tool-only savings evaporate when you price in batteries and a charger. Two caveats worth knowing: batteries lose runtime in cold garages (lithium chemistry delivers less at low temperatures), and wet work drains them faster because the motor is under load more consistently. None of that is disqualifying — it just means budget two packs and rotate them.
Improved water recycling on newer saws pumps reservoir water through a filter instead of spraying and forgetting. That means fewer refill trips and less silica-laden slurry dumped in your yard — which is an environmental point, not just a convenience point, because dried slurry in soil is dispersible silica you’ll track back inside on shoes. Speaking from experience cleaning out crew saws: you want the model where the tray lifts out in one piece. The ones where you disassemble the pump from below are misery, and the misery compounds — a pump that’s hard to clean is a pump that doesn’t get cleaned, and a sludged pump is the number-one cause of mid-project water failure, which cascades into dry cutting and glazed blades.
Laser guides are nice-to-have. A good fence does the same job, but a projected line helps on repeated angle cuts like a herringbone floor, where marking every piece eats time. The honest tradeoff: a laser shows you where the cut will be, but it doesn’t make the cut straighter — straightness comes from the fence and the table, so never buy a laser to compensate for a sloppy carriage. Skip digital readouts on a saw you’ll use for one weekend — that money buys the good blade and a rubbing stone, with lunch left over, and unlike the readout, both of those measurably improve your finished tile.
Frequently Asked Questions
What is the best tile saw for a DIY bathroom remodel?
A rented 7-inch wet tile saw with a fresh continuous-rim diamond blade. It handles ceramic, porcelain, and most stone, cuts bevels, and costs $40–$80 for a day. If you’d rather own, a $150–$400 corded 7-inch model from DEWALT, MK Diamond, QEP, or SKIL covers one bathroom and a future backsplash.
How do I choose between a wet and dry tile saw?
Choose wet for any hard tile — porcelain, stone, glass — because water cools the blade, prevents chipping, and suppresses hazardous silica dust. Dry cutting is acceptable only for quick, rough cuts on soft ceramic outdoors with a HEPA vacuum and ventilation. For bathroom work, wet is the professional standard.
What size tile saw do I need for standard bathroom tiles?
A 7-inch blade with at least 24-inch rip capacity and roughly 2-inch depth of cut covers standard bathroom tile up to 12×24 planks. If you’re laying large-format tile diagonally or thick stone, step up to a 10-inch sliding-table saw — or rent one for the week.
Are cordless tile saws as effective as corded models?
For bathroom-scale work, yes. Modern battery platforms deliver enough torque and runtime for a full bathroom’s cuts on one or two packs, and dropping the cord near water is a real safety benefit. For all-day production cutting, corded saws still win on sustained power and zero charging downtime.
What safety precautions should I follow when using a tile saw?
Plug into a GFCI outlet, keep the water pump running so the blade never cuts dry, and wear sealed safety glasses plus hearing protection. Cut outdoors or in a ventilated space, keep fingers behind the blade plane, and unplug before changing blades or clearing jams. Never disable the blade guard.
Can I cut curved or irregular shapes with a tile saw?
Yes, but not by twisting the tile sideways. Make a series of straight relief cuts toward your marked curve, snap or nip out the waste, then refine with tile nippers and a rubbing stone. For pipe holes, cut spoke-style relief cuts to the circle and clean up with nippers or a carbide rasp.
Conclusion
Here’s the crisp version: for a bathroom remodel, rent a 7-inch wet saw, put a fresh continuous-rim diamond blade on it, and set up outside on a GFCI-protected circuit. That combo costs under $100 and will cut porcelain cleaner than an $800 saw running its stock blade — I’ve proven it on jobsites more times than I can count.
The tile saw is one of the few tools where the smart money buys precision at the blade and rent at the body. Nail your measurements, test on scrap, and when you step back and see that first unbroken row of porcelain running clean along the shower wall, you’ll know exactly where the $40 blade earned its keep.