TL;DR

Get business pricing on tools and workshop supplies
- Business-only prices and quantity discounts
- Tax-exempt purchasing
- Multiple users, one account, clear invoices
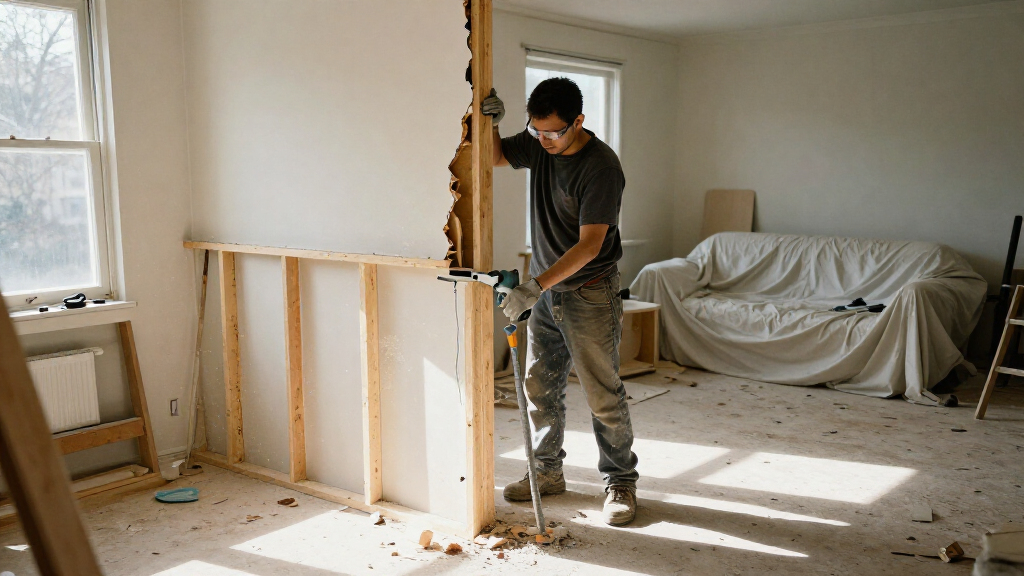
The top tools for efficient demolition of wall partitions depend on what the wall contains, how it is built, and how carefully you need to protect nearby finishes. Inspect for structural roles, wiring, pipes, and hazardous materials before cutting; then pair hand tools or power tools with suitable PPE, dust controls, and a legal debris plan.
Inspect the wall for structural roles, wiring, plumbing, ductwork, and hazardous materials before selecting a cutting tool.
Use a utility knife, pry bar, and driver for careful drywall removal; reserve reciprocating saws for confirmed safe cuts.
Choose a demolition hammer for dense plaster or masonry only when the scale justifies its noise, dust, and vibration.
Pair tool use with suitable PPE, dust containment, extraction, utility isolation, and a planned debris route.
Check local permit and disposal requirements, and hire qualified professionals for structural, electrical, or hazardous-material concerns.
Renovation field guide · Tool selection
Top Tools for Efficient Demolition of Wall Partitions
The right tool depends on what the wall contains, how it is built, and how much nearby finish must be protected. Inspect first, then match the method to the material and the job.
01 / Before the first cut
Inspect what the wall can’t show
A partition may conceal wiring, plumbing, ductwork, insulation, or framing that supports something above. These checks determine whether careful DIY work is suitable or a qualified professional should assess it.
Structural role
Appearance alone cannot confirm whether a wall is load-bearing. Review plans and get a qualified assessment if its role is uncertain.
Hidden services
Look for likely wire, pipe, and duct routes. Plans and detection tools help, but do not guarantee a clear cutting zone.
Hazardous materials
Where building age or history raises concern about asbestos or lead, arrange assessment. Never cut or break suspect material to check.
Rules and access
Check local permit and disposal requirements. Plan containment, a debris route, and a clear area away from bystanders.
Uncertain structure, electrical or plumbing work, or suspected hazardous material calls for professional assessment. Isolate utilities as required and have electrical work handled by a licensed electrician.
02 / Tool selector
Match the tool to the material
Hand tools suit small jobs and careful removal. Power tools can speed larger projects, while increasing dust, noise, vibration, and the risk of damaging concealed items.
| Tool | Best suited to | Main advantage |
|---|---|---|
| Utility knife | Scoring drywall; paper and light materials | Precise, controlled cuts |
| Pry bar / wrecking bar | Trim, drywall, and framing | Leverage with little setup |
| Hammer / sledgehammer | Rough break-up after inspection | Fast impact on material |
| Reciprocating saw | Studs, fasteners, framed sections | Quick cuts when the zone is confirmed safe |
| Oscillating multi-tool | Corners, trim, and close work | Control in tight areas |
| Drill / impact driver | Screws and fittings | Speeds disassembly; can limit breakage |
| Demolition hammer | Dense plaster or masonry | Chipping power for hard material |
| Filtered shop vacuum | Dust collection during and after work | Helps collect fine debris when suitable |
A detector and building plans can help narrow down service routes, but neither makes blind cutting safe. Choose tools only after inspecting the wall.
03 / The practical trade-off
Control or speed?
The job’s scale and the finish you intend to keep should guide the balance. More force may shorten the break-up, but can increase repair and cleanup work.
Protect what stays
For a small drywall opening or a remodel beside trim, score edges, remove accessible screws with a driver, then ease panels away with a pry bar. Smaller sections are easier to control and inspect.
Make planned cuts
A reciprocating saw can cut framing quickly once the cutting zone is confirmed safe. A demolition hammer can chip dense plaster or masonry when project scale justifies its dust, noise, and vibration.
04 / Controlled sequence
Open the wall in manageable steps
For a verified non-structural drywall partition, a measured sequence makes it easier to limit falling material, manage dust, and stop if the cavity differs from expectations.
Prepare the area
Clear the room, protect floors and nearby finishes, and keep bystanders out of the work zone.
Wear suitable PPE
Use eye, hand, foot, hearing, and respiratory protection suited to the material and site conditions.
Isolate and score
Isolate utilities as required. Score drywall edges and trim lines with a sharp utility knife.
Remove and reassess
Remove accessible screws, ease panels away, and pause to inspect framing and services before proceeding.
Use containment, suitable ventilation and extraction, appropriate debris bags or bins, and a clear disposal route. Local disposal and permit rules vary by location.
05 / Evolving practice
Efficiency includes the cleanup
Recent practice emphasizes containing dust, reducing disruption, and recovering reusable material where project scale makes it practical.
Capture at the source
Tool-mounted extraction, improved filtration, and temporary containment are increasingly emphasized to manage dust during work.
Cordless tool access
Battery-powered saws and other cordless tools can improve mobility where access to outlets is limited.
Selective deconstruction
Larger projects increasingly consider sorting materials to reduce waste and recover reusable components.
These are broad industry trends. Product availability, performance, and local requirements vary by product and location.
Trace the decision
From wall to work plan
Each step informs the next. If a check raises uncertainty, pause before choosing a cutting or impact tool.
Inspect the wall before you choose a tool
Efficient demolition starts with identifying the wall’s structure, contents, and hazards before you cut. A partition may look like a simple sheet of drywall, but behind it you could find electrical wiring, plumbing, ductwork, insulation, or framing that supports something above. These possibilities change the work: wiring affects where and how you can cut, plumbing can turn a small opening into water damage, and structural framing may need an engineered support plan. A detector and building plans can help narrow the possibilities, but neither guarantees a clear wall because services can take unexpected routes and plans may be incomplete. For example, a homeowner planning to remove a short hallway partition might find an outlet on one side and a bathroom directly behind it. That combination makes a blind cut especially risky: the outlet suggests wiring, while the bathroom raises the chance of water or drain lines. Investigate routes before making an opening. Turn off relevant power before work near electrical wiring, confirm isolation safely, and use a licensed electrician for electrical work. Bring in a qualified professional if the wall’s structural role is uncertain; appearance alone is not a reliable test, and removing a load-bearing wall without a support plan can affect the structure beyond the room. Check for materials that may contain asbestos or lead where the building’s age or history makes them a concern. Do not cut, sand, or break suspect material to “see what happens.” Disturbing it can spread hazardous dust, making later cleanup and exposure control more difficult. Arrange appropriate assessment and follow local rules. Permits can apply even to interior work, depending on location, building type, and scope, so check with the local building authority before demolition. Permit checks matter because they can identify required reviews before work makes the wall or its supports inaccessible. Inspection is part of the tool choice. It tells you whether a controlled hand-tool opening is sensible, whether a power-tool cut can be planned safely, or whether the work needs professional assessment first.Popular right now

De'Longhi 15-Bar Pump Espresso Machine with Milk Frother & Temperature Control

Vitamix Propel Series 750 Professional-Grade Blender, 4 Programs, Black

Apple AirPods Pro 3 Wireless Earbuds with Active Noise Cancellation
As an affiliate, we earn on qualifying purchases.
Match the tool to the wall and the finish you want
The top tools for efficient demolition of wall partitions change with the wall’s material and the amount of finish you must preserve. Drywall over timber framing gives you different options from plaster over lath, metal studs, or masonry. A precise opening beside a door calls for control; a full gut renovation may call for speed, extraction, and rented equipment. The practical tradeoff is that faster tools can shorten demolition time while increasing dust, noise, vibration, and the chance of damaging something you meant to keep. | Tool | Best suited to | Main advantage | |—|—|—| | Utility knife | Scoring drywall paper and light materials | Precise, controlled cuts | | Pry bar or wrecking bar | Trim, drywall, and framing | Leverage with little setup | | Hammer or sledgehammer | Rough break-up after inspection | Fast impact on material | | Reciprocating saw | Studs, fasteners, and framed sections | Quick, controlled cuts when used carefully | | Oscillating multi-tool | Corners, trim, and close work | Control in tight areas | | Drill or impact driver | Screws and fittings | Speeds disassembly and can limit breakage | | Demolition hammer | Dense plaster or masonry | Chipping power for hard material | | Shop vacuum with suitable filtration | Dust collection | Helps collect fine debris when used appropriately | Picture a bedroom remodel where the doorway casing and adjacent plaster stay untouched. Score the drywall edges with a sharp utility knife, remove screws with a driver where accessible, and work the sheet away with a pry bar. The hand tools take longer than a heavy impact tool, but their slower force is easier to direct; that can avoid repairs that would erase the time saved. By contrast, a wide-open strip-out may justify a reciprocating saw after you have confirmed the cutting zone is safe. It can cut framing quickly, but the blade’s reach makes unseen services a serious concern. Choose tools that match both the material and the consequences of a missed cut.Remove drywall with control instead of brute force
For a typical drywall partition, a utility knife, drill or impact driver, pry bar, and hammer cover much of the work. These tools let you open the wall in manageable sections, which makes it easier to inspect cavities and control debris. Small sections also limit how much material can fall at once and make it easier to stop if the wall differs from expectations. Start with the least destructive move that gives you useful information. A practical sequence for a small, verified non-structural drywall wall looks like this:- Clear the work area, protect floors and nearby finishes, and keep bystanders out. This gives you room to handle panels safely and prevents foot traffic from carrying dust into clean areas.
- Wear eye protection, hearing protection where needed, gloves, sturdy footwear, and a suitable respirator based on the material and site conditions. Dust and sharp edges are part of even a small job, so PPE should match the exposure rather than the apparent size of the wall.
- Isolate utilities as required. Score the drywall along edges and around trim with a utility knife. A score creates a predictable break line and helps keep paper from tearing into finishes you intend to keep.
- Remove accessible screws and fittings with a drill or driver, then ease panels away with a pry bar rather than swinging blindly. Controlled leverage reduces sudden panel release and lets you notice hidden fasteners or resistance.
- Pause when you expose the cavity. Check framing and services before making any cuts. This pause matters because the first opening provides better evidence than an exterior detector reading, but it still does not prove every part of the wall is clear.
Use power tools where speed pays off—and control the tradeoffs
Power tools can shorten a large demolition job, but they also raise noise, dust, and the risk of collateral damage. A reciprocating saw is useful for cutting studs and fasteners in a framed wall; an oscillating multi-tool gives you more control near corners, trim, or surfaces you want to preserve. A drill or impact driver can remove screws quickly, keeping intact material easier to sort and carry out. The right choice depends on whether the minutes saved outweigh the setup, exposure, and repair risk on that particular cut. For instance, a crew removing a long run of metal-stud partition may use a reciprocating saw for confirmed framing cuts and a multi-tool at the junction with a finished ceiling. That combination can move the job along while limiting damage where the wall meets the room. The multi-tool’s slower cut can be worthwhile at the edge because repairing a damaged ceiling may take longer than the demolition it avoided. Cordless tools improve mobility when outlets are scarce, but check battery charge and runtime before committing to a long cut sequence; a battery that fails mid-cut can leave work awkwardly paused. Torque and blade choice matter too: use the right blade for the material, and avoid forcing a tool that bogs down or wanders, since forcing it reduces control and can overheat the tool or damage the work. A sledgehammer belongs in rough break-up after inspection, not as a blind first step. Its impact can crack adjoining plaster or damage concealed services, so speed at the point of impact may create repair work elsewhere. For plaster or masonry, a demolition hammer can work faster than hand blows, but it brings more vibration, noise, and dust. That makes it a better fit for substantial hard-material removal with suitable controls than for a small opening near finished surfaces. For a one-room DIY job, renting a heavy demolition tool may cost less than buying one and storing it; for a small careful opening, it is often needless overkill.Contain dust and debris before the first panel comes down
Dust control is part of efficient demolition because debris that escapes into adjoining rooms creates extra cleanup and can affect people who never enter the work zone. Dust can travel farther than visible chunks, so barriers, extraction, and cleanup work together: barriers slow migration, extraction captures dust near its source, and filtration affects what the vacuum sends back into the room. Seal doorways and openings, protect floors, plan ventilation, and use suitable extraction and filtration for the material. A shop vacuum only helps when its filtration and setup suit the dust; ordinary cleanup equipment is not a substitute for controls required for hazardous materials. Say you are opening a wall between a living room and a hallway while the rest of the home stays occupied. A temporary barrier over the doorway, protected floor edges, and a clear route to a debris bin can keep dust and broken drywall from traveling through the house. The route matters because carrying loose rubble across clean rooms spreads debris and increases the chance of spills or damage. Keep bags or bins close enough to avoid carrying loose rubble across clean rooms, but do not overload them until they split at the threshold. Recent renovation practice puts more emphasis on tool-mounted extraction, better filtration, and temporary containment. Capturing dust at the cut can reduce what escapes into the room, although the setup must suit the tool and material. For larger projects, selective deconstruction and sorting can reduce waste and recover reusable framing or hardware. Sorting takes time, but keeping reusable materials separate can make them easier to salvage and can reduce disposal volume. Separate materials where practical, and follow local disposal rules—especially if you suspect a hazardous substance. Efficient demolition means the wall comes out and the rest of the property remains manageable.Protect yourself and know when to hand the job over
Demolition tools only make sense when you can use them safely and legally. Choose eye, hearing, respiratory, hand, and foot protection for the actual material and site conditions. Dust type and amount affect respiratory protection; noise and flying fragments affect hearing and eye protection. Keep bystanders clear, isolate utilities as required, and do not treat a detector as proof that a wall contains no wiring or pipes. PPE reduces exposure, but it cannot make an unsafe cut or an unknown material safe to disturb. A common example: you open drywall expecting timber studs and uncover a pipe or a bundle of cables. Stop work, keep tools away from the cavity, and have the relevant licensed professional assess the situation. Continuing can turn a manageable interruption into a leak, shock, or fire risk. Electrical work calls for a licensed electrician and verified power isolation; suspected asbestos or lead calls for proper assessment and controls. If you are unsure whether the wall carries load, ask a qualified structural professional before removal. Permits and inspections depend on local rules, so check them before you start; required review can affect how work is staged and what evidence must be available before the wall is closed or removed. Small, confirmed non-structural drywall work may suit an experienced DIYer who can control dust and debris. Structural uncertainty, live or unknown services, hazardous materials, or work that requires code decisions changes the job because each may require specialist assessment, equipment, or legal sign-off. That is the point to hire the right trade or rent the right equipment with competent operation. A few minutes of assessment can prevent days of repair and a dangerous surprise.Plan cleanup so demolition does not become a second project
A good demolition plan includes the debris route and disposal method before tools start making dust. Decide where material will go, how you will keep sharp fragments contained, and whether any components can be reused or sorted for recycling. Local disposal requirements vary, and suspected hazardous waste needs specific handling rather than a regular skip or household bin. Planning ahead matters because the material and its condition determine whether it can be reused, recycled, or must follow a controlled disposal route. For example, when removing a partition in a small flat, carrying broken plaster through a narrow shared hallway can spread dust and chip door frames. Bag manageable loads near the work area, protect the route, and schedule removal so bags do not block exits. Smaller loads are easier to carry and less likely to tear, while keeping the route clear preserves access for occupants and emergency exit. If framing is sound and the project allows it, removing screws and fittings carefully may preserve reusable timber or metal studs. That takes more care than breaking the frame apart, but reusable pieces are easier to inspect and repurpose when they remain intact. Keep the work zone organized: place hand tools where you can reach them, keep cords and batteries clear of the walking path, and collect debris before it piles up around your feet. An organized floor reduces trip hazards and gives you space to maneuver panels. Dust extraction and sealed barriers help, but they do not replace a final cleanup suited to the material. The job is finished when the space is safe, the waste is handled correctly, and the surrounding rooms are still usable.Key takeaways for a safer, faster wall removal
The most useful top tools for efficient demolition of wall partitions are the tools that suit the wall in front of you, not the most powerful tools in the van. A utility knife and pry bar often give you the control needed for a careful drywall opening; a reciprocating saw can speed verified framing cuts; a demolition hammer suits dense material when the scale justifies it. Matching the tool to the task reduces wasted effort, but it also limits the chance that speed creates more repair work than it saves. Think through a real room before starting: if you need to preserve painted trim, use controlled cuts and careful disassembly. If the partition contains unknown services, stop before cutting and investigate. If the wall may be structural, get a qualified assessment. The price of the wrong tool is rarely just the tool—it can be damaged finishes, extra disposal, or an injury. A short inspection and a slower first opening can reveal what later cuts will involve, helping you decide whether the project remains suitable for DIY work.- Inspect structure, services, and material hazards before demolition.
- Match hand or power tools to wall construction and the finish that must be preserved.
- Use appropriate PPE, utility isolation, dust barriers, and filtration.
- Rent heavy equipment for larger jobs when buying it does not make sense.
- Check permits and disposal rules with local authorities.