
TL;DR

Get business pricing on tools and workshop supplies
- Business-only prices and quantity discounts
- Tax-exempt purchasing
- Multiple users, one account, clear invoices
Power demolition tools can speed up flooring removal, but the right choice depends on the flooring, underlayment, hazards, and subfloor. Identify what you have before disturbing it, control dust, then work in small sections with a tool set to lift or break the flooring without damaging what lies below.
A demolition hammer can turn a tiled floor into rubble in minutes. It can also crack the slab, fill the room with dust, or punch through a fragile subfloor if you start at the wrong angle. Speed comes from knowing what is under the flooring before you pull the trigger.
This guide walks you through identifying old flooring, choosing a powered scraper or hammer, preparing the room, and working without chewing up the surface you plan to keep. You’ll also learn when to stop for hazardous-material testing or call a licensed professional. Those checks are among the most important aspects of a job, because the fastest tool is no help if it creates a bigger repair.
Identify the flooring, underlayment, adhesive, utilities, and subfloor before using powered demolition tools.
Stop and arrange testing and professional abatement if old flooring or adhesive may contain asbestos; don’t dry-scrape, grind, or sand suspect material.
Use a powered scraper for suitable resilient flooring or adhesive, and a rotary or demolition hammer with a chisel for tile where the substrate can tolerate im…
Work at a shallow angle in short passes, and stop if the subfloor splinters, cracks, or breaks up.
Plan dust control, debris routes, and disposal before demolition; rent or hire based on room size, substrate, and hazard uncertainty.
Tips for Efficiently Removing Old Flooring with Power Demolition Tools
Power tools can speed up removal, but the best choice depends on the flooring, layers beneath it, possible hazards, and the subfloor you need to keep. Identify first, control dust, then work in short, shallow passes.
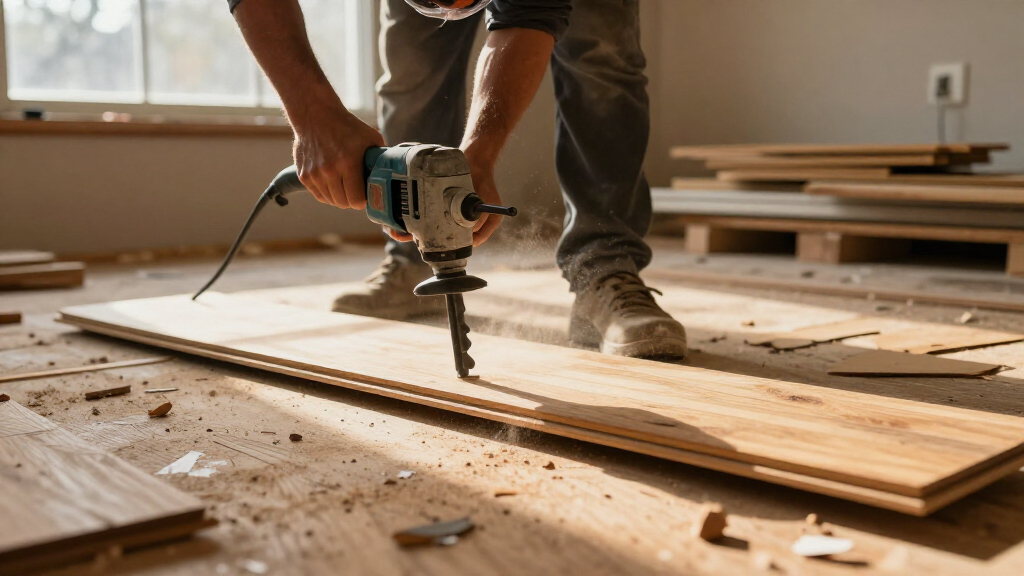
A shallow angle and short passes give you more control over every lift and break.
Know what is underfoot
A few minutes at a threshold, vent, or loose edge can reveal multiple layers, backing, adhesive, and the substrate. Check plans and accessible areas for radiant heat, plumbing, and electrical lines before powered work.
Map every layer
Look at transitions and exposed edges. Note flooring, underlayment, adhesive, and subfloor; a hidden layer changes both the tool and the risk.
Locate utilities
Radiant heat, pipes, and wiring may sit close to the surface, especially in kitchens and bathrooms. If you cannot establish a safe work zone, ask a qualified contractor to assess it.
Assess the substrate
Tile bonded to concrete may tolerate more impact than tile over plywood. Choose a method that removes the finish while preserving the surface below.
Match the tool to the floor
The most efficient tool is the one that removes the material without turning the subfloor into the next repair. Tool weight, vibration, blade options, dust extraction, room size, and substrate all matter.
| Flooring | Common tool choice | Watch for |
|---|---|---|
| Vinyl or carpet adhesive | Powered floor scraper with a suitable blade | Hidden layers and adhesive hazards |
| Tile on concrete | Rotary or demolition hammer with a chisel | Dust, flying chips, and slab damage |
| Wood flooring | Reciprocating saw for manageable sections, plus a pry tool | Utilities and blade depth |
| Tile on plywood | Careful scraper or hand tools near delicate areas | Aggressive blows can crack the underlayment |
Older resilient flooring, backing, mastics, and some underlayments may contain asbestos. Arrange appropriate testing and professional abatement. Do not sand, grind, or dry-scrape suspect material; a basic dust mask does not make it safe to disturb.
Work in short, shallow passes
Start at an edge or existing loose spot. Keep the blade or chisel close to the floor, let the tool work, and inspect the exposed surface before moving on.
Control dust, noise, and debris
Power demolition can produce substantial dust, sharp fragments, noise, and vibration in a short time. Treat even a small room like a jobsite and prepare the route out before removal begins.
Prepare the work zone
- Clear furniture and loose items; protect doorways and nearby surfaces.
- Seal adjacent spaces where practical and cover vents to limit dust spread.
- Plan a debris staging spot that keeps exits and walkways clear.
- Keep other people out of the work area and explain when noisy work will happen.
Wear task-appropriate protection
- Safety glasses or a face shield, hearing protection, suitable gloves, and sturdy footwear.
- Respiratory protection and dust collection appropriate to the material and conditions.
- Follow the tool maker’s instructions and use suitable dust controls.
- Stop if material is suspect; ordinary dust collection does not make it safe to disturb.
Rent, work by hand, or call a pro?
A powered scraper may make sense for a large resilient floor, while transport, setup, and cleanup can outweigh the benefit in a small bathroom. Compare the job size with material certainty and the cost of substrate repair.
Best for suitable larger areas
Consider renting a powered scraper for broad resilient flooring or adhesive removal when the material is known and the substrate can tolerate the method.
Best for delicate or small jobs
Use careful hand work around edges, stubborn spots, confined rooms, and fragile subfloors where impact control matters more than speed.
Best when uncertainty is high
Bring in qualified help if hazards are suspected, utilities cannot be located, the substrate is failing, or the removal method is unclear.
From inspection to a sound subfloor
Separate materials when required, contain dust, and confirm local rules for construction debris and hazardous waste. A clean, visible subfloor makes it easier to spot cracks, water damage, and leftover fasteners before installing new flooring.
Identify Every Layer Before You Power Up
Before you use power demolition tools, identify the flooring, underlayment, adhesive, and subfloor, because each layer changes the safest removal method. Hardwood over plywood behaves differently from tile over concrete, and old vinyl may hide a second floor underneath. A few minutes at a doorway or existing loose edge can save hours of repair.
Look for flooring transitions, vents, thresholds, and exposed edges where you can see the layers. Tap tile for hollow spots and inspect a lifted corner for a foam pad, felt backing, or black adhesive. If your kitchen has vinyl over sheet goods and then plywood, that stack may be thicker than it looks from above.
Check what runs below the floor as well. Radiant heat, plumbing, and electrical lines can sit close to the surface, especially around bathrooms and kitchens. Review available plans, inspect accessible areas, and locate utilities before using powered equipment; if you can’t establish a safe work zone, get a qualified contractor to assess it.
Old materials need a separate check. Some resilient flooring, backing, mastics, and underlayments may contain asbestos, while old paint or settled dust may contain lead. If you suspect a hazard, stop and arrange appropriate testing and professional abatement; don’t sand, grind, or dry-scrape it. A dust mask does not make suspected asbestos safe to disturb.
Popular right now

Shark Navigator Lift-Away Upright Vacuum (NV360)

Dreame L40 Ultra Gen 2 Robot Vacuum and Mop

Dreame L50 Ultra Robot Vacuum and Mop
As an affiliate, we earn on qualifying purchases.
Match the Tool to the Floor and the Subfloor
The most efficient power tool is the one that removes your flooring while leaving the surface beneath it in usable condition. A powered floor scraper can lift resilient flooring or carpet adhesive, while a rotary hammer or demolition hammer with a chisel can break tile and mortar. For wood flooring, a reciprocating saw can cut manageable sections, but you must know where the blade will go.
Think about the substrate as the tool’s stopping point. Tile bonded to concrete can usually take more impact than tile on a plywood floor, where aggressive blows may crack the underlayment or loosen fasteners. If a delicate subfloor must stay, use a scraper with a suitable blade and modest speed, then switch to hand tools around edges and stubborn spots.
Renting can make sense when a larger floor needs a powered scraper or when tile removal would exhaust you with hand tools. For a small bathroom, though, setup, transport, and cleanup may take longer than careful hand work. Compare the tool’s weight, vibration, power source, blade availability, and dust-collection options against the room size and material.
| Flooring | Common tool choice | Watch for |
|---|---|---|
| Vinyl or carpet adhesive | Powered floor scraper | Hidden layers and adhesive hazards |
| Tile on concrete | Rotary hammer or demolition hammer with chisel | Dust, flying chips, and slab damage |
| Wood flooring | Reciprocating saw for sections, plus a pry tool | Utilities and blade depth |
Current tools may offer adjustable speed or impact settings, tool-less blade changes, battery power, and dust-extraction attachments. Those features can improve control or convenience, but performance varies by model and floor. A more powerful hammer is not automatically the better choice if you need to preserve the substrate.
Set Up Dust Control and Protective Gear Before Removal
Prepare the room before starting: clear the floor, protect nearby surfaces, control dust, and plan how debris will leave the building. Power demolition can create heavy dust, sharp fragments, loud noise, and vibration in a short time. Treat the work area like a small jobsite, even if you’re only renovating one bedroom.
Move furniture and loose items, then protect doorways and adjacent rooms where practical. Cover vents so dust doesn’t spread through the heating or cooling system, and decide where you’ll stage debris without blocking your exit. For example, a hallway pile of tile chunks may seem convenient at first, but it can become a trip hazard and slow every trip outside.
Wear safety glasses or a face shield, hearing protection, suitable gloves, sturdy footwear, and respiratory protection appropriate for the material and work conditions. Use dust collection or other suitable controls, and follow the tool maker’s instructions. Match the controls to the task: a basic dust mask is not asbestos protection, and ordinary dust collection does not make suspect materials safe to disturb.
Stop work if the material is suspect. Isolate the area and arrange appropriate testing and professional abatement before removal. Don’t use powered tools to find out what an unknown floor contains.
Dust control also protects the next stage of renovation. A clean, visible subfloor makes it easier to spot cracks, water damage, and leftover fasteners before you install new flooring. If you’re working near other people, keep them out of the work area and explain when noisy work will happen.
Remove Flooring in Short, Controlled Passes
- Start at an edge or loose spot. Use an existing transition or a small hand-tool opening to expose the floor layers. If you uncover an unexpected layer or adhesive, pause and reassess.
- Set the blade or chisel shallow. Keep it close to the floor rather than pointing down into the subfloor. Make short passes that lift flooring or break tile into controllable pieces.
- Let the tool work. Use steady pressure and the appropriate speed or impact setting. If the tool stalls, chatters, or gouges, stop and check the blade, angle, and material.
- Clear debris as you go. Keep fragments from piling up around your feet or blocking your view of the work surface.
- Inspect, then continue. Check the exposed floor before moving to the next section, especially where the subfloor needs to remain.
This sequence makes power demolition more predictable because you work with the material rather than forcing the tool through it. Imagine removing tile from a concrete slab: a shallow chisel angle can pop pieces up, while a steep angle drives the chisel into the slab like a pick. The difference is a clean removal pass versus a repair job.
Work in sections small enough to control and clear. If you’re using a powered scraper on vinyl, start where an edge is accessible and watch how the blade tracks under the sheet. If it begins shaving plywood or tearing up a fragile layer, release the trigger and change the angle or tool.
Take breaks when vibration, noise, or fatigue dulls your control. A demolition tool should feel like a steady lever in your hands, not a runaway machine. If a surface begins to splinter, crack, or break up, stop; a slower approach or professional help may protect more of the floor than another hard pass.
Protect the Subfloor and Handle Stubborn Adhesive Carefully
Protecting the subfloor means choosing the least aggressive tool that can remove the flooring, then stopping as soon as the underlying surface shows damage. The right approach depends on whether you’re exposing concrete, plywood, or another layer, and whether it must remain intact for the next installation. Subfloor damage can erase any time saved by a fast demolition pass.
Watch for early warning signs: plywood splinters lifting ahead of a scraper, fresh cracks spreading through a slab, or a chisel digging a trough instead of lifting tile. If you see those signs, stop and reassess the angle, blade, and impact setting. A small change can help, but damaged or uncertain areas may need a flooring professional to judge what can be repaired or must be replaced.
Adhesive can be the slowest part. A powered scraper may lift some carpet glue or resilient flooring residue, but stubborn material can remain in patches. Don’t assume that grinding or sanding is the next step; dust from old adhesives and floor coverings can carry hazards. Confirm the material and follow appropriate testing or abatement advice before disturbing suspect residue.
For a concrete floor with known, nonhazardous residue, use a suitable scraper attachment and controlled passes, collecting dust as you work. For a wood subfloor, avoid aggressive scraping that removes the plywood’s surface layers. For example, if a bedroom’s carpet comes up clean but a few glue ridges remain, a hand scraper may be safer and quicker than bringing in a heavy machine that can gouge the plywood.
Plan Cleanup, Disposal, and the Point to Call a Pro
Plan debris removal before demolition so sharp pieces and dust don’t spread through the house. Separate materials when local rules require it, contain dust during cleanup, and check disposal requirements for construction debris and any hazardous waste. Tile, wood, carpet, and old resilient flooring may not all belong in the same collection stream.
Use sturdy containers or manageable bundles rather than overloading a bag with heavy tile. A bucket that feels easy to lift from the floor can become unsafe after several trips, especially on stairs. Keep routes clear, wear gloves and sturdy shoes, and avoid sweeping fine dust into the air; use suitable collection methods for the material and task.
Hire a qualified professional when testing identifies asbestos or lead concerns, when utilities or radiant heat create uncertainty, or when the floor structure is damaged. A licensed professional is the right call for electrical, gas, structural, or roof work connected to the renovation; shut off power before any permitted work near electrical components, use appropriate PPE, and follow applicable code and permit requirements. Flooring removal can reveal work that needs a specialist, such as a cracked subfloor or hidden wiring.
Cost matters, but so does the room you’re trying to preserve. Renting a powered scraper may be sensible for a large, open room with a robust substrate. In a cramped bathroom with a delicate wood floor, a hand tool or contractor may be faster overall once you count setup, protection, cleanup, and repairs. The best schedule is the one that gets you to a sound, clean subfloor without leaving a bigger problem behind.
Frequently Asked Questions
Which power tool should I use to remove tile?
A rotary hammer or demolition hammer with a suitable chisel can break tile and mortar, especially over concrete. Keep the chisel at a shallow angle and watch for slab damage; tile over a wood subfloor needs a more cautious approach.
Could old flooring adhesive contain asbestos?
Some old resilient flooring, backing, mastics, and underlayments may contain asbestos. If you suspect it, stop and arrange appropriate testing and professional abatement before disturbing the material. Don’t sand, grind, or dry-scrape it.
How can I remove flooring without damaging the subfloor?
Choose a tool suited to the substrate, start at an edge, and work in short passes with the blade or chisel held shallow. Stop if plywood splinters or concrete cracks, then reassess the angle, setting, or removal method.
Is a powered floor scraper worth renting for one room?
It can be worth renting for a large room with resilient flooring or carpet adhesive, especially when hand scraping would take hours. For a small room or fragile subfloor, setup and repair risk may outweigh the time saved; compare the area, tool weight, and substrate first.
What protective gear and dust controls should I use?
Use safety glasses or a face shield, hearing protection, suitable gloves, sturdy footwear, and respiratory protection appropriate to the material and work conditions. Add suitable dust collection, protect nearby vents, and follow tool instructions. A basic dust mask does not make suspect asbestos safe to disturb.
What should I do with the debris after removal?
Contain dust, separate materials when required, and check local rules for construction debris and hazardous waste. Keep loads manageable and clear your route so sharp, heavy fragments don’t create a trip or lifting hazard.
Conclusion
Remember the sequence: identify the layers, control the hazards, then choose the tool that matches both the flooring and the surface beneath it. Short, shallow passes give you control; forcing a tool can turn a removal job into a subfloor repair.
Start with the smallest safe test area, keep dust and debris contained, and stop when the floor tells you something is wrong. A clean subfloor is the quiet, solid foundation your next room needs.