TL;DR

Get business pricing on tools and workshop supplies
- Business-only prices and quantity discounts
- Tax-exempt purchasing
- Multiple users, one account, clear invoices
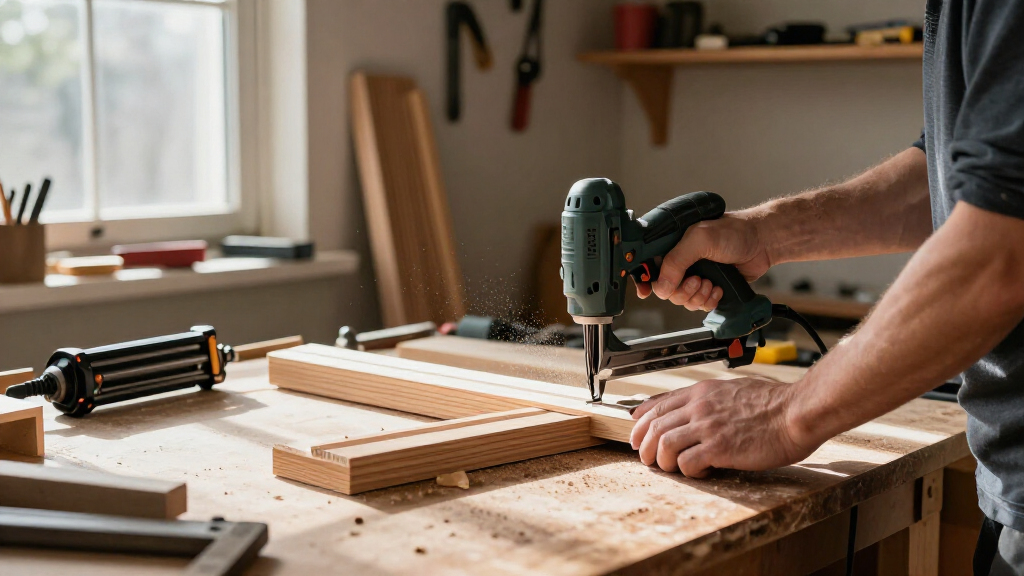
A cordless 23-gauge pin nailer is best for holding lightweight trim, veneer details, and cabinet parts in position while adhesive cures. Choose a pin that enters the backing without breaking through, test the depth on matching scrap, and use glue or a stronger fastening method when the joint must carry a load.
A pin nailer can hold a hair-thin molding in place while you reach for a clamp, then leave a hole that disappears into the grain. It can also send a pin through the visible face of a cabinet stile if you trust the length without testing. That small difference separates clean finish work from a repair involving putty, sanding, and a fresh coat of finish.
This guide shows you how to use a cordless 23-gauge pin nailer for trim, veneer, cabinet details, and other delicate pieces. You’ll learn what pins can hold, how to choose length and depth, how to keep parts aligned, and when glue, clamps, brads, or a pro belong in the plan.
Think of the pin as a quick, quiet hand that holds a part still. It is not a substitute for a well-made joint, and its small hole is nearly invisible, not guaranteed invisible. A few careful test shots and a sensible fastening plan will save more time than rushing through a whole run of molding.
Use a 23-gauge pin mainly to hold light trim or cabinet details while adhesive cures; it has limited pull-out resistance.
Choose only a pin length approved for your nailer, and test it in matching scrap to check for breakthrough.
Dry-fit and align the pieces before pinning; use clamps, tape, or a jig when thin parts slide.
Adjust depth on offcuts until the pin sits cleanly without protruding or crushing the surface.
Wear eye protection and disconnect the power source before loading, servicing, or clearing a jam as the manual directs.
Fine finish field guide · Cordless tools
Best Practices for Using Cordless Pin Nailers for Fine Finish Work
Use a 23-gauge pin to hold lightweight trim, veneer details, and cabinet parts in position while adhesive cures. Choose length and depth with care, test on matching scrap, and give structural work a joint and fastener designed for its load.
The key tradeoff
A smaller mark usually means less holding power. Let the adhesive do the lasting work.
A cordless pin nailer is a quick, quiet hand that can hold a hair-thin molding while glue grabs. It is not a substitute for a sound joint, and its tiny hole is easy to conceal—not guaranteed invisible. A few test shots can prevent a breakthrough, split edge, or crushed finish.
Where pins help—and where they stop
Think of the pin as a temporary clamp for careful assembly. Match the method to the part, material, and expected load.
Delicate trim
Hold narrow bead, small molding, and light decorative returns in place while adhesive cures.
Keep parts still
Secure applied strips and lightweight components after dry-fitting and checking the seam.
Minimize surface damage
A thin, nearly headless pin leaves a small entry mark that is often easier to conceal than a brad hole.
Expect less grip
Thin pins have less pull-out resistance than brads or finish nails. Bumps and flex can loosen a pin-only joint.
Design for the load
Use an appropriate joint, clamps, screws, or stronger fasteners when the work must carry weight.
Try the real position
Compare weight, balance, nose visibility, firing cycle, battery platform, and maintenance for the task.
Four checks before the first shot
Make the joint predictable before loading the tool against finished work.
Dry-fit, align, and mark the final position.
Check both thicknesses and the pin path.
Use matching scrap; inspect both faces and edges.
Apply glue as directed, seat fully, then pin.
Length · path · depth
Keep the pin inside the work
Choose only a gauge and length approved for your nailer. The pin should pass through the attached piece and enter the backing without emerging from the far side. A 6 mm strip over a 12 mm cabinet side leaves little room for guesswork.
Make trial shots in offcuts with the same thickness and grain direction. Check the back, edge, and visible face for breakthrough, splitting, or a crushed halo. Adjust depth if the model allows it.
Read the test shot
Bars are a visual guide, not measured performance data. Results vary with tool, pin, material, and shot angle.
Set the work up to stay aligned
Thin molding can skate or twist as the nose meets the surface. Keep the part seated before fastening.
Mark the landing
Dry-fit first and mark the final location, especially at corners and narrow cabinet rails.
Use a third hand
Hold the work firmly. Add tape, a clamp, or a positioning jig when slippery parts wander.
Check as you go
Start from a stable end on long runs and verify alignment as you move along the molding.
Pick the right hold
Choose a method based on the part’s job, not just the size of the hole.
| Method | Best role | Holding strength | Surface mark |
|---|---|---|---|
| 23-gauge pin | Light details; temporary hold during glue-up | Limited | Very small |
| Brad nail | Trim needing more mechanical grip | Greater than pin | More visible |
| Glue + clamp | Bonding parts that can be held during cure | Depends on joint and adhesive | No fastener hole |
| Designed joint / screw | Load-bearing assembly | Specified for the load | Plan for access and finish |
Safe, repeatable work
Every cordless model differs. Follow its manual for operation, loading, jam clearing, service, and storage.
Protect eyes and hands
Wear eye protection. Keep hands clear of the nose and likely exit path, and never point the tool at anyone.
Assume it can fire
Keep control of the energized tool whenever its safety contact is engaged.
Disconnect for service
Remove the battery or power source before loading, clearing a jam, or servicing as the manual directs.
Use approved pins
Keep the magazine clean and use only the pin type and lengths specified for your model.
The fine-work sequence
From an accurate fit to a lasting bond, each step has a clear purpose.
Use a pin nailer as a third hand, not as a structural fastener
A cordless pin nailer is most useful when you need to hold a light, delicate part in place without leaving a large nail hole. Its usual 23-gauge pin is headless or nearly headless, so it makes a small mark, but it also has limited pull-out resistance. Treat it mainly as a temporary clamp for glue-ups or a fastener for light decorative details.
That tradeoff makes more sense on the bench. Suppose you are fitting a narrow bead onto a cabinet door: a pin can stop the bead sliding as the glue grabs, while an appropriate adhesive provides the lasting bond. A pin alone may not hold a part that gets pulled, bumped, or flexed over time. For a load-bearing joint, use a joint designed for that load and the appropriate fastening method.
Using cordless pin nailers for fine work can save setup time because battery-powered models generally need no compressor or air hose. Some cordless models use a battery and flywheel or another drive mechanism; others use a gas cell. Weight, balance, firing cycle, noise, and maintenance depend on the specific tool, so check the manual and test the tool in the position you’ll use.
A homeowner installing a small return on a baseboard may value a compact tool that fits near the floor. A finish carpenter pinning delicate trim overhead may care more about the tool’s weight and nose visibility. For occasional work, compare battery compatibility, pin availability, and rental options before buying.
Popular right now

Shark Clean & Empty Cordless Stick Vacuum with Auto-Empty System, BU3521

Shark PowerPro Reveal Plus Cordless Vacuum Cleaner, Charcoal, IZ376H

De'Longhi Magnifica Evo Fully Automatic Espresso Machine with Manual Milk Frother, Silver
As an affiliate, we earn on qualifying purchases.
Choose a pin length that stays inside the work
Choose a pin long enough to pass through the attached piece and enter the backing, but short enough to avoid emerging from the far side. That sounds simple until you add a thin molding, an angled shot, and a narrow cabinet rail. Pin travel can vary with the tool’s nose position and the path through the material, so a quick scrap test is more reliable than a guess.
Start by measuring the combined thicknesses of the attached piece and the backing. Then check the pin lengths approved for your particular model; most pin nailers take 23-gauge pins, but the compatible range varies. Do not load a pin just because it fits the magazine. Follow the tool manual for the approved gauge and length.
For example, imagine a 6 mm decorative strip on a cabinet side that is only 12 mm thick. A pin long enough to grip securely may still travel close to the opposite face. Fire into an offcut made from the same materials and thicknesses. Inspect both faces and the edge before committing to the cabinet.
Keep the fastener path in mind when working near an edge, end grain, or brittle material. A pin aimed too close to a fragile edge may split the piece; one aimed toward the visible face may break through. On narrow stock, angled or staggered shots can sometimes help, but only if you can place them safely and predictably. Test the setup first.
- Check the manual for the exact pin type and approved lengths.
- Test matching scrap with the same thicknesses and grain direction.
- Inspect both sides for protrusion, splitting, and a crushed surface.
Set up the joint before you fire the first pin
Dry-fit the parts, confirm their alignment, and apply adhesive evenly when the joint needs a lasting bond. A pin can hold a piece where you put it, but a slippery molding can skate sideways as the tool fires. If the pieces are not seated before the shot, the fastener may lock in a small gap that glue will not fix neatly.
Take a cabinet face frame as an example. A thin applied strip can twist when you press the nailer nose against it, especially near a corner. Mark the intended position, test the fit without glue, and use tape, a clamp, or a small positioning jig if the part wants to wander. Once the adhesive is spread, press the piece home and check the seam before pinning.
Use a repeatable sequence for a run of trim. Hold the work firmly, set the nose where you want the pin to enter, and confirm that the attached piece is seated. Fire only when your hand is clear of the nose and the likely exit path. If you are fastening a long molding, work from a stable end and check the alignment as you move along it; do not pin a misaligned section in several places and hope it settles.
Adhesives need the coverage and cure time stated on their packaging. A pin can keep a light part still during that period, but it does not make a poor glue joint strong. In a real repair, a cabinet scribe pinned against a wall may stay put while a trim adhesive cures; a shelf carrying books needs a properly designed support, not a row of tiny pins.
- Dry-fit the pieces and mark the final position.
- Apply adhesive as directed, then seat the parts fully.
- Hold the work steady and test the intended shot on scrap.
- Pin only after confirming alignment, then respect the adhesive’s cure time.
Test depth until the pin sits flush without bruising the surface
A well-set pin seats without protruding and without crushing the wood around its entry point. If your tool has depth adjustment, use it with trial shots in offcuts; the result depends on the tool, pin length, and material. Set the fastener too shallow and you may leave a proud wire that catches a fingernail. Set it too deep and the nose can leave a dent in soft wood.
Make your first test on a scrap pair that matches the job, not on a random block of pine. A pin that sits cleanly in a dense hardwood molding may bury itself in a soft, painted finger-jointed trim piece. Inspect the surface in the same light you’ll use to judge the finished work. Strong raking light can reveal a crushed halo that disappears when you look straight on.
If a pin stands proud, stop and check the manual and setup before correcting it. Confirm the tool’s depth setting, the pin type, and whether the material is suitable. Do not improvise by striking a delicate surface with a hammer; a small punch and suitable surface protection may be appropriate only if the tool maker’s guidance supports that approach and you can avoid denting the work.
On a stained oak cabinet, even a tiny hole can catch dark finish and show as a dot. On painted trim, a shallow hole may be easy to fill, but a crushed edge can telegraph through the paint. Depth control is not just cosmetic: a properly seated pin is less likely to snag during handling, sanding, or finishing.
Pick the fastener that matches the job’s holding force
A pin nailer leaves the smallest mark in this group, but it also provides the least holding power. A brad or finish nailer uses a larger fastener that can offer more mechanical hold, while screws or a designed joint may suit parts that carry meaningful loads. Choose based on what the joint must do after the glue cures, not only on how visible the hole will be.
Consider the difference between a small applied cabinet molding and a door casing near a busy hallway. The molding may need a discreet pin while glue sets; casing can take bumps and may need a stronger fastening plan suited to the wall and trim. A pin nailer is not a universal replacement for a brad nailer or finish nailer. For a heavy or stressed joint, consult the design requirements and use a suitable method.
Here is a practical comparison. The exact performance still depends on the tool, fastener, material, and joint, so check the manufacturer’s specifications and test when appearance matters. A clean-looking hole does not tell you how well the joint will resist pulling apart.
| Fastener | Best fit | Tradeoff |
|---|---|---|
| 23-gauge pin | Light trim, veneer details, or holding a glued piece during cure | Small hole, limited pull-out resistance |
| Brad nail | Light to moderate trim where a larger hole is acceptable | More visible entry mark; more hold than a pin in many uses |
| Finish nail or designed joint | Heavier trim or parts with greater holding demands | Requires a plan for the larger fastener and the substrate |
For a one-off repair, think about rental too. If you only need to attach a short piece of trim, the cost of a tool, battery, and pin supply may outweigh the convenience. A rental or an existing fastening method may make better sense.
Keep hands clear and disconnect power before clearing a jam
Wear eye protection, keep your hands away from the nose and likely exit path, and treat an energized nailer as ready to fire whenever its safety contact engages. A thin pin can still injure you, especially if it deflects off a knot, a hidden hard surface, or an unexpected gap. Never point the tool at yourself or another person.
Before loading, servicing, or clearing a jam, disconnect the battery or other power source as the manual directs. If your cordless model uses a gas cell, follow its specific handling instructions too. Do not reach into the nose or magazine while the tool is energized. A jammed pin can shift suddenly when you open the mechanism.
Picture a pin that stops halfway into a knot during a trim repair. The tempting move is to push harder or tap around the nose, but that can damage the tool or send the pin in an unexpected direction. Set the tool down, disconnect power, and use the manufacturer’s jam-clearing procedure. Cordless designs differ, so a technique that works on one model may be unsafe on another.
Keep the magazine clean and use only pins approved for that nailer. Inspect the nose and fasteners, then follow the manual for lubrication, jam clearing, storage, and battery care. If a pin repeatedly bends, jams, or exits at an odd angle, stop and inspect the pin type, material, and tool condition before continuing.
Wear eye protection and disconnect the power source before clearing a jam. Keep your free hand out of the fastener’s path, even when you expect a pin to stay inside the wood.
Frequently Asked Questions
What gauge pin does a cordless pin nailer use?
Most pin nailers use 23-gauge pins, but confirm the compatible gauge and lengths in your tool’s manual. The magazine can look similar across models while the approved fasteners differ.
Can I use pin nails without glue?
Sometimes, for very light decorative pieces that will not be pulled or bumped. For most joints that need lasting strength, use an appropriate adhesive or a stronger fastening method; pins have limited holding power on their own.
How do I choose the right pin length?
Choose a length that passes through the attached piece and enters the backing without coming through its far face. Check your tool’s approved range and test on matching scrap, since material thickness and the pin’s path affect the result.
Will the pin holes be invisible?
They are small, but not always invisible. Wood species, grain, lighting, finish, and pin depth affect how much you see; inspect a test piece under the lighting the finished work will get.
Can a pin nailer split wood?
Yes. Thin stock, brittle species, end grain, or a shot close to an edge can split. Test first and keep pins away from vulnerable edges when the design allows.
Can a pin nailer replace a brad or finish nailer?
Usually not. Pins suit delicate, lightweight work where a small hole matters; brads and finish nails can provide more holding power for suitable trim applications. Pick the fastener for the joint’s demands.
Do cordless pin nailers need a compressor?
Battery-powered models generally do not need a compressor, though some cordless designs use a gas cell. Check the specific tool’s power system and consumables before you buy or rent.
Conclusion
Remember the pin nailer’s real job: it gives a delicate piece a steady hand while you build a sound bond. Match the pin to the material, test the path and depth on scrap, and let adhesive or a stronger fastening method carry the load the joint must bear.
When you hear that quick, dry snap, the work should already be aligned and your hands should already be clear. A clean finish starts before the shot.