
TL;DR

Get business pricing on tools and workshop supplies
- Business-only prices and quantity discounts
- Tax-exempt purchasing
- Multiple users, one account, clear invoices
Handling and transporting heavy materials safely comes down to planning the route, knowing load limits, using mechanical aids for anything over about 44 lbs (20 kg), lifting with correct technique, and securing loads properly during transport. According to OSHA-aligned safety guidance, proper equipment and training can reduce handling-related injuries by up to 70%. When in doubt, rent the right equipment rather than muscle a load you shouldn’t.
I still remember a framing carpenter on a job years ago who insisted on carrying an 80 lb bundle of shingles up an extension ladder alone — one-handed, to keep the other hand on the rail. He made it three rungs from the top before the load shifted, and he spent the next six weeks in a back brace. No fall, no dropped load. Just a back that gave out because he skipped the basics.
That’s the thing about moving heavy materials: the injuries are almost never dramatic. According to occupational safety data, manual handling of heavy loads accounts for a significant share of workplace injuries — backs, shoulders, knees, hands. And according to OSHA-aligned guidance, proper equipment and training can cut those injuries by up to 70% [1].
In this guide, you’ll get top tips for handling and transporting heavy materials safely — including recent developments like load monitoring tech — from someone who’s hauled enough lumber, drywall, and concrete bags to know what actually works. We’ll cover lifting technique, equipment choices, PPE, securing loads, and the honest line between DIY-grade and pro-grade work.
Walk the full route and clear it before lifting anything — five minutes of planning prevents most handling incidents.
Use mechanical aids (dollies, panel carriers, stair climbers) for any load over about 44 lbs (20 kg); that includes most sheet goods.
Lift with your legs, keep the load close, and pivot your feet to turn — never twist under load.
Secure transport loads with rated ratchet straps at multiple points and re-tension after the first few miles; rope and bungees don’t count.
Forklifts, cranes, and hoists require certified operators — hire the operator with the machine rather than renting solo.
Top Tips for Handling and Transporting Heavy Materials Safely
Planning the route, knowing load limits, using mechanical aids for anything over about 44 lbs (20 kg), lifting with correct technique, and securing loads properly. The injuries are almost never dramatic — they come from skipped basics.
Plan the Route Before You Touch the Load
Planning is the cheapest safety measure you own. Most injuries happen at the unplanned moments: a door that opens inward, a hose across the walkway, a porch step nobody accounted for. If you can’t see your destination clearly from where you’re standing, you’re not ready to lift.
Note stairs, turns, thresholds, and overhead clearance before anything moves.
Remove debris, cords, and anything you could trip over mid-carry.
If you don’t know it, treat it as heavy. Guessing is how backs get hurt.
Dolly, hand truck, stair climber, or extra hands — choose before lifting.
Standardized communication whenever more than one person is carrying.
Lift It Right: The Technique That Saves Your Back
Nearly every back injury on a job comes from breaking one of four rules — usually the twisting one. Twisting under load is how a two-dollar movement becomes a two-thousand-dollar MRI. Slow is smooth, and smooth is safe.
Feet shoulder-width, stand over the load.
Bend your knees — never your waist. Back straight.
Grip firmly, tighten your core, drive up with your legs, load against your torso.
Turn your whole body. Never swing the load with a fixed waist.
Keep loads between knee and shoulder height — lifting from the floor is the worst position for your spine; lifting overhead invites dropped loads. Stage materials at waist height: sawhorses plus a sheet of ply make a cheap staging table.
Use the Right Equipment — Or Rent It Instead of Buying
Equipment choice depends on three things: the load’s weight, its shape, and the environment you’re moving it through. Get those three right and the choice almost makes itself. Inspect everything before every job — a frayed ratchet strap at 60 mph is a missile, not an inconvenience.
| Material | Best Equipment | Buy or Rent? |
|---|---|---|
| Boxes, bags, small crates (up to ~200 lbs) | Hand truck (two-wheel dolly) | BUY — $60–120, lasts forever |
| Appliances, heavy machinery | Appliance dolly with straps | BUY OR RENT — ~$25/day |
| Sheet goods (plywood, drywall) | Panel carrier + second person | BUY — ~$10–20 |
| Stairs, multi-floor moves | Stair-climbing dolly | RENT — ~$40–60/day |
| Anything over ~500 lbs, palletized | Pallet jack or forklift — certified operators only | HIRE OUT — with operator |
Gear Up: The PPE That Actually Prevents Injuries
None of it is glamorous. All of it works. Start with cut-resistant work gloves with a good grip — not garden gloves — when carrying rough-sawn lumber or sheet metal.
Good grip, puncture and cut protection for lumber, metal, and concrete bags.
Toe protection and slip resistance — dropped loads land where you stand.
Required where overhead work, hoists, or suspended loads are in play.
Essential when vehicles or multiple workers share the handling zone.
The Safe Handling Chain
Every stage feeds the next. Skip one link and every step after it gets riskier — this is the full workflow from planning to delivery.
Plan the Route Before You Touch the Load
Safe handling of heavy materials starts before you lift anything: walk the entire route first, clear obstacles, and decide who and what is needed. Planning is the cheapest safety measure you own — it costs five minutes and prevents the majority of handling incidents [1]. Most injuries happen at the unplanned moments: a door that opens inward, a hose snaked across the walkway, a porch step nobody accounted for.
On a recent kitchen renovation, we had to bring 30 sheets of 3/4-inch plywood through a house to a rear addition. Instead of muscling each sheet through the hallway, we spent twenty minutes clearing the path, propping both doors, laying down drop cloths, and staging a dolly at the tightest corner. Total time saved: about an hour. Total backs saved: two.
Here’s a quick pre-lift checklist I run through every time:
- Walk the route end to end — note stairs, turns, thresholds, and overhead clearance.
- Clear the path of debris, cords, and anything you could trip over mid-carry.
- Know the weight of what you’re moving. If you don’t know it, treat it as heavy.
- Decide on equipment — dolly, hand truck, stair climber, or extra hands.
- Agree on signals if more than one person is carrying.
The rule I’ve worked by for twenty years: if you can’t see your destination clearly from where you’re standing, you’re not ready to lift.
This planning discipline matters double on ladders and scaffolds, where you’re combining a heavy load with height. More on that shortly.
Popular right now

Shark Navigator Lift-Away Upright Vacuum (NV360)

Vitamix Propel Series 510 Professional-Grade Blender, 3 Programs, Black

Dreame L50 Ultra Robot Vacuum and Mop
As an affiliate, we earn on qualifying purchases.
Lift It Right: The Technique That Saves Your Back
Correct manual lifting technique means bending at the knees, keeping the load close to your body, maintaining a straight back, and never twisting while carrying. That’s the short version. The long version is that nearly every back injury I’ve seen on a job came from breaking one of those four rules — usually the twisting one.
Here’s how it breaks down in practice. Let’s say you’re picking up a 60 lb bag of concrete mix. You stand over it, feet shoulder-width, squat down by bending your knees — not your waist. Grip the bag firmly, tighten your core, and drive up with your legs while keeping the bag hugged against your torso. Once you’re upright, if you need to turn, move your feet, pivot your whole body. Never swing the load around with a fixed waist. That twisting motion under load is how a two-dollar movement becomes a two-thousand-dollar MRI.
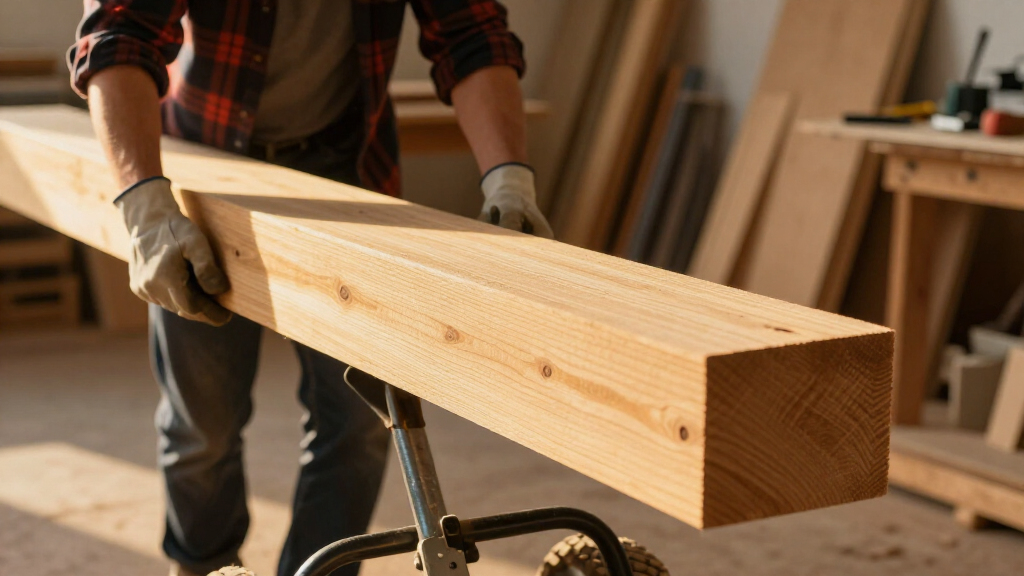
Keep the load between knee and shoulder height whenever possible. Lifting from the floor is the worst position for your spine; lifting above your head invites dropped loads and shoulder damage. Stage materials at waist height when you can — a couple of sawhorses and a sheet of ply make a cheap staging table.
And know your limits. Safety agencies recommend mechanical aids for any load over 20 kg (44 lbs) [1]. That’s a lower number than most people expect. A single sheet of 1/2-inch drywall runs around 51 lbs. A 4×8 sheet of 3/4-inch plywood is over 60 lbs. If you’re regularly moving sheet goods solo, get a panel carrier handle — ten dollars, and it changes the whole equation.
One more thing: momentum is not technique. Sudden jerks and fast pivots multiply the force on your spine. Slow is smooth, and smooth is safe.
Use the Right Equipment — Or Rent It Instead of Buying
The right equipment for moving heavy materials depends on three things: the load’s weight, its shape, and the environment you’re moving it through. Get those three right and the equipment choice almost makes itself. Get them wrong and you’re fighting physics with a bad tool.
Here’s an honest breakdown from someone who owns some of this and rents the rest:
| Material | Best Equipment | Buy or Rent? |
|---|---|---|
| Boxes, bags, small crates (up to ~200 lbs) | Hand truck (two-wheel dolly) | Buy — $60–120, lasts forever |
| Appliances, heavy machinery | Appliance dolly with straps | Buy or rent — rental ~$25/day |
| Sheet goods (plywood, drywall) | Panel carrier + second person | Buy — ~$10–20 |
| Stairs, multi-floor moves | Stair-climbing dolly | Rent — ~$40–60/day |
| Anything over ~500 lbs, palletized loads | Pallet jack or forklift (certified operators only) | Always hire out or rent with operator |
That last row matters. Forklifts, cranes, and hoists require certified operators [1]. This isn’t a suggestion — it’s the kind of thing that shows up in OSHA citations and, worse, in injury statistics. If your project needs a telehandler or a crane, hire the operator with the machine.
Whatever equipment you use, inspect it before every job. Check dolly wheels for flat spots, strap webbing for fraying, and sling hardware for cracks. A frayed ratchet strap that lets go at 60 mph on the highway is a missile, not an inconvenience.
Recent developments are changing this space, too. Remote-controlled cranes, automated guided vehicles (AGVs), and real-time load monitoring systems that alert operators to overloads are becoming standard on commercial sites [1]. For a DIYer, that mostly translates to one lesson: if the pros are buying sensors to tell them when a load is too heavy, your gut feeling isn’t a reliable gauge either.
Gear Up: The PPE That Actually Prevents Injuries
Personal protective equipment for heavy material handling means gloves, safety boots, a helmet where overhead work is happening, and high-visibility clothing when vehicles or multiple workers are involved [1]. None of it is glamorous. All of it works.
Start with gloves. Not garden gloves — cut-resistant work gloves with a good grip. When you’re carrying rough-sawn lumber or sheet metal, splinters and lacerations are the most common injuries, and they’re almost entirely preventable. I’ve pulled slivers out of palms that went through cheap leather. Spend the fifteen dollars.
Footwear is the one people skip, and it’s the one that ends careers. A 35 lb paver dropped from waist height will destroy a sneaker and what’s inside it. Steel-toe or composite-toe boots with puncture-resistant soles are non-negotiable around masonry, steel, and demolition debris. Add decent ankle support and you’ll also cut down on the rolled ankles that come from walking backward with a loaded dolly.
Helmets have quietly improved, too. Newer impact-resistant helmets — the climbing-style ones replacing traditional hard hats — offer better side protection and stay on when you bend over [1]. If there’s any overhead work, scaffold erection, or crane activity on your site, wear one.
High-visibility clothing sounds like road-crew cosplay until you’ve watched a reversing truck back toward a guy carrying drywall who can’t see behind himself. Bright colors and reflective strips make you visible to everyone who can’t watch where they’re driving because they’re watching their load.
The honest framing: PPE is your last line of defense, not your first. Planning and technique prevent the incident; PPE limits the damage when something still goes sideways. You need both.
Securing Loads for Transport: Where Most People Cut Corners
Securing a load for transport means strapping it to the vehicle at multiple points, balancing the weight over the axles, and checking that nothing can shift, slide, or take flight. Road vibration loosens straps — a load that’s snug at the driveway can be loose two miles down the road.
Every year, unsecured loads cause thousands of road accidents and debris-related crashes. That tarp you threw over the pickup bed with two bungee cords? At highway speed, it’s a sail. Here’s how to do it right:
- Load low and centered. Heaviest items go on the bottom, weight distributed between the axles — not all on the tailgate.
- Use rated tie-downs. Ratchet straps with a working load limit stamped on the tag. Rope is not a tie-down.
- Strap at multiple points. Two straps minimum for lumber or ladders; cross-strapping prevents lateral shift.
- Flag overhang. Anything extending past the bumper gets a red flag, and check your local rules — many states require flags beyond 3–4 feet.
- Re-check after the first few miles. Vibration settles loads. Stop and re-tension.
A real example: I once watched a neighbor head to the dump with a stack of old fence panels held down by — I’m not making this up — a beach towel draped over the top. The first panel let go at about 45 mph, cartwheeled across the shoulder, and missed a cyclist by maybe ten feet. He got lucky. Unsecured loads aren’t just a ticket; they’re a liability and a genuine hazard.
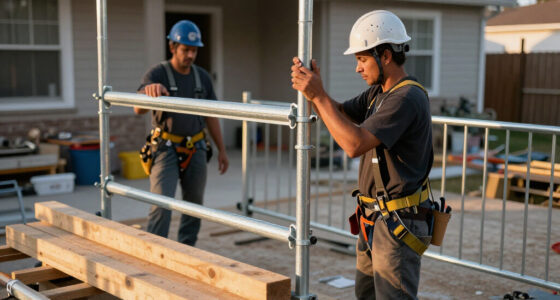
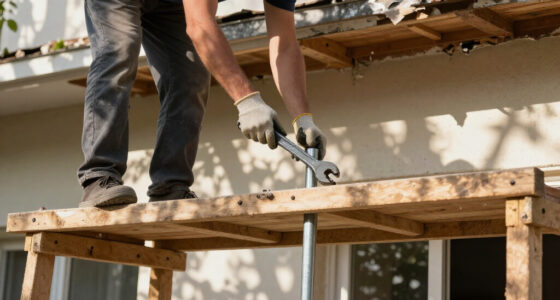
Inside buildings, the same logic applies to staged materials. Don’t stack pallets of tile three high on a mezzanine without knowing the floor’s live-load rating. Don’t overload a scaffold platform — scaffolds have specific load capacities, and overloading them is one of the fastest routes to a collapse. If you’re erecting scaffolding or working at height, follow the manufacturer’s assembly spec exactly, and for anything structural or involving significant height, bring in licensed professionals who know the code requirements.
Communication and Training: The Invisible Safety Tool
Clear communication prevents more handling accidents than any single piece of equipment. When two or more people are moving a heavy object together, one person leads, everyone uses the same signals, and nobody improvises mid-carry. It’s that simple and that frequently ignored.
Picture this: you and a partner are carrying a 6-foot solid-core door up a staircase. You’re below, sightline blocked by the door itself. Your partner steps into a drop cloth, stumbles, and drops their end. If you haven’t agreed beforehand that “STOP” means stop instantly and “SET” means controlled lowering, you’re absorbing 90 lbs of wood on a twisted spine with no warning. That conversation takes ten seconds beforehand.
Standard practice on well-run sites:
- One designated caller gives directions — not a committee.
- Agreed verbal commands: lift, walk, stop, set, all repeated back.
- Radios or hand signals when noise or distance makes voice unreliable — standard for crane work, where only the designated signal person directs the operator.
- A “stop work” rule anyone can invoke, no questions asked.
Training matters at every level. Operators of forklifts, cranes, and hoists must be certified [1]. But even manual handling training pays off — and the way it’s delivered is changing. VR and simulation-based training now lets workers practice risky lifts and equipment operation without real-world consequences [1]. You won’t put on a headset for a DIY weekend, but the principle translates: rehearse the awkward moves. Walk the stairs empty-handed first. Dry-run the turn at the landing before you do it holding a bathtub.
If you spot unsafe handling practices — someone riding a load, a strap missing, an overloaded platform — say something immediately and stop work until it’s corrected. Reporting isn’t snitching; it’s how everyone goes home with the same vertebrae they arrived with.
Frequently Asked Questions
What is the maximum weight one person should lift manually?
Occupational safety guidance recommends mechanical aids for loads over 20 kg (44 lbs) [1]. That’s lower than most people assume — a standard sheet of 1/2-inch drywall already exceeds it. Individual limits also depend on your strength, the load’s shape, the lifting height, and how many times you’ll repeat the lift. When in doubt, use a dolly or grab a second person.
Should I buy or rent equipment for moving heavy materials?
Buy the small stuff you’ll use forever — a two-wheel hand truck ($60–120) and a panel carrier ($10–20) earn their cost back on one project. Rent the specialized gear: stair-climbing dollies (~$40–60/day) and appliance dollies (~$25/day). Anything requiring a forklift, crane, or hoist should come with a certified operator — don’t rent those solo [1].
Are there legal requirements for handling heavy materials?
Yes. Regulations vary by region, but they generally mandate training, PPE, equipment standards, and documented risk assessments [1]. Powered machinery like forklifts and cranes requires certified operators, and transport loads must be secured to specific standards. For homeowners, structural work, roof work, and anything touching gas or electrical systems typically require licensed professionals and permits — don’t improvise those.
How do I secure materials in a pickup truck safely?
Place the heaviest items low and centered over the axles, use rated ratchet straps (not rope or bungees) at a minimum of two points, flag anything overhanging the bumper, and stop to re-tension the straps after a few miles — road vibration loosens even tight loads. Unsecured load violations carry real fines, and shifted loads cause thousands of road accidents annually.
How is technology improving heavy material handling safety?
Three recent developments stand out: remote-controlled cranes and automated guided vehicles (AGVs) that keep people away from loads, real-time load monitoring systems that warn operators of overloads or instability before failure, and VR-based training that lets workers rehearse hazardous lifts without real-world risk [1]. Improved impact-resistant helmets and more durable high-vis PPE round out the picture.
Conclusion
Here’s the one thing to remember: no load is worth your back. Every rule in this article — the planning walk, the knee bend, the second strap, the second person — exists because someone skipped it and paid for it. Proper equipment and training can cut handling injuries by up to 70%, which means most of this pain is optional [1].
Before your next heavy move, ask yourself one question: if this load shifted right now, could I control it? If the answer is no, put it down, rent the dolly, call the friend, or hire the pro. The lumber yard doesn’t care how you got the material there. Your spine will.