
TL;DR

Get business pricing on tools and workshop supplies
- Business-only prices and quantity discounts
- Tax-exempt purchasing
- Multiple users, one account, clear invoices
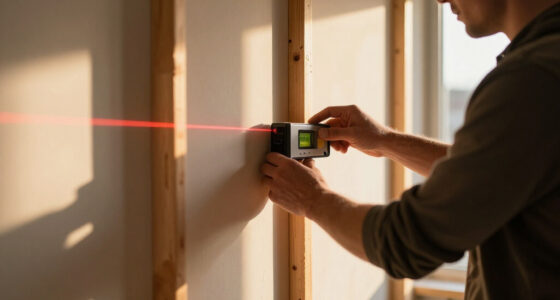
The best laser levels for tile and drywall work are self-leveling models rated around ±1/8 inch at 30 feet, with a secure mount and the line pattern your layout requires. Choose a green cross-line laser for bright indoor rooms, or a three-plane 360-degree model when you regularly tile multiple walls, hang ceilings, or transfer layout around an entire space.
A laser level can project a beautifully crisp line while being quietly out of calibration. Follow that line across a 20-foot bathroom wall, and the final tile course may taper like a wedge—one of those mistakes that looks small at first and painfully obvious after the grout dries.
This guide shows you how to choose among cross-line, 360-degree, red-beam, and green-beam lasers without turning the decision into a brand popularity contest. You will learn which specifications matter, what you can safely ignore, and why a solid mounting system often saves more time than an app or a crowded control panel.
You will also get practical setup methods for tile layout, drywall hanging, ceiling work, and calibration checks. The goal is simple: buy enough tool for the work, but do not pay pro-grade money for features that will sit untouched in the case. A clean laser line should make layout faster—not give you a more expensive way to make a crooked cut.
Choose a cross-line laser for single-wall tile and drywall work; pay for three 360-degree planes only when you regularly transfer layout across floors, walls,…
Use ±1/8 inch at 30 feet as a practical accuracy target, then verify the tool against its stated tolerance before every precision layout and after any drop.
Treat green as a visibility upgrade, not an accuracy upgrade; line sharpness, mounting stability, and calibration still control the finished result.
Create pencil control marks before setting tile or covering framing so a bumped tripod or dead battery cannot erase your reference.
Rent a receiver-compatible rotary system for occasional outdoor or long-range work instead of buying a specialized tool that rarely leaves its case.
Best Laser Levels for Tile and Drywall Work
Buy the line pattern your layout needs. A self-leveling laser rated around ±1/8 inch at 30 feet, paired with a stable mount, handles most indoor work. Green improves visibility; continuous 360-degree planes reduce repositioning. Neither feature can rescue poor calibration.
A sound target for residential tile and drywall layout.
Sharp, stable lines matter more than an oversized range claim.
A crisp beam can still be quietly out of calibration.
Choose coverage by the work you repeat
More projected lines do not make a laser inherently straighter. They reduce tool moves—and every avoided move protects the shared reference.
Cross-line
One horizontal and one vertical line for backsplashes, single shower walls, cabinet alignment, and drywall fastener marks.
Choose when: most work stays on one surface.Three-plane 360°
Continuous planes carry one datum across walls, floors, and ceilings for full surrounds, partitions, bulkheads, and ceiling grids.
Choose when: full-room layout is routine.Dot or point
Transfers precise locations from floor to ceiling. Useful for track placement and plumb points, but offers less guidance along long courses.
Choose when: point transfer matters most.The right laser for each layout
A secure mount, fine height adjustment, and selectable planes often save more time than Bluetooth controls or a crowded display.
| Work type | Cross-line | Three-plane 360° | Dot / point | Priority feature |
|---|---|---|---|---|
| Kitchen backsplash | ✓ Best fit | ~ Extra coverage | ✗ Limited help | Fine height adjustment |
| Single shower wall | ✓ Strong fit | ~ Useful | ✗ Limited help | Sharp vertical line |
| Full shower surround | ~ Repositioning | ✓ Best fit | ✗ Limited help | Continuous horizontal plane |
| Four-wall drywall layout | ~ Adequate | ✓ Fastest | ~ Point transfer | Selectable planes |
| Dropped ceiling or bulkhead | ~ More moves | ✓ Best fit | ~ Transfer only | Tripod thread and runtime |
| Floor-to-ceiling transfer | ✗ Indirect | ✓ Capable | ✓ Purpose-built | Plumb-point visibility |
A tool rated ±1/8 inch at 30 feet can produce a possible 1/4-inch difference between readings at opposite error extremes. That may disappear in rough framing yet become obvious where a narrow grout joint meets a cabinet, ceiling, or adjacent tiled wall.
Build a reference that survives the job
Calibration, placement, and control marks matter more than beam color. Follow this sequence before adhesive, board, or ceiling work hides the original reference.
Find the controlling reference
Check the floor, ceiling, cabinets, and adjoining surfaces. Decide which finished edge must look level.
Lock the mount in place
Use a tripod, clamp, or magnetic bracket. Set the height with fine adjustment instead of nudging the base.
Check repeat readings
Mark the beam, rotate or reposition the tool, and compare the returning line with the original mark.
Add pencil control marks
Create physical references before work begins so a bumped mount or dead battery cannot erase the layout.
Recheck after any drop or hard impact. A beautifully sharp line can remain visible while the internal reference has shifted. Never let visual crispness substitute for a calibration check.
Spend for control, not decoration
These relative scores show practical importance for typical indoor tile and drywall work—not laboratory performance or brand rankings.
Feature impact on finished work
Prioritize the features that prevent drift, lost references, and mid-layout interruptions.
Buy at your workload
Move up only when additional coverage repeatedly removes setup time.
Red beam: economical and adequate in dim or controlled rooms.
Green beam: easier to see in bright interiors, but not more accurate.
Outdoor work: rent a receiver-compatible rotary system when long-range use is occasional.
Five rules for a straighter finish
The best laser is the simplest model that holds an accurate reference through the full task.
Use cross-line for single surfaces; buy three 360-degree planes for repeated full-room layout.
Target ±1/8 inch at 30 feet, then verify calibration before precision work.
Treat green as a visibility upgrade—not an accuracy upgrade.
Add pencil control marks before tile, board, or framing covers the reference.
Rent specialized long-range equipment when it would rarely leave the case.
Choose the Line Pattern That Matches the Work You Actually Do
The best laser levels for tile and drywall work project the lines your job needs without adding needless setup or cost. A cross-line laser handles most small rooms, while a three-plane 360-degree laser earns its keep when you need continuous lines across several walls, floors, or ceilings.
- Cross-line laser: Projects one horizontal and one vertical line, usually forming a bright cross. It works well for a kitchen backsplash, one shower wall, cabinet alignment, or marking drywall fasteners across a single surface.
- Three-plane 360-degree laser: Projects continuous horizontal and vertical planes around the room. It suits full shower surrounds, suspended ceilings, bulkheads, steel-stud partitions, and layout that must carry around corners.
- Dot or point laser: Transfers specific points, such as moving a floor mark directly to the ceiling. It can help with track placement but provides less guidance for long tile courses.
The practical difference is not simply how many lines appear. It is how often you must move the tool and rebuild the same reference. Every move introduces another chance to change the height, disturb the base, or align the new beam imperfectly with an old pencil mark. Continuous planes reduce those transitions, which matters when several surfaces must agree with one another; on a single wall, the extra planes mainly consume battery power and crowd the workspace with unused light.
Say you are setting a 12-by-24-inch tile backsplash between two cabinets. One horizontal line keeps the second course straight, and one vertical line centers the layout behind the range. A simple cross-line model does that job cleanly; a 360-degree unit would provide more coverage, but it would not make those two lines any straighter.
Now move to a room where you are hanging drywall on four walls and building a dropped ceiling. A 360-degree horizontal plane marks the same elevation around every corner, while two vertical planes help align top and bottom tracks. You spend less time rotating the tool, but only if its base stays fixed and its controls let you select individual planes to save battery power.
That distinction affects both speed and error control. If one ceiling line must meet itself after traveling around four walls, a continuous plane gives you one shared datum instead of four separately established lines. The benefit is consistency, not greater inherent accuracy: a poorly calibrated three-plane laser can spread the same error farther and faster than a basic cross-line model.
Buy for repeat work: If you tile one wall twice a year, a good cross-line laser is usually enough. If you lay out full rooms every week, the extra coverage of a three-plane laser quickly pays back the higher price.
Popular right now

Dreame L50 Ultra Robot Vacuum and Mop

Bose QuietComfort Wireless Bluetooth Headphones with Active Noise Cancellation, Mic, USB‑C Charging, Deep Bass, 24‑Hour Battery – White Smok

Bose QuietComfort Wireless Noise-Cancelling Over-Ear Headphones, Black
As an affiliate, we earn on qualifying purchases.
Use These Five Specs to Separate Useful Tools From Shiny Distractions
The best laser levels for tile and drywall work combine about ±1/8-inch accuracy at 30 feet, a self-leveling range near ±4 degrees, useful indoor visibility, secure mounting, and enough runtime for a work session. Those five specifications affect your finished layout far more than Bluetooth controls or decorative displays.
| Specification | Good Working Target | Why You Notice It |
|---|---|---|
| Accuracy | ±1/8 inch at 30 feet | Controls drift across long tile courses and drywall lines |
| Self-leveling range | About ±4 degrees | Reduces fiddling on uneven floors |
| Indoor range | 30 to 50 feet | Covers most bathrooms, kitchens, and residential rooms |
| Ingress protection | IP54 or better | Helps resist jobsite dust and splashing water |
| Mounting | Magnet, clamp, tripod thread, fine adjustment | Keeps the beam at the exact working height |
| Runtime | One full workday in needed line mode | Avoids shutdown halfway through layout |
Accuracy deserves a closer look. A rating of ±1/8 inch at 30 feet does not mean every reading will miss by exactly 1/8 inch; it describes the permitted error under stated conditions. Across two measurements, one at each opposite error extreme, the visible difference could reach 1/4 inch.
Whether that tolerance is acceptable depends on what the line controls. An eighth-inch deviation may disappear within a rough framing layout, but it can become obvious when a narrow grout joint meets a cabinet, ceiling, or adjacent tiled wall. Longer runs also magnify the visual consequence, so the specification should be judged against the finish work rather than treated as a universal pass-or-fail number.
The self-leveling range answers a different question: how crooked the tool can sit before it can no longer establish level. A wider range makes setup easier on uneven floors, but it does not make the final beam more accurate. Fine adjustment on the mount is often more valuable because self-leveling corrects the beam angle, not its working height; you still need to place that level line precisely on a tile course or ceiling mark.
Range claims also need context. A beam may technically reach 100 feet in a dim warehouse yet disappear against a sunlit white wall at 25 feet. For typical indoor tile and drywall work, a stable, sharp line at 10 to 50 feet matters more than a large number printed on the box.
Specifications also interact. A bright green beam improves visibility but usually demands more energy, while a heavily protected housing may add bulk in a cramped shower. A powerful magnet is useful on steel framing but irrelevant on wood studs unless the kit includes a clamp or plate. Judge the tool as a system: a precise laser paired with a bracket that creeps downward cannot deliver precise layout.
Check what the quoted runtime includes. A tool may last all day with one plane lit but drain much faster with three green planes running together. On a bathroom job, that difference may not matter; during an eight-hour commercial partition layout, a spare battery or USB power option can keep the crew moving.
Pick Green or Red Without Paying for Brightness You Cannot Use
The best laser levels for tile and drywall work often use green beams because your eyes usually see green more readily under bright indoor lighting. A red-beam laser still makes sense in dim rooms, for occasional DIY work, or when lower price and longer battery life matter more than maximum visibility.
Imagine laying pale gray tile beside a window at noon. A thin red line can wash into the glare, leaving you squinting and shading the wall with your hand. A bright green line tends to stand out more clearly against the cool tile surface, which helps you read the layout without repeatedly dimming the room.
The payoff is fewer pauses and fewer ambiguous marks, not a straighter reference. If both tools share the same accuracy rating and calibration quality, the green model is only easier to see. That distinction matters when comparing prices: better visibility can justify the premium in bright occupied spaces, while a red laser may produce the same finished result in a windowless bathroom.
Green diodes often use more power, though modern rechargeable batteries have narrowed the gap. If you run three planes at full brightness, that glowing green cage can pull down a small battery faster than expected. Select only the plane you need and lower the brightness when possible; usable runtime beats leaving every beam blazing.
Power-system tradeoffs extend beyond runtime. A proprietary rechargeable pack can deliver strong output and convenient charging, but a dead or discontinued pack may sideline the tool. Replaceable batteries are easy to source, yet they create recurring cost and can leak during storage. For daily work, a spare compatible pack has real value; for occasional use, common batteries may be simpler.
Beam thickness matters alongside color. A fuzzy line that grows wide across the room makes it hard to decide whether your pencil mark belongs on the upper edge, lower edge, or center. For repeatable results, always reference the center of the laser line, and keep the tool close enough that the beam remains clean and narrow.
This is why maximum brightness is not always ideal. On glossy tile, an overly intense line can flare, reflect, or appear wider, making its center harder to judge. The best setting is the lowest brightness that remains easy to read at the working distance.
Bright color does not turn an indoor laser into an outdoor layout tool. Sunlight can swallow both red and green beams, even when the box advertises a long range. If you routinely work outside or across large commercial spaces, choose a model compatible with a laser receiver, or rent a rotary laser and receiver rather than chasing a nearly invisible line.
Set Up Your Laser So the First Tile Course Stays Honest
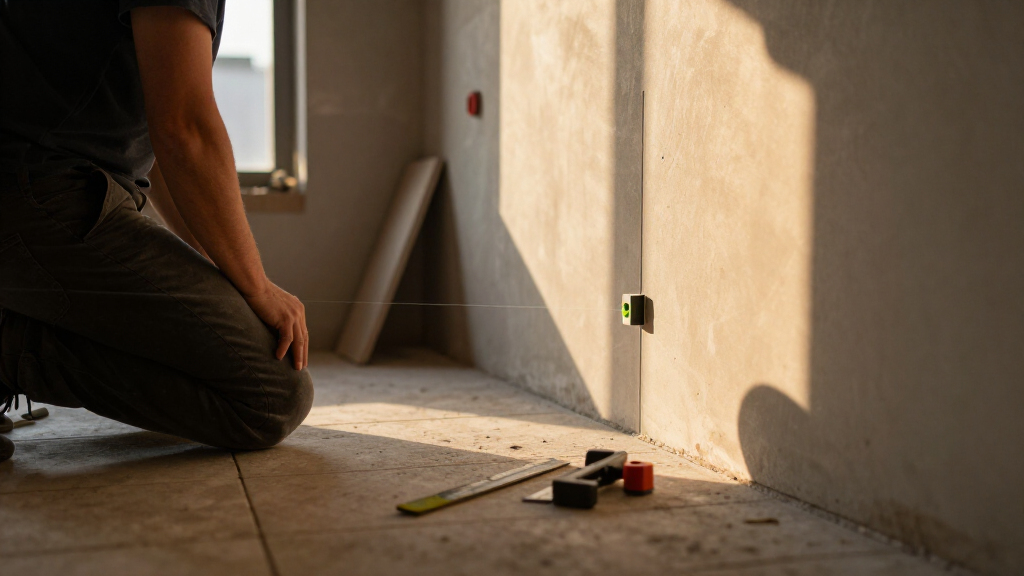
- Find the controlling reference. Check the tub, shower base, countertop, or floor with a physical level before placing the laser. Do not assume the surface below your tile is level.
- Build the layout from the high point. Measure a full tile plus the planned grout joint, then place your reference line so the bottom course can be trimmed where needed.
- Center the pattern. Mark the wall center, account for focal points such as niches and faucets, and check the cuts at both ends before spreading mortar.
- Mount and verify the laser. Let the pendulum settle, confirm that the self-level warning has stopped, and compare the beam with a second measurement.
- Protect the reference. Add light pencil marks at several points so you can recover the layout if the laser moves, loses power, or gets bumped.
For tile work, the laser is a reference tool, not a substitute for layout. Start from a measured control line instead of blindly following the floor, tub, or countertop below. If the tub rim rises 1/4 inch from left to right, copying it will carry that slope through every grout joint.
Starting from the highest point protects the planned height of the first full course. If you start from the low point instead, the rising surface may leave too little room for a full tile at the opposite end, forcing a pinched cut or pushing the whole layout upward. The tradeoff is that the bottom row must be cut individually, but those controlled cuts are usually less noticeable than a visibly sloping field of grout joints.
Suppose you are setting 3-by-12-inch subway tile above a tub. You find the highest point on the rim, allow space for a flexible sealant joint, and project a line one tile course above that point. The lower tiles receive small, controlled cuts while every course above stays level and visually calm.
Centering also involves judgment. Perfectly equal cuts at both ends can place a grout joint through the center of a faucet or leave an awkward sliver beside a niche. Dry-lay or calculate several courses before committing, then decide which feature should control the eye. Symmetry is useful, but alignment with the room’s focal points often matters more.
Use spacers and a physical straightedge even with the beam glowing across the wall. Tile faces can vary, spacers can compress, and mortar thickness can push one piece slightly proud. The laser gives you a trustworthy horizon; your hands, wedges, and straightedge still control the finished surface.
Pencil marks are insurance because the laser creates a temporary reference. A bump may shift it without triggering an out-of-level warning if the tool settles into a new level position. Permanent control marks let you distinguish a moved tool from a crooked tile before wet mortar hardens.
Wear eye protection and gloves while cutting tile, and use wet cutting or dust extraction suited to the material. Silica dust can hang in the air like pale smoke, so follow the tool maker’s dust-control instructions and local workplace rules. The next challenge is carrying that same discipline into faster, rougher drywall work.
Make Drywall Layout Faster Without Trusting the Beam Blindly
A laser speeds drywall work when you use it to align tracks, transfer framing lines, mark fastener rows, and establish ceiling heights. It does not confirm that framing is structurally sound or code-compliant, so check the substrate, fastening schedule, fire-rated details, and approved drawings before hanging sheets.
Its main advantage is preserving a common reference across surfaces that are difficult to measure between. A vertical plane can connect a floor mark to a ceiling mark, while a horizontal plane can hold one elevation around an irregular room. That reduces accumulated measuring error, but it also makes a mistaken starting mark easy to reproduce everywhere. Verify the controlling dimension before projecting it through the space.
On a simple wall, place the laser so a vertical line runs down the center of a hidden stud. Make small pencil ticks across the adjacent floor or ceiling before covering the framing. After you lift the sheet, those marks help you recover the stud centerline instead of firing screws into empty space.
The location of that line should come from the actual stud, not from assumed spacing. Framing can shift around openings, corners, blocking, or repairs, and a sheet can hide those exceptions instantly. Marking verified centers takes slightly longer before hanging, but it reduces missed screws, damaged board faces, and searching once the panel is in place.
A 360-degree laser becomes especially useful for ceiling work. Set the horizontal plane at the planned elevation, then carry that height around pipes, ducts, door openings, and corners without moving the tool. In a basement with a wavy slab, the glowing line stays level even while the floor rises and falls beneath your boots.
That level plane exposes another tradeoff: a fixed ceiling elevation may leave different clearances below beams, pipes, or the floor structure because the surrounding construction is not level. Finding the conflict before installing track gives you time to revise the elevation or obtain approval; discovering it after board is hung turns a layout issue into demolition.
This works well for non-load-bearing layout, but only if the proposed wall location has been checked for wiring, plumbing, HVAC, and structural conflicts. Turn off power before opening walls near electrical circuits, verify de-energization with an appropriate tester, and wear eye and respiratory protection when cutting board. Licensed electricians should move circuits, and structural changes belong with qualified professionals and any required permit review.
Do not use the laser line as a screw target without confirming what lies behind the board. A line can identify a stud, but it cannot see a water pipe drilled close to the face or a cable missing a protective plate. Keep the approved screw length and spacing handy, and follow local requirements for fire assemblies, moisture-resistant board, and fastening patterns.
The beam shows alignment, not permission. A straight line does not override approved plans, fastening schedules, utility checks, or building code requirements.
Check Calibration in Ten Minutes Before a Small Error Spreads
You can check laser calibration by projecting a line on a wall, rotating or repositioning the tool, and comparing repeat readings from the same distance. Perform this before a precision layout, after a drop, and whenever the pendulum sounds or feels different. A self-leveling mechanism cannot correct an internal calibration error.
The purpose of the check is to separate two problems that can look identical on the wall. Self-leveling compensates for a slightly tilted base within the tool’s operating range, while calibration determines whether the projected beam is truly level or plumb after the pendulum settles. A laser can appear to operate normally and still reproduce the same incorrect angle every time.
For a horizontal check, place the laser about 15 to 30 feet from a wall and mark the beam height. Rotate the tool 180 degrees without changing its platform height, let the pendulum settle, and mark the new beam position. Compare the difference with the manufacturer’s stated tolerance for that distance.
Use the maker’s exact procedure when available because rotation point, wall spacing, and error calculation vary among designs. A difference between marks is not automatically the tool’s full error; some procedures require dividing the observed gap or comparing marks on two opposing walls. The manual’s tolerance and method belong together.
You can check a vertical line against a plumb reference, such as a properly suspended plumb bob in still air. Project the vertical beam beside the string and compare it from top to bottom. If the line touches at the ceiling but wanders away near the floor, stop using it for layout until you follow the maker’s calibration or service procedure.
Distance makes the test more revealing because angular error creates a larger separation over a longer run. A short bathroom wall may hide a problem that becomes obvious across a large room. At the same time, an improvised test on an unstable floor or vibrating tripod can falsely suggest failure, so repeat an unexpected result before condemning the tool.
A real jobsite bump can be surprisingly gentle: someone slides a bucket under the tripod, nudges one leg, and the beam shifts an eighth of an inch. Pencil control marks reveal that movement immediately. Without them, you may set two more rows of tile before the crooked grout line catches your eye under a raking work light.
A moved laser is not necessarily out of calibration. If the beam no longer meets the control marks, first check the mount, tripod, and working height; then repeat the calibration test if needed. This distinction prevents unnecessary service while ensuring that repositioning the tool does not silently replace the original datum.
Lock the pendulum before transport and store the tool in its case. Keep mortar dust off the windows with a soft, dry cleaning method approved by the manufacturer; scratched glass can scatter the beam into a fuzzy halo. The IEC 60529 IP Code defines protection categories such as IP54, but an IP54 tool is not waterproof and should not be rinsed under a tap [1].
Spend More Only When the Job Will Pay You Back
Choose a DIY-grade laser for occasional single-room work, a mid-range unit for regular renovation projects, and a pro-grade multi-plane system for daily layout. Typical price bands run about $50–$150, $150–$300, and above $300, but line quality, service support, batteries, and mounting hardware matter more than price alone.
The useful question is not whether the expensive model has more features, but whether those features remove a repeated cost. Continuous planes can eliminate repositioning, a fine-adjustment base can shorten setup, and replaceable batteries can prevent downtime. If a feature saves only a few minutes on one personal project, its payback is weak; if it saves those minutes every morning across a crew, the economics change quickly.
A homeowner tiling one laundry-room backsplash may get full value from a compact cross-line laser with a clamp. If that tool produces a sharp line, holds calibration, and sits securely, spending another $250 will not improve the grout joints. Put the savings toward a better tile cutter, dust control, or quality setting materials.
The lowest purchase price can still be poor value if the bracket slips, the controls make it difficult to select one line, or calibration service costs nearly as much as replacement. Conversely, occasional users may not benefit from a premium repair network because the tool sees little wear. Match durability and support to exposure, travel, and frequency of use rather than buying them as abstract signs of quality.
A drywall contractor laying out partitions every morning has a different calculation. A three-plane green laser can project floor, wall, and ceiling references from one position, cutting repeated measuring and tool rotation. Add a fine-adjustment base, spare battery, and repair support, and the higher purchase price starts buying real labor savings.
For professional use, downtime belongs in the price calculation. A cheaper laser that cannot be serviced locally may cost more than the initial savings if a crew waits for replacement. Compatibility also matters: shared battery platforms, common tripod threads, and readily available brackets can make a modestly priced tool more useful than a feature-rich system with proprietary accessories.
Rent when you need long outdoor range, receiver operation, or a rotary laser for one unusual project. Buying a specialized tool that spends 350 days a year in a cabinet is poor use of money, especially when batteries age during storage. A rental unit also lets you test whether a feature fits your workflow before committing to a pro-grade kit.
Rental has its own tradeoff: you must allow time to inspect calibration, learn the controls, and confirm that the receiver, bracket, charger, and batteries are included. For a tightly scheduled job, availability and familiar operation may justify ownership even when annual use is limited.
Inspect the package, not just the laser head. A weak bracket can sag on a corner bead, and an oversized tripod can crowd a tight shower stall. The most useful kit includes a stable mount, compatible thread, protective case, and practical power system—the plain pieces that keep a precise beam where you put it.
Protect Your Eyes, Your Tool, and the Finished Layout
Use a laser level safely by keeping the beam below or above normal eye height, warning other people in the room, and never staring into the aperture or reflected beam. The U.S. Food and Drug Administration advises users not to aim lasers at people and not to look directly into a beam [2].
Placement is the first control because it reduces the chance of exposure without depending on everyone remembering where the beam is. A laser set near eye height may cross the face of someone who walks through a doorway or climbs a ladder. Moving it above or below that zone may require a little more setup, but it makes an accidental direct view less likely.
Glossy tile, mirrors, chrome trim, and glass shower panels can reflect the line in unexpected directions. A beam projected harmlessly toward the wall may bounce from a polished faucet and flash across your face. Reposition the tool, cover reflective surfaces when practical, and keep children and bystanders outside the active work area.
Reflections are especially deceptive because the visible line on the work surface encourages attention toward the layout rather than toward its return path. Check the entire projected plane after changing the tool position or installing a reflective fixture. A beam that was safe during substrate preparation may behave differently once glass, metal, or polished tile enters the room.
Laser glasses are not automatic eye protection. Many tinted glasses simply improve line contrast; they do not block every wavelength or make deliberate viewing safe. Read the tool label and manual, use properly rated protection when the work requires it, and treat the beam with the same steady respect you give a spinning grinder wheel.
Contrast glasses can even make a weak beam easier to follow while creating a false sense of protection. Their convenience does not justify using a brighter setting than necessary or looking toward the aperture. Administrative controls, careful placement, and avoiding exposure remain the foundation of safe use.
Jobsite protection matters too. Keep the laser away from wet-saw spray, fine gypsum dust, falling offcuts, and the path of extension cords. An IP54-rated housing offers useful resistance to dust and splashing water under the defined test conditions [1], but it does not make the tool safe for submersion or careless cleaning.
Protection ratings describe controlled test conditions, not every combination of slurry, impact, dust, and aging seals encountered on a jobsite. Mounting the laser outside the wet-saw plume is more reliable than expecting the housing to survive repeated contamination. It also keeps residue off the optical window, where even a thin film can blur the reference line.
At the end of the shift, lock the pendulum, wipe the housing, check the window, and recharge or remove batteries according to the manual. That two-minute habit protects calibration and prevents the sour smell and crusty contacts of a leaking disposable cell. A laser earns trust through repeatable checks and careful handling, not through its color or price tag.
Frequently Asked Questions
What type of laser level works best for shower tile?
A green self-leveling cross-line laser handles one or two shower walls, while a three-plane 360-degree model makes it easier to carry courses around a full enclosure. Choose roughly ±1/8-inch accuracy at 30 feet, a fine-adjustment mount, and an appropriate ingress-protection rating for the damp, dusty workspace.
Can you use a laser level instead of a physical spirit level?
A laser is excellent for layout and reference lines, but it does not replace a spirit level or straightedge in every task. You still need physical tools to check individual tiles, studs, tub rims, substrate flatness, and surfaces hidden from the beam.
Is a green laser more accurate than a red laser?
Beam color does not determine accuracy. Green usually appears brighter to your eyes indoors, while accuracy depends on the laser’s calibration, optics, pendulum, mounting stability, and stated tolerance.
How often should you check laser-level calibration?
Check calibration before precision tile or drywall layout, after any drop or hard impact, and whenever readings conflict with known references. Daily trade use warrants more frequent checks than occasional DIY use, especially when a small error could spread across a long wall.
Can you use an indoor laser level outside?
You can use it outside at short distances in shade, but sunlight quickly overwhelms visible beams. For reliable outdoor layout, use a receiver-compatible tool or rent a rotary laser with a detector instead of relying on beam color alone.
Where should you place a laser level when hanging drywall?
Place the tool where its beam can reach the working surface without sitting in the path of sheets, ladders, cords, or falling scraps. Use the vertical line to mark verified stud centers and the horizontal plane for ceiling or track elevations, then save those references with pencil ticks before covering the framing.
Conclusion
Your smartest purchase is the laser whose line pattern, accuracy, mount, and runtime match the work already on your calendar. For most homeowners, that means a reliable self-leveling cross-line model; for crews carrying layout around whole rooms, a three-plane unit can return its cost through faster setup and fewer measurements.
Whatever you buy, perform a ten-minute calibration check, lock the pendulum during transport, and leave pencil control marks before work begins. When the last tile clicks into place and the grout line runs straight into the corner without climbing or sagging, that quiet strip of light has done exactly what you paid it to do.