
TL;DR

Get business pricing on tools and workshop supplies
- Business-only prices and quantity discounts
- Tax-exempt purchasing
- Multiple users, one account, clear invoices
The best cordless power tools for installing and finishing ceiling textures depend on the material and method: use a torque-capable drill or mud mixer for preparation, a compatible hopper-and-compressor rig or approved sprayer for application, and a dust-managed sander and raking light for repairs and inspection. Check material compatibility before spraying, plan spare batteries for demanding work, and protect the room and your lungs from dust.
A ceiling texture job can go sideways before the first blob hits the drywall: the mixer stalls, the sprayer clogs, or a cord catches your ladder while you’re holding a wet hopper overhead. Cordless tools can make the work easier where outlets are scarce or cords would snag, but the battery label alone does not tell you whether a tool can handle your material.
This guide helps you match tools for installing ceiling textures to the task: mixing, spraying, smoothing repairs, lighting the surface, and controlling dust. You’ll learn what to compare, where cordless gear makes sense, and when a compressor-based rig or rented equipment is the better fit.
Think of the setup as a small crew, not one magic tool. A mixer prepares the material; an application tool puts it on the ceiling; a light shows the flaws you missed. Get those roles right, and your finish has a better chance of looking even under the hard sideways light from a window.
Choose the applicator for the texture method and verify that the manufacturer approves your material.
Use a torque-capable, variable-speed mixer with a suitable paddle; faster mixing is not always better.
Plan spare batteries for heavy mixing or spraying, while accounting for the extra weight of larger packs.
Treat sanding as a dust-producing repair task: mask the room, use suitable extraction and PPE, and check rules before disturbing older coatings.
Use sideways work-light placement to reveal ridges and missed spots before the finish is done.
Field Guide / Ceiling Finishes
Best Cordless Power Tools for Installing and Finishing Ceiling Textures
Build the setup around the material and method. Match mixing, application, repair, lighting, and dust control to the job, then plan for battery demand and overhead handling.
01 / Build the crew
Match each tool to one part of the job
No single cordless tool handles mixing, texture application, repair sanding, and inspection equally well. Start with the finish and work backward.
Torque-capable mixer
Choose variable speed, a compatible paddle, and a duty cycle suited to the batch size. Controlled mixing helps avoid air, splashes, and a stalled tool.
Compatible applicator
Confirm material approval, tip or nozzle options, output, and method. A paint sprayer is not automatically a texture machine.
Drywall sander
Useful for patches and high spots. Compare reach, weight, head movement, abrasives, and dust-extraction connection.
Work light
Place light low and sideways across the ceiling. Raking light makes ridges, missed spots, and sanding marks easier to see.
02 / Tool fit comparison
Check capability before you commit
Compare the work each category can do, then confirm specifications for the exact tool, material, and project scale.
| Tool category | Best suited to | What to compare | Watch for |
|---|---|---|---|
| Cordless drill or mud mixer | Preparing joint compound or texture material | Torque, speed control, paddle compatibility, balance, duty cycle | ~ Light-duty drills can bog down in thick mixes |
| Hopper gun + compressor | Common sprayed texture methods | Material instructions, nozzle options, compressor capacity, cleanup | ✓ Air supply is part of the setup |
| Cordless airless sprayer | Only manufacturer-approved sprayable coatings | Approved materials, viscosity, tip size, output, cleaning procedure | ✗ May not handle thick compound or hopper techniques |
| Drywall sander + extractor | Limited repairs, feathering, and high spots | Weight, reach, extraction connection, filtration, abrasive | ~ Portable extraction may not capture all dust |
| Work light | Surface inspection before the finish is done | Brightness, placement, stability, battery compatibility | ✓ Sideways light reveals unevenness |
Buy for the actual finish and workload.
For a small room with a couple of patches, a drill, sander, extractor, and light may cover the work. Repeated mixing and spraying across several ceilings can drain batteries and strain DIY-grade tools. Compare real output and duty cycle with a compressor-based rig or rental.
03 / Buying checklist
Five checks before you buy or rent
Use the workload, material, handling, and cleanup needs to narrow the options.
Confirm the method
Decide whether the finish is sprayed, rolled, or hand applied. Verify that the applicator and material work together.
Match material limits
Check approved materials, viscosity limits, tips, output, paddle, and speed guidance on product documentation.
Size for the workload
Estimate batches and ceiling area. Review runtime, duty cycle, and charged spare batteries for demanding work.
Test overhead handling
Consider weight, grip, balance, vibration, and reach. Larger packs can add runtime and fatigue at the same time.
Plan protection and cleanup
Mask the room, use suitable extraction and PPE, and clean tips, hoses, hoppers, and paddles promptly as instructed.
Prepare the surface and access
Remove loose material, repair defects, and prime or seal when appropriate. Use stable ladder or scaffold access and avoid sideways reaches.
04 / Jobsite tradeoffs
Where cordless helps—and what it asks of you
Battery platforms and compact equipment are improving. Performance still depends on the particular tool, material, and task.
Relative planning cues, not measured product ratings. Actual runtime and dust capture vary by tool, battery capacity, temperature, material, and technique. Use charged spare batteries, suitable respiratory and eye protection, and thorough masking.
05 / Trace the finish
From bare surface to final inspection
Good results come from a sequence of compatible steps, stable access, and timely cleanup.
Prepare
Mask the room, check the substrate, repair defects, and set up stable access.
Mix
Use the approved paddle and speed for a consistent, workable blend.
Apply
Use an applicator approved for the exact material and chosen texture method.
Refine
Sand only where needed, with extraction, room protection, and suitable PPE.
Inspect
Use sideways light to find flaws, then clean equipment promptly as directed.
Match each cordless tool to one part of the job
The best cordless power tools for installing ceiling textures are the ones suited to a specific step: a capable mixer prepares material, a compatible applicator puts it on the ceiling, a sander handles limited repairs, and a work light exposes defects. No single cordless tool does all four jobs well.
That distinction matters because texture methods are not interchangeable. A hopper gun and compressor are common for sprayed textures, while other finishes may be rolled or applied by hand. Orange-peel, knockdown, popcorn, and hand-applied textures each call for different materials and techniques, so check the product label before choosing the applicator.
For a small bedroom with two patched spots, your useful setup may be a drill, sanding attachment or drywall sander, vacuum, and bright work light. A whole-house project with several ceilings calls for a different plan: continuous mixing and spraying can drain batteries and wear out DIY-grade tools. Compare actual output, duty cycle, and material compatibility before you buy.
Start with the finish and work backward. If you’re matching an existing knockdown ceiling, for example, the application and timing of the knockdown pass matter as much as the power source. The right tool makes texture work easier, but technique and preparation still decide what the ceiling looks like when the light hits it.
Popular right now

Bose QuietComfort Wireless Bluetooth Headphones with Active Noise Cancellation, Mic, USB‑C Charging, Deep Bass, 24‑Hour Battery – White Smok

KitchenAid Classic Series 4.5 Quart Tilt-Head Stand Mixer K45SS, Onyx Black

KitchenAid Artisan Series 5-Quart Tilt-Head Stand Mixer, Dried Rose (KSM150PS)
As an affiliate, we earn on qualifying purchases.
Choose a mixer that can turn thick compound without wearing you out
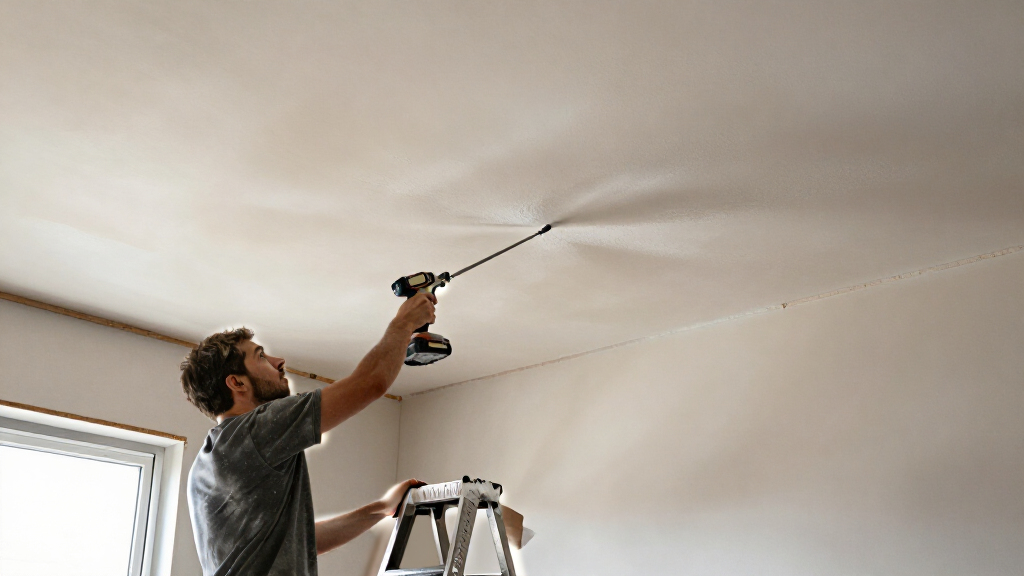
A cordless drill or mud mixer for ceiling texture needs enough torque, controlled speed, and a paddle approved for the material; a lightweight drill made for driving screws may bog down in thick compound. For overhead work, comfortable weight and balance count as much as raw power because you lift, carry, and reposition the tool repeatedly.
Use the mixing speed and procedure on the compound or texture product label. Spinning too fast can whip air into the mix and splash material up the sides of the bucket. You want a consistent, workable blend, not a foamy mess that behaves differently through the applicator.
Suppose you’re mixing a single bucket for a laundry-room repair. A suitable drill with variable speed may be easier to handle and store than a dedicated mixer. If you’re preparing batch after batch for a large ceiling, a purpose-built mixer may handle the workload better; check its recommended duty cycle and paddle compatibility rather than assuming a bigger battery solves everything.
Battery size creates a tradeoff. A larger pack may keep you working longer, but it adds weight at the handle. If you’re holding the mixer above a bucket or moving it around a tight room, a lighter compatible battery can feel like the difference between steady control and a tired wrist.
Check the sprayer before you put ceiling texture through it
A cordless sprayer can apply ceiling texture only when its manufacturer approves the specific material and the tool’s limits fit the job. Many cordless paint sprayers are built for thinner coatings, not thick joint-compound textures, so check approved materials, viscosity limits, tip sizes, output, and cleaning instructions first.
Conventional hopper guns usually connect to an air compressor and handle common texture methods. A battery-powered airless sprayer may work for compatible sprayable coatings, but it does not automatically replace a hopper gun for standard texture compound or application techniques. If your plan depends on a particular finish, confirm that the applicator can produce it before you buy.
Imagine coating a garage ceiling with a cordless paint sprayer that is not rated for the thick mix. Material can clog the tip, strain the pump, and leave you with an uneven pattern and a long cleanup. A cordless label does not make a paint sprayer a texture machine. For an extensive ceiling or continuous spraying, compare practical runtime and output with a compressor-based setup or consider renting the proper rig.
Texture dries in awkward places: tips, hoses, hoppers, and paddle crevices. Clean the equipment promptly according to its manufacturer’s instructions. That cleanup is part of the spraying job, not a chore you can safely postpone until tomorrow.
Use sanding tools for repairs, and keep the dust under control
A cordless drywall sander is most useful for smoothing repairs and high spots, not automatically for removing every textured ceiling. Compare its weight, reach, head movement, abrasive compatibility, and dust-extraction connection, then pair it with suitable respiratory and eye protection.
Fine sanding dust hangs in the air and coats nearby surfaces. Mask the room, use a suitable dust extractor and filtration, and follow the product’s safety information and local requirements. Portable extraction can help, but it may not capture all dust, so don’t treat the vacuum as a substitute for protective equipment.
For example, a homeowner feathering the edge of a small ceiling patch can work carefully with an appropriate sander and extraction setup, checking the surface as they go. Sanding an entire textured ceiling is a much larger, dustier job and can damage the underlying finish. Before disturbing older coatings, check applicable rules and seek qualified advice where required.
Access matters too. Use a stable ladder or scaffolding, keep your balance, and avoid reaching sideways with a running sander. If you can’t hold the tool comfortably in a controlled position, adjust the access setup or get help; an awkward overhead reach is a poor time to discover the tool is too heavy.
Let a bright work light show flaws before the texture dries
A well-positioned work light helps you see uneven application, missed spots, and sanding marks before the job is finished. Compare brightness, beam spread, positioning options, runtime, and battery compatibility, then aim the light across the ceiling rather than straight at it.
That low, sideways beam—often called raking light—throws small ridges into sharp relief. A ceiling that looks smooth under a light directly below you may show lap marks when afternoon sun cuts across it from a window. This is why lighting is a finishing tool, not just a way to see in a dark room.
Consider a patched hallway ceiling where the old texture catches a narrow strip of daylight. Move the work light along the surface while you inspect the repair. You may spot a high edge that needs a small correction before applying the finish, saving yourself from seeing it every time you walk down the hall.
Position lights so they don’t create a trip hazard or interfere with your ladder. A cordless light can simplify placement where power outlets are scarce and cords would snag underfoot, but keep an eye on its battery during a long inspection. A light that dies halfway through does not help you check the last room.
Plan the batteries around the work, not the package claim
There is no universal runtime for cordless texture work: the tool, battery capacity, material load, temperature, and working technique all affect how long a charge lasts. Mixing and spraying can draw substantial power, so plan charged spares for demanding tasks and check that packs fit the other jobsite tools you use.
Brushless motors and higher-capacity batteries have expanded what cordless platforms can handle, but they do not erase the difference between a short repair and continuous production. A pack that lasts through light sanding may run down faster under a heavily loaded mixer. Check manufacturer specifications and consider how the tool performs under the task you actually expect it to do.
On a single patched ceiling, one charged battery and a backup may be enough. On several rooms, a battery rotation plan can keep a mixer moving while another pack charges. If the work requires uninterrupted high output, weigh the cost and downtime of spare packs against a corded mixer or compressor-based rig.
Balance affects runtime in your arms, too. A bigger battery adds weight, and that matters when the tool is held overhead or carried up stairs. Choose enough capacity for the job while keeping the tool manageable; short breaks and stable access equipment help you maintain control as fatigue builds.
Use this checklist before buying or renting the setup
Choose cordless ceiling-texture equipment by checking the method, material compatibility, workload, handling, and cleanup before you compare prices. A short checklist can prevent the costly mistake of buying a tool that works beautifully with paint but cannot handle your texture material.
- Name the finish and material. Check the product label and application directions for your texture type.
- Match the applicator. Confirm whether the method calls for a hopper gun and compressor, a compatible sprayer, a roller, or hand tools.
- Check capacity and control. For a mixer, look at torque, variable speed, paddle fit, weight, and duty cycle.
- Plan runtime and access. Estimate the work area, charged batteries, safe ladder or scaffold positions, and where power outlets are available.
- Prepare protection and cleanup. Set out masking, drop cloths, eye protection, suitable respiratory protection, extraction, and the cleaning supplies the tool maker specifies.
- Decide whether to rent. For a large ceiling or a specialized sprayer you’ll use once, rental may beat buying and storing a tool you rarely need.
Take a garage ceiling as a practical example: if it is large and needs continuous spraying, a compatible hopper-and-compressor setup may make more sense than a small battery sprayer. For a couple of patches in a spare room, a cordless drill, careful hand application, a sander with dust control, and a raking light may cover the work without a major purchase.
Room protection belongs on the checklist alongside the tools. Cover floors and furnishings, mask edges, and keep your equipment and cords out of walking paths. For electrical work near fixtures, shut power off at the breaker and verify the circuit is de-energized; hire a licensed electrician for wiring changes. Structural or roof changes also call for licensed professionals and any required permits.
Frequently Asked Questions
Can I apply ceiling texture with a cordless tool?
Yes, depending on the method and material. A cordless mixer can prepare material, and some battery sprayers handle products their manufacturers approve; many conventional texture applications still use a hopper gun and compressor.
Can a cordless paint sprayer spray drywall texture?
Not necessarily. Many paint sprayers are designed for thinner coatings, so check approved materials, viscosity limits, tip options, and cleaning instructions before loading one with texture. Thick compound can clog or damage equipment that is not made for it.
Do I need a compressor for ceiling texture?
A conventional pneumatic hopper gun generally needs an air compressor. Some electric or battery sprayers use no compressor, but they may handle different materials and application methods.
How long will a cordless tool battery last?
Runtime depends on the tool load, material, battery capacity, temperature, and how you work. Keep charged spares for demanding mixing or spraying, and don’t assume a battery that handles sanding will last as long under a loaded mixer.
Can I sand an entire textured ceiling with a cordless drywall sander?
A drywall sander can help with repairs or high spots, but whole-ceiling sanding creates heavy dust and can damage the finish. Confirm removal is appropriate, use dust control and PPE, and check applicable requirements before disturbing older coatings.
Conclusion
Choose your ceiling-texture tools by working backward from the finish and material: mix at controlled speed, apply with a compatible system, and use light and dust-managed sanding to inspect and refine the surface. Keep batteries, access equipment, room protection, and cleanup in the plan from the start.
The right setup should feel steady in your hands and leave the ceiling even under a sideways beam of light. If the job needs specialized gear for one big run, rent it—and let the texture dry without a clogged hose waiting for you tomorrow.