
TL;DR

Get business pricing on tools and workshop supplies
- Business-only prices and quantity discounts
- Tax-exempt purchasing
- Multiple users, one account, clear invoices
A power miter saw makes accurate, repeatable cuts when you use a sharp blade rated for the material, support and secure the stock, verify the saw’s angles with a square and test cut, and let the blade stop before moving the work. Disconnect power before cleaning, adjusting, or changing blades, and recheck alignment after moving the saw or swapping a blade.
A board can look perfectly square on the saw and still leave a hairline gap that runs the full length of your trim joint. That small miss often comes from a fence that shifted, a blade that wandered, or stock that crept during the cut—not from your tape measure.
Power miter saws make repeatable crosscuts and angled cuts in wood, but a good result depends on the whole setup: a blade suited to the material, a stable saw, proper support, and a controlled cut. You’ll learn how to check those pieces, make cuts safely, and spot the maintenance issues that cause burning, rough edges, and stubborn gaps.
Use your saw’s manual for its capacity, approved materials, adjustment procedure, and safe cutting methods. A model’s features and limits vary, and a careful test cut on scrap can save an expensive length of finished trim.
Match blade diameter, arbor, speed rating, and material approval to the saw and the cut.
Support long stock at table height, keep it flat against the fence, and clamp it when practical.
Verify important angles with a square or gauge and make a test cut in matching scrap.
Let the blade reach full speed, cut smoothly, and wait for it to stop before moving stock or offcuts.
Disconnect power before maintenance, and recheck alignment after moving the saw or changing blades.
Workshop Field Guide / Accuracy + Care
How to Properly Use and Maintain Power Miter Saws for Accurate Cuts
Accurate, repeatable cuts come from the whole setup: a suitable sharp blade, stable support, verified angles, controlled cutting, and regular care. A square reading on the saw is only a starting point; a test cut in matching scrap reveals how the parts work together.
01 / The reliable cut
Five habits that prevent the hairline gap
A joint can miss even when the tape measure is right. Keep the board still, the references clean, and the angle proven.
Match blade diameter, arbor, speed rating, and material approval to the saw and job.
Support long stock at table height; hold it flat to the fence and clamp when practical.
Verify important angles with a square or gauge, then test on matching scrap.
Reach full speed, cut smoothly, and let the blade stop before moving stock or offcuts.
Disconnect power before cleaning or adjustment; recheck alignment after a move or blade change.
02 / Choose the setup
Capacity first. Blade fit always.
A larger blade alone does not make a more accurate cut. Choose a saw that can handle the stock in one stable, controlled pass.
Saw type / 01
Basic miter
Handles crosscuts and miter angles. A compound model adds bevel cuts; a sliding compound model reaches wider stock within its rated capacity.
Blade / 02
Match the material
Use a sharp, undamaged blade approved for the saw and material. Tooth count and geometry affect finish; a wood blade is not automatically suitable for plastic or metal.
Finish / 03
Let the edge decide
A suitable finer blade can reduce tear-out on visible trim. A coarser blade may suit framing. Neither makes a dull or damaged blade safe or accurate.
03 / Make the setup true
Build a stable reference
The saw, fence, table, and workpiece establish the cut angle. A chip or sagging board can undo a careful measurement.
01 / Stabilize
Secure the saw
Use a stable, level surface and anchor the saw as its manual directs, especially on a temporary stand or bench.
02 / Support
Keep stock level
Support long or wide stock at table height. Keep it flat against fence and table; clamp when practical to prevent movement.
03 / Verify
Check the angle
Clean the fence and table, confirm alignment with a square or angle gauge, and test on scrap from the same material.
04 / Controlled cutting sequence
Move through the cut with purpose
Follow the saw manual for narrow pieces, bevels, compound angles, and sliding cuts. Methods vary by model.
Keep the guard in place and working. Never reach behind or around a moving blade. Use only materials and cutting methods approved for your saw and blade.
05 / Keep accuracy in service
Clean, inspect, then recalibrate
Dust, wear, or a shifted reference can affect operation and alignment. Disconnect power before cleaning, adjustment, or blade changes.
06 / Trace the result
Accuracy is a chain
When a cut is wrong, trace the setup from the material back to the reference.
Choose a blade and saw that match the cut
Choose a miter saw and blade that fit the material, stock width, and cut you need; a larger blade alone does not make the cut more accurate. A basic saw handles crosscuts and miter angles, a compound model adds bevel cuts, and a sliding compound saw reaches wider stock within its rated capacity. Check the manual before buying or fitting a blade. Capacity matters because a saw that cannot cut the stock in one controlled pass may tempt you to reposition the work, creating another opportunity for it to shift.
Blade diameter, arbor size, speed rating, and approved material must match the saw. For wood, a higher tooth count generally leaves a smoother finish, while tooth geometry also affects how a blade cuts. The right choice depends on whether you’re trimming painted molding, crosscutting framing lumber, or sizing plywood. A blade meant for wood is not automatically safe for plastic or nonferrous metal. A finish blade may reduce cleanup on visible edges, while a faster, coarser blade may be more practical for rough framing where the edge will be hidden. Neither choice compensates for a dull or damaged blade.
| Task | What to check | Typical tradeoff |
|---|---|---|
| Framing lumber | Blade approved for the saw and material | Fast cuts may leave a rougher edge |
| Finish trim | Sharp blade with tooth geometry suited to clean wood cuts | Smoother cuts can take longer |
| Wide boards | Sliding capacity within the saw’s stated limits | More reach adds setup and alignment checks |
For example, when you cut painted door casing, a dull or coarse blade can tear fibers that show through the finish. A finer blade may help, but it still needs the correct diameter, arbor, and speed rating. If you only need one wide-board job and don’t own a suitable sliding saw, renting can make more sense than buying a tool you’ll rarely use. The practical choice is the saw and blade that handle the actual stock in a stable, supported setup, with enough quality at the cut edge for its intended use.
Never install a cracked, warped, dull, or unsuitable blade. Check the blade and saw manuals for material approval. Once the blade fits the job, the next question is whether your saw and workpiece are sitting still.
Popular right now

KitchenAid Artisan Series 5-Quart Tilt-Head Stand Mixer, Dried Rose (KSM150PS)

KitchenAid Classic Series 4.5 Quart Tilt-Head Stand Mixer K45SS, Onyx Black

Dreame L40 Ultra Gen 2 Robot Vacuum and Mop
As an affiliate, we earn on qualifying purchases.
Set up the saw so your marks stay true
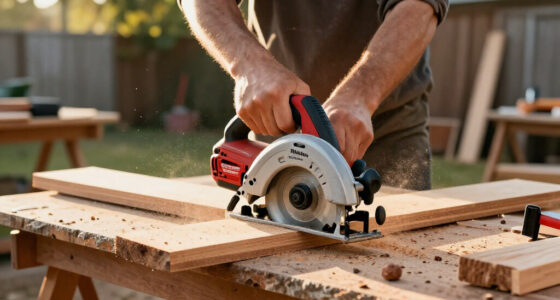
Set the saw on a stable, level surface, secure it as the manufacturer directs, and support the workpiece at table height. Then confirm the fence and table are clean, the stock sits flat, and the angle you need matches a reliable square or angle gauge. The setup establishes the reference surfaces for the cut: if the board rocks, sags, or sits on a chip, even a correctly measured angle can produce a joint that does not fit.
- Stabilize the saw. Anchor it according to the manual, especially on a temporary bench or stand.
- Clear the table and fence. A small chip trapped behind the board can tilt it just enough to spoil a joint.
- Support long stock. Use a stand or level support so the far end does not sag or twist.
- Verify the angle. Treat the scale as a guide and confirm important settings with a square or angle gauge.
- Mark and account for kerf. The kerf is the width of material the blade removes; keep the waste side of the mark clear.
A six-foot baseboard balanced on a short bench is a common source of bad cuts: its far end droops, the board rotates away from the fence, and the miter closes poorly at the wall. Support it at the saw table’s height and clamp it when practical. Support prevents sag from changing the board’s position during the cut; clamping helps prevent the blade’s force from moving it. Keep your hands outside the marked safety zones and never brace a small offcut where fingers sit close to the blade.
Make a test cut in scrap from the same material when the angle matters. A saw can show zero on its scale and still cut slightly out of square because the scale, fence, or blade alignment may be off. A test piece shows the combined result of those parts, including how the material behaves, before you repeat the setting on finished stock. Once the setup checks out, your cutting rhythm matters just as much.
Make each cut with control and clear hands
For accurate cuts, keep the stock flat against the fence and table, let the blade reach full speed, and lower it smoothly without forcing it through the wood. Wait until the blade stops before raising it or removing offcuts. A smooth feed gives the teeth time to cut consistently; forcing the blade can increase deflection, heat, and tear-out. Waiting for the blade to stop also prevents a spinning blade from catching an offcut or pulling it across the table.
Before cutting, wear eye and hearing protection and control dust with the saw’s extraction connection or suitable respiratory protection for the conditions. Check the stock for nails, screws, knots, or other hazards, and cut only materials the saw and blade are rated to handle. Keep the guard in place and working; never reach behind or around a moving blade. These checks address different hazards: debris can damage the blade or become a projectile, while dust and noise build up with repeated cuts even if one cut seems brief.
Suppose you’re cutting a batch of short shelf pieces. A board that shifts even slightly can turn identical marks into pieces with different lengths. Clamp the stock when practical, keep it pressed against the fence, and follow the manual for narrow pieces, bevels, compound angles, and sliding cuts. Don’t cut freehand, and don’t hold a tiny piece beside the blade to keep it steady. Small pieces leave less room for safe hand placement, so use a suitable stop or workholding method described by the manufacturer rather than improvising near the blade.
For a sliding cut, follow the model’s prescribed method and travel direction. Instructions differ among saws, so don’t assume one technique applies to every machine. If your cut needs a bevel or compound angle, test the setting on scrap first and confirm the stock remains supported across the cut. Angled cuts change where the blade enters and exits the work, which can make a piece less stable or alter the finished dimension.
Disconnect power before changing a blade, cleaning the saw, or making adjustments. For a corded saw, unplug it; for a cordless model, remove the battery according to its manual.
A steady cut sounds and feels controlled. If you must shove the saw through the stock, stop and check the blade, alignment, and work support. Continuing to force a cut can worsen the finish and conceal a problem that will affect every piece in the batch.
Keep the saw clean, sharp, and aligned
Keep your miter saw accurate by clearing dust and chips from the table, fence, vents, and moving parts, then checking the blade, guard, cord, plug, switches, clamps, and fasteners. Dust can pack into working areas, interfere with operation, and get between the board and fence. A clean contact surface helps the stock sit flat instead of balancing on grit. Cleaning also makes new damage or looseness easier to see, so inspection and maintenance support each other.
Inspect the blade for buildup, wear, or damage. A dirty or dull blade can burn wood, leave a ragged edge, wander, or demand extra force. For example, if a trim cut leaves a dark stripe and a rough surface, clean or replace the blade as appropriate before pushing harder. Sharpening may be an option for a suitable blade; damage calls for replacement. A blade that needs extra force can also encourage the operator to push less steadily, so blade condition affects both cut quality and control.
Lubricate or adjust parts only as the manufacturer directs. Don’t guess at a repair from a different saw’s instructions. After you move the saw, change the blade, or notice cuts drifting out of square, verify alignment again and make a test cut in scrap. Moving or reinstalling parts can change their relationship by a small amount, and a small angular error grows into a visible gap across a long joint.
A practical routine is to check the saw before a project and clean it after dusty work. A contractor making repeated trim cuts may inspect more often than a homeowner who uses the saw twice a year. In either case, treat a new burning smell, unusual vibration, damaged cord, sticky guard, or loose fastener as a reason to stop and investigate before the next cut. These changes can signal a maintenance issue that affects safe operation as well as accuracy.
Fix burning, rough edges, and gaps at the source
When cuts burn, wander, or leave gaps, check the blade, alignment, and workpiece support before changing your measuring technique. These symptoms often point to a dirty or dull blade, unsuitable blade choice, misalignment, or stock that moved during the cut. Make one change at a time and test on scrap so you know what fixed the problem. This approach saves material and gives you useful evidence: changing several things at once may improve the cut, but it leaves you unable to tell which condition caused the defect.
If the saw burns the wood, inspect the blade for residue or dull teeth and confirm it suits the material. If the edge tears out, use a sharp blade appropriate for the job, orient the finished face as the manual recommends, and slow down enough to keep the cut controlled. The finished-face direction depends on the saw and cut, so check the model’s instructions instead of relying on a universal rule. Burning and tear-out have different likely causes, so note which symptom appears rather than treating every poor edge as a reason to change blades.
A miter joint with a wedge-shaped gap usually needs both mating angles checked, not just one. Cut a pair of test pieces from the same stock, assemble them, and look for the gap before repeating the settings on expensive trim. Wood can also move or twist, so confirm each piece sits firmly against the fence and table. The shape of the gap can help distinguish a setup error from a support problem, while checking the pair together shows whether the two cuts complement each other.
If the cut is consistently out of square, verify blade-to-fence and blade-to-table alignment using the manual’s adjustment procedure, then confirm the result with a test cut. When a board shifts, add support and clamp it when practical. Think of troubleshooting like tuning a door: a small correction at the hinge can fix the whole fit, but sanding the edge first may only hide the real cause. Correcting the underlying setup helps the next cuts fit too; trimming each imperfect piece by eye can create inconsistent lengths and compound the error.
Decide when your saw suits the job—and when it doesn’t
A power miter saw is a strong choice when you need repeated crosscuts or angled cuts in suitable stock, but its capacity and approved materials set the limits. Use a basic saw for ordinary crosscuts and miters, a compound saw when bevels are part of the work, and a sliding model for wider stock within its rated range. A feature list does not replace reading the manual or checking the actual cut capacity. The tradeoff is reach and versatility against cost, setup, and the need to keep more moving parts aligned.
For example, a homeowner installing a few lengths of narrow baseboard may get accurate results with a basic saw and a properly set up support. A crew cutting wide boards all day may benefit from a sliding model, but it still needs alignment checks, dust control, and safe support. If you need a specialized cut once, renting a suitable saw can be cheaper and easier to justify than buying one for storage. Frequency and stock size help determine whether extra capacity is useful: a larger or more complex saw adds little value if the work rarely needs it.
Modern saws may offer dust collection connections, work lights, cut-line indicators, electronic braking, or cordless operation. Those features can improve visibility or convenience, but they do not correct a dull blade or a crooked fence. Cordless runtime also depends on the battery and workload; plan for a spare battery if a long run of cuts would otherwise stop the job. Consider whether a feature solves a recurring work problem, because convenience can speed up a workflow while accuracy still depends on the blade, setup, and operator.
Use only blades and materials the manufacturer approves. A saw that cuts wood is not automatically suitable for metal, PVC, or composite decking; blade tooth geometry, speed rating, and material guidance matter. If the work involves electrical wiring, gas lines, structural framing, or roof components, use a licensed professional where required and follow applicable codes and permits. Turn off power before any nearby electrical work and wear the proper PPE.
Build a repeatable routine before your next project
A short routine makes a miter saw easier to trust from the first cut to the last. Check the setup before work, make a test cut when accuracy matters, and inspect the result before cutting a full batch. That habit catches a misread angle or shifted support while the mistake still costs only one scrap piece. Repeating the checks also reduces variation between cuts, which matters when several parts must fit together rather than look acceptable one at a time.
- Read the model’s manual for blade limits, capacity, safe zones, and adjustment instructions.
- Inspect the tool and blade for damage, buildup, loose parts, and a functioning guard.
- Set stable support at table height and keep the stock flat to the fence.
- Check the angle and kerf with a square or gauge, then place the cut on the waste side of your mark.
- Make one test cut from matching scrap and check its fit before batching parts.
- Cut with control and wait for the blade to stop before moving the work or offcut.
- Clean and recheck after dusty work, a blade change, or moving the saw.
Imagine cutting twelve pieces for window casing. If the first test piece is a fraction short, you can correct the stop or measurement before the remaining eleven boards share the same mistake. If the first piece fits, that test gives you a real reference from the actual material and setup. It also confirms the cut in the way the parts will be used, which a reading on the saw’s scale cannot do by itself.
Repeatability comes from the routine, not a confident glance at the scale. A clear workspace, stable support, and sound blade turn a power miter saw into a predictable tool. Keep those checks simple enough to do every time, even when the job is moving quickly; a brief check before a batch is easier than correcting several finished pieces afterward.
Frequently Asked Questions
How do I make sure my miter saw cuts square?
Check blade-to-fence and blade-to-table alignment using the procedure in your saw’s manual, then verify the setting with a reliable square or angle gauge. Make a test cut in scrap and check the result before cutting finished stock.
How often should I check or calibrate my miter saw?
Recheck alignment after moving the saw, changing the blade, or noticing inaccurate cuts. For a project where a small error would spoil a joint, verify the angle and make a test cut before you start a batch.
Which blade should I use for trim, framing lumber, plywood, or plastic?
Choose a sharp blade with the correct diameter, arbor, speed rating, and tooth geometry for the saw and material. More teeth generally produce a smoother wood cut, but check the manufacturer’s blade and material guidance, especially for plastic or nonferrous metal.
Why is my saw burning the wood or leaving a rough edge?
A dirty, dull, unsuitable, or misaligned blade can burn wood or leave a poor edge. Check the blade and workpiece support, then try a test cut with a clean, appropriate blade before applying more force.
How should I support long boards safely?
Support long stock at the same height as the saw table so it stays flat and does not sag or twist. Keep the board against the fence and clamp it when practical, while keeping your hands outside the marked safety zones.
Can I cut metal, PVC, or composite decking with a miter saw?
Only if the saw and blade manuals approve the specific material and the blade has the required rating and tooth geometry. A wood blade is not automatically suitable for those materials; follow the manufacturer’s method and wear appropriate PPE.
Conclusion
For accurate miter saw cuts, start with the right sharp blade, a stable setup, and a test cut that proves the angle. Support and secure the stock, keep your hands clear, and let the blade stop before you move anything.
Clean the saw and check alignment when the cut quality changes. A square joint starts with small, repeatable checks—the kind that leave your trim meeting cleanly, with no daylight in the corner.