
TL;DR

Get business pricing on tools and workshop supplies
- Business-only prices and quantity discounts
- Tax-exempt purchasing
- Multiple users, one account, clear invoices
For most drywall installations, use coarse-thread screws with wood framing and fine-thread screws designed for light-gauge steel studs. Match length and spacing to the board, framing, manufacturer instructions, and local code, and drive each head just below the paper without tearing it. Drywall fasteners secure the board; shelves, cabinets, and TVs need a suitable connection to framing or an anchor rated for the load and wall conditions.
A drywall screw can look perfectly snug and still be doing a poor job. Drive it too deep and the head cuts through the paper; use the wrong thread for the framing and it may not grip properly. A few bad fasteners can turn a smooth new wall into a row of dimples, loose panels, or popped heads.
This guide explains how to choose drywall fasteners for wood and steel framing, what screw length and installation depth to consider, and when nails, specialty screws, or anchors make sense. You’ll also see why the fasteners holding a sheet to a stud are a different decision from the hardware supporting a shelf or television.
For example, a half-inch board on a wood stud usually calls for a different screw than the same board on a steel stud. Get that match right, set your driver depth, and you’ll have a tighter surface that’s easier to tape and finish.
Use coarse-thread drywall screws for most wood framing and fine-thread screws specified for light-gauge steel.
A common pairing is a 1¼-inch screw with ½-inch drywall on wood framing, but verify the full assembly instructions.
Set each head just below the paper; a torn face weakens the fastener’s hold.
Use the manufacturer’s and local code’s spacing pattern, especially for ceilings and specialty assemblies.
For shelves, cabinets, and TVs, connect to framing or use an anchor rated for the actual load and wall conditions.
FIELD GUIDE / WALLBOARD SYSTEMS
The Essential Guide to Drywall Fasteners and When to Use Each Type
Choose the right fastener for the framing, board, and assembly. A good match holds the sheet securely, protects the paper face, and leaves a cleaner surface for finishing.
At a glance: match the fastener to the job
For most new installations, drywall screws are the standard choice. The right type depends on framing material, board thickness, location, and the requirements of the full assembly.
A screw driven too deep can lose holding strength. If the head tears through the face paper, that paper can no longer help hold the board against the framing. A snug-looking screw may still be doing a poor job.
Use coarse-thread screws for most wood framing and fine-thread screws specified for light-gauge steel.
1¼-inch screws are a common pairing for ½-inch drywall on wood. Verify the assembly instructions.
Set the head just below the paper surface. A torn face weakens the fastener’s hold.
Follow manufacturer patterns and local code, especially for ceilings and specialty assemblies.
For shelves, cabinets, and TVs, connect to framing or use an anchor rated for the load and wall.
Choose by framing and purpose
Identify the framing first, then check the board and system instructions. Recent refinements such as collated screws and self-drilling points can speed installation, but they do not replace the correct fastener match.
Coarse-thread screw
Typical choice for drywall attached to wood studs or joists. Wider, more widely spaced threads grip wood well. Choose a length that penetrates adequately without protruding through the far side.
Fine-thread screw
Generally used with steel studs. Tighter threads engage thin metal framing. Match the screw to the actual steel thickness and the manufacturer’s guidance.
Self-drilling screw
A drill-point tip can cut into some steel studs without a pilot hole. Confirm it suits the stud gauge; “self-drilling” does not mean suitable for every metal frame.
Drywall nail
Useful in certain wood-framed installations or repairs where the specified system calls for nails. They can install quickly, but may loosen more readily than screws.
Corrosion-resistant screw
Use where the wall assembly calls for corrosion resistance. Choose a coating approved for the environment and compatible with surrounding materials.
Drywall anchor
For objects where framing is unavailable. Select by wall thickness, load, and rated capacity, then install as directed. Fasteners for board attachment are not automatically load anchors.
Six checks before the first sheet
Work through this sequence before fastening. Ceiling, fire-rated, moisture-resistant, multi-layer, and other specialty systems may require specific fasteners or patterns.
Length is an assembly decision
The screw needs enough engagement in framing without extending through the far side. A familiar pairing is only a starting point; board thickness, framing, ceilings, and multiple layers can change the answer.
Common starting point
½-inch drywall + 1¼-inch screw + wood framing is a common pairing. Check the board or fastener maker’s recommendations for your specific installation.
Recheck changed conditions
Thicker board, ceiling work, resilient channels, specialty panels, or steel framing can require a different length or type. Don’t reuse a wall detail automatically.
Set the head below the surface—not through it
A shallow dimple gives joint compound room to cover the head. The paper remains intact to help hold the sheet against the framing.
Target depth
Small dimpleHead just below paper. Stop before the face tears or the gypsum core crushes.
Use a drywall screw gun with a depth stop or a drill attachment designed for drywall. Start with a scrap-board test, keep the driver square, and let the tool do the work.
A proud head can catch a taping knife. An overdriven head tears the paper. Both create extra finishing work.
If paper tears, add a replacement screw nearby in solid framing and follow the board maker’s repair guidance. Do not count the torn-paper screw as the only secure attachment point.
Drywall attachment and hanging loads are different jobs
The fastener that secures a sheet to a stud does not automatically support a shelf, cabinet, television, or other object. Plan the load connection separately.
For the drywall sheet
Match screw thread to framing, choose length for the full assembly, and use the specified spacing and depth. Screws are generally less prone to backing out than nails.
For an object on the wall
Connect to framing where possible. If no stud is available, choose an anchor rated for the actual load, wall thickness, and wall conditions, and install as directed.
Quick comparison
| Fastener | Typical use | Key consideration |
|---|---|---|
| Coarse-thread screw | Drywall on wood studs or joists | Get adequate framing penetration without protruding through the far side. |
| Fine-thread screw | Drywall on light-gauge steel studs | Match screw and steel thickness to manufacturer guidance. |
| Self-drilling screw | Some steel framing applications | Confirm the drill point suits the stud gauge. |
| Drywall nail | Certain wood-framed jobs and repairs | Use the specified nail and pattern; nails may loosen more readily. |
| Corrosion-resistant screw | Assemblies requiring corrosion resistance | Check coating approval and material compatibility. |
| Drywall anchor | Objects when framing is unavailable | Choose for wall thickness, conditions, and rated load. |
Match the screw thread to the framing for a stronger hold
Drywall fasteners hold best when their threads match the framing: coarse-thread screws generally suit wood studs, while fine-thread screws generally suit light-gauge steel studs. The wood screw’s wider, more widely spaced threads bite into the wood; the finer thread gives a screw more engagement in thin metal. Check the screw maker’s guidance for the actual stud gauge and board assembly.
On a typical wood-framed bedroom wall, coarse-thread screws are the everyday choice. Their sharp threads pull the board tight to the stud without needing a special setup. If you switch to steel studs, that same coarse thread may fail to engage the metal as intended. A fine-thread screw designed for the stud thickness is a better fit.
Some metal-framing jobs call for self-drilling screws. Their drill-point tip can cut into certain steel studs without a pilot hole, saving a step on a large run. But “self-drilling” does not mean suitable for every gauge. A screw that spins without biting leaves the board loose, while a mismatched fastener can make a frustrating row of holes. Check the framing and product instructions before stocking up.
The basic choice stays simple: identify whether you’re fastening into wood or steel, then select a screw specified for that framing. That’s what drywall fasteners do when they’re chosen well: connect the board to the structure so the wall stays put under normal use. Recent product refinements, such as more self-drilling options and collated screws for drivers, may speed work, but they don’t replace a correct thread match.
Popular right now

Dreame L50 Ultra Robot Vacuum and Mop

Bose QuietComfort Wireless Bluetooth Headphones with Active Noise Cancellation, Mic, USB‑C Charging, Deep Bass, 24‑Hour Battery – White Smok

Bose QuietComfort Wireless Noise-Cancelling Over-Ear Headphones, Black
As an affiliate, we earn on qualifying purchases.
Choose a screw length that fits the board and the job
Drywall screw length depends on board thickness, framing, and the assembly; the fastener needs enough engagement with the framing without extending through the far side. A common pairing is a 1¼-inch screw for ½-inch drywall on wood framing, but treat that as a starting point, not a universal rule. Follow the drywall or fastener manufacturer’s recommendations for your specific installation.
Thicker board needs a different length. For example, a renovation might replace a thin ceiling layer with ⅝-inch board for a specified assembly. Reusing the old 1¼-inch screws may not provide the penetration the new board requires. Multiple layers, resilient channels, specialty panels, or steel framing can also change the choice, so check the full build-up rather than measuring only the visible sheet.
A screw that’s too short may barely catch the framing. One that’s too long can protrude into a cavity or reach wiring and plumbing where the assembly allows little clearance. If a screw misses the stud, don’t keep driving and hope it will pull the board tight; locate the framing, then place a suitable fastener. In older houses, use a stud finder carefully and stay alert to hidden services.
Ceilings deserve particular care because the board’s weight constantly pulls downward. A ceiling installation may call for longer screws or a different spacing pattern than a wall; the answer depends on board type, framing, and the specified system. When a ceiling, fire-rated partition, or other specialty assembly is involved, follow its documentation and local requirements rather than borrowing a wall detail.
Set every screw just below the paper without tearing it
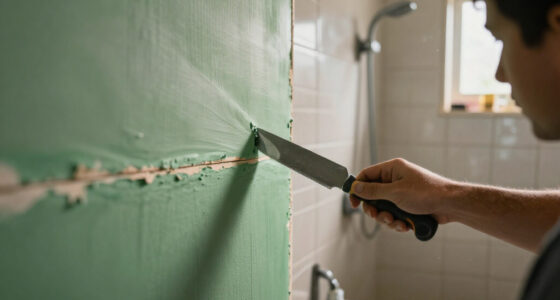
Set a drywall screw so its head sits just below the paper surface, leaving a small dimple for joint compound without tearing the face paper. The paper is part of the board’s strength. If the head cuts through it, the fastener can lose its grip on the sheet, even though it looks deeply seated.
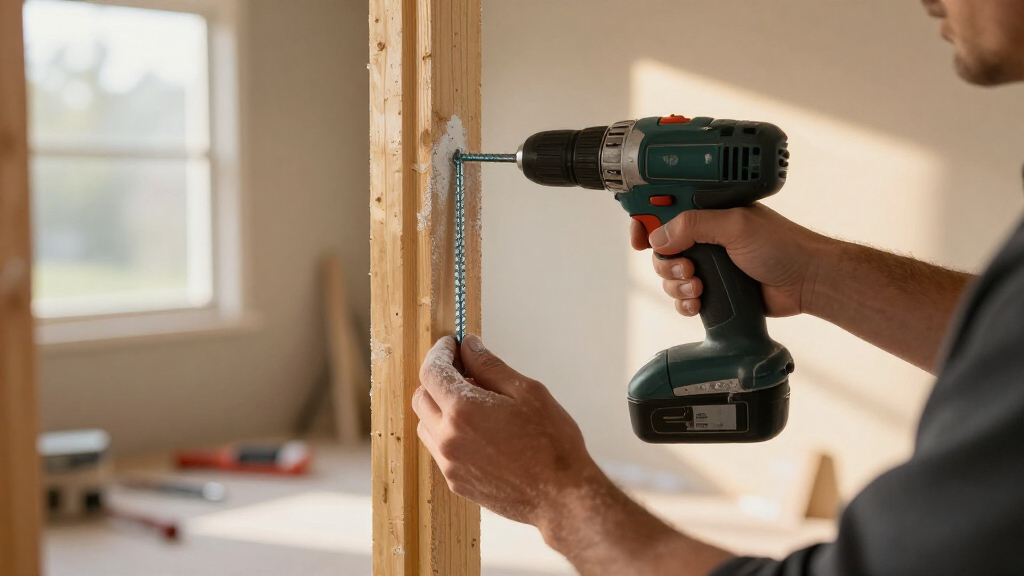
Use a drywall screw gun with a depth stop, or a drill fitted with a drywall depth-setting attachment. Start with a test on scrap board. The sound changes as the head seats: a quick drive, a soft stop, then no grinding paper. On a 20-sheet room, a consistent depth setting saves time and helps avoid hundreds of small repairs at the taping stage.
Keep the driver square to the surface and let the tool do the work. Leaning hard on a drill can crush the gypsum core, while a low battery or poor bit engagement may leave heads proud. A proud screw catches the taping knife; an overdriven one tears the paper. Either way, you’ll spend more time patching than fastening.
If you tear the paper, place a replacement screw nearby in solid framing, then remove or leave the damaged fastener according to the board maker’s repair guidance. Don’t count a torn-paper screw as your only secure attachment point. This careful setup is especially useful when you’re working overhead, where fatigue makes it easy to push too hard and where a loose sheet is more than a cosmetic nuisance.
Use nails for the right wood-framed repair, but expect the tradeoff
Drywall nails still have a place in some wood-framed installations and repairs, especially where the specified system calls for them. They can be quick to install, and skilled crews may use them efficiently on suitable jobs. Screws are generally less prone to backing out over time, which is why they’re the standard choice for most new installations.
Consider a small patch in a wood-framed closet where the existing board is nailed and you’re matching a repair method recommended for that wall. The nail may be appropriate if you use the specified type and pattern. In a busy hallway with door slams and vibration, screws may be the more dependable everyday choice because they’re less likely to loosen and create a visible pop later.
Fastener pops can have more than one cause: a fastener may miss the framing, the framing may move as lumber dries, or the board may not sit firmly against the stud. Replacing every visible nail with a screw won’t fix a warped stud or unsupported edge. Find the cause first, then secure the sheet to sound framing using a method suited to the repair.
Whether you use a nail or screw, follow the board manufacturer’s installation pattern and local code. Don’t improvise a faster pattern on a ceiling or on a fire-rated assembly. For a small DIY repair, hand tools or a standard driver may be enough; for a whole house, a depth-controlled screw gun can save your wrist and produce more consistent work.
Treat corrosion resistance and specialty boards as assembly requirements
Use corrosion-resistant fasteners only when the wall assembly or product instructions call for them, and choose a coating approved for that environment. Bathrooms and other damp areas can expose materials to moisture, but a label that sounds protective does not make a screw right for every board or location. Compatibility between the fastener, panel, framing, and surrounding materials matters.
For instance, a bathroom remodel may include a moisture-resistant gypsum panel in one area and a different panel in a shower surround. Those locations may have different fastening and waterproofing requirements. A drywall screw is not automatically suitable for cement board or other wall panels. Use the panel maker’s approved fasteners and installation details, and follow the waterproofing system instructions where the surface will get wet.
Specialty assemblies can also include fire-rated walls, sound-control layers, or multiple sheets. A seemingly minor change to screw type, length, or spacing may affect the tested system. If plans specify a particular assembly, match its fastening schedule. Where permits or inspections apply, check local code and keep the product documentation available.
Dust and eye protection still matter during board work. Wear safety glasses and a well-fitting dust mask or respirator suited to the dust exposure, and control dust with cleanup methods appropriate to the job. For work involving electrical wiring, switch off power at the breaker before opening or drilling into a wall, verify the circuit is de-energized with a suitable tester, and call a licensed electrician for wiring changes. A fastener choice is only one part of a safe, code-compliant wall.
Choose anchors for hanging objects, not for fastening drywall sheets
A drywall screw that secures a sheet to a stud is not automatically rated to hold a shelf, cabinet, or TV. For a hanging load, attach to framing where possible; if framing is unavailable, select a drywall anchor rated for the object’s load and the wall conditions. Check the anchor’s instructions, including board thickness and installation method.
A small picture frame and a deep bookshelf create very different forces. The frame’s light load may suit a simple anchor; the bookshelf pulls outward as its weight moves away from the wall, especially when loaded with books. A television bracket can also place considerable leverage on its mounting points. Use framing for heavy or high-leverage items whenever possible, and follow the bracket maker’s layout.
Anchor ratings are not a promise that every real wall will carry the printed maximum. Ratings depend on the anchor model, drywall condition, installation, load direction, and how many anchors share the load. Old, crumbly, water-damaged, or patched board may not hold as expected. If the wall feels soft or the item could injure someone if it falls, stop and locate framing or get qualified help.
Before drilling, check for hidden wires and pipes. If you’re uncertain about wiring, switch off power to the relevant circuit and have a licensed electrician assess the area; do not treat a stud finder as proof that a cavity is clear. Anchors solve a specific problem, but they don’t make a weak wall strong. The safe plan for a heavy cabinet is usually a solid connection into framing, with installation details matched to the load and wall.
Follow a six-step check before you fasten the first sheet
Before you start, identify the framing, board, and assembly, then choose a fastener and installation pattern that the product instructions support. A few minutes of checking can prevent loose panels, torn paper, and a long afternoon of filling avoidable holes. On a ceiling or specialty wall, the manufacturer’s schedule and applicable code take priority over a general rule of thumb.
- Find the framing. Confirm whether you have wood studs or steel studs, and mark their centers.
- Check the panel. Note its thickness, number of layers, and whether it is a specialty board.
- Select the fastener. Match thread to framing and length to the complete assembly.
- Read the instructions. Confirm the fastening pattern and any coating or system requirements.
- Set the driver depth. Test on scrap board until heads sit just below the face without tearing paper.
- Check your work. Look for missed studs, proud heads, torn paper, and spacing that departs from the specified pattern.
For example, if you’re hanging half-inch drywall on wood studs in a spare room, you might start by checking whether coarse-thread 1¼-inch screws suit the product instructions. You’d mark the framing, test the depth stop, and then follow the specified spacing for that wall. If the same room instead has steel studs, the thread choice changes, even though the drywall thickness stays the same.
There is no single spacing number that safely covers every wall and ceiling. Board type, framing, application, and local code can change the pattern. Keep the product sheet with the job notes, especially when a future repair or inspection may need to identify how the wall was installed.
Frequently Asked Questions
What is the difference between coarse-thread and fine-thread drywall screws?
Coarse-thread screws generally suit wood studs because their wider threads grip wood well. Fine-thread screws generally suit light-gauge steel studs, where the tighter threads engage the thin metal. Check the fastener maker’s guidance for your stud thickness.
What screw length should I use for ½-inch drywall?
A 1¼-inch screw is a common pairing for ½-inch drywall on wood framing. The right length can change with steel framing, ceilings, extra layers, or a specialty assembly, so follow the drywall and fastener manufacturer’s instructions.
How far apart should drywall screws be?
There is no one spacing pattern for every job. Spacing varies by wall or ceiling use, framing, board type, and assembly; follow the product instructions and local code. Pay particular attention to ceiling and fire-rated work.
Can I use drywall screws to hang a shelf or TV?
A drywall screw used to attach board to framing is not automatically suitable for supporting an object. Fasten heavy or high-leverage loads to framing where possible, or use an anchor rated for the load and wall conditions. Follow the bracket and anchor instructions.
How deep should a drywall screw sit?
Set the head just below the paper surface without tearing it. A small dimple accepts joint compound; a torn face paper weakens the hold. Test the depth stop on scrap board before fastening the installed sheets.
Are drywall nails still used?
Yes. Drywall nails remain useful in some wood-framed installations and repairs when the specified pattern calls for them. Screws are less prone to backing out over time, so they’re the usual choice for most new installations.
Conclusion
Choose the fastener by the framing first, then check the board thickness and the wall assembly. Set the driver so each head sits just below the paper, and treat any hanging load as a separate hardware decision. Those habits do more to prevent loose panels and popped heads than buying a screw marketed as universal.
Take a moment to mark the studs and test your depth setting before the first sheet goes up. A smooth wall starts with a quiet, solid bite behind the paper.