
TL;DR

Get business pricing on tools and workshop supplies
- Business-only prices and quantity discounts
- Tax-exempt purchasing
- Multiple users, one account, clear invoices
Drywall taping and finishing covers seams, corners, and fasteners with tape and joint compound, then blends the surface through several thin, progressively wider coats. Let each coat dry or set as its label directs, sand lightly with dust protection, inspect under angled light, and prime before painting.
A fresh drywall seam can look invisible at noon and show up like a raised road under evening window light. That gap between “looks fine” and “ready for paint” is where beginners learn that drywall finishing is patient work: thin coats, dry time, and a little discipline beat a heavy swipe of mud.
This guide walks you through surface preparation, tape and compound choices, seam and corner work, sanding, and priming. You’ll see which tools earn their place in a DIY kit, how to avoid common flaws, and when a fast-setting product—or a rental tool—makes sense.
The goal isn’t a showroom finish on your first pass. It’s a wall or ceiling that looks smooth in the light the room actually gets, with no obvious ridges, bubbles, or fastener dimples. For electrical, gas, structural, or roof work around the drywall job, use a licensed professional and follow applicable permits and safety rules; switch off power before work near wiring and wear suitable PPE.
Secure panels and set screw heads slightly below the surface without tearing the paper before you tape.
Use paper tape for many flat seams and inside corners; pair mesh tape with compound only as the product instructions allow.
Build several thin, progressively wider coats and feather the edges instead of piling compound over a seam.
Wait for full drying or setting as directed, then sand lightly with ventilation, eye protection, and respiratory protection.
Inspect with angled light, remove dust, and prime before painting so seams and patches blend more evenly.
FIELD GUIDE · DIY FINISHING
The Complete Guide to Drywall Taping and Finishing for Beginners
A smooth wall comes from patient prep, clean tape work, and several thin coats. Learn how to blend seams, finish corners, sand safely, and get the surface ready for paint.
Start with a sound surface
Compound cannot hold a dependable finish over movement, torn paper, or dust. A few minutes of preparation can prevent cracked joints and hours of patching.
Stabilize the panels
Press beside each seam. If a board flexes, secure it before taping. Compound will not correct loose panels or badly misaligned framing.
Make a slight dimple
Screw heads should sit just below the face without tearing the paper. Proud heads catch the knife; torn paper weakens the hold.
Remove dust and damage
Trim ragged paper, repair damaged spots as directed, and brush or vacuum dust from the seams before spreading compound.
Side light from a window or recessed fixtures can make small bumps look larger. Check the room’s real lighting as you work, and set expectations for rough framing or uneven boards.
Choose materials that work together
There is no universal best bucket or tape. Match the materials to the job, and use the manufacturers’ directions to confirm compatibility and timing.
Flat seams and inside corners
Embed it in a bed of wet compound. Press from the middle outward to release air while keeping compound beneath the tape.
Check compound compatibility
Mesh sticks directly to the board and is often paired with setting-type compound. Use another pairing only when the product instructions allow it.
Pick for the task
All-purpose premixed compound suits general work. Lightweight or topping compounds may sand more easily for later coats; setting compound can help with faster repairs.
Keep the tool kit simple
A 4–6 inch knife, wider taping knife, mud pan, utility knife, sanding sponge or pole sander, eye protection, and a suitable respirator cover many beginner jobs.
Choose tools for the project size
An automatic taper may save time across a whole house. For one bedroom, setup and cleanup can outweigh the benefit; consider renting for larger work.
Build coats wider, not thicker
The first coat embeds the tape. Later coats hide its edges and blend the joint into the board. Feathered edges matter more than a mound of compound at the center.
Wait for the full coat to dry or set as directed. Surface-dry compound may still need time underneath. Timing varies with product, coat thickness, humidity, and temperature.
A five-stage finishing flow
Keep the knife clean, scrape its edge often, and work in manageable lengths. A dried crumb dragged through wet compound can leave a scratch that takes longer to repair than the seam.
Secure, check, clean
Stabilize board, set screws, repair damage, and remove dust.
Set tape evenly
Apply a thin bed, press tape into place, and smooth out air.
Widen each pass
Let coats dry, then feather a wider layer over the joint.
Sand lightly
Remove ridges and tool marks without scuffing drywall paper.
Inspect, dust, prime
Use angled light, remove dust, and prime before painting.
Give corners their own attention
Corners catch light from two directions, so a small hump or wandering line can stand out. Use manageable lengths and check the line as you work.
Folded paper tape
Apply compound to both sides, fold tape along its crease, and press it into the corner. Smooth one side, then the other, without pulling the tape loose.
Secure a corner bead
Outside corners typically need a bead that is secured and then coated with compound. Keep the line straight as you build thin layers.
Watch for movement
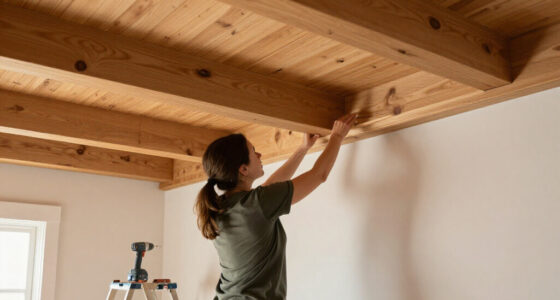
A flexing ceiling panel can crack a seam or reveal a line later. Secure the panel first, then tape and finish the joint.
Sand, inspect, and protect
Sanding is for ridges and tool marks, not for reshaping the whole joint. Too much pressure can expose or fuzz the drywall paper and create more work.
Control the dust
Ventilate the work area, contain dust where practical, and wear suitable eye and respiratory protection. Use a sanding sponge or pole sander without pressing hard.
Use angled light
Check the finished joint with a bright light held at an angle. Add a thin, feathered pass where the seam still stands proud or a dimple remains.
Prepare for paint
Remove sanding dust and prime the finished surface. Primer helps even out differences in texture and absorption so patches and seams blend more evenly.
For electrical, gas, structural, or roof work around the drywall job, use a licensed professional and follow applicable permits and safety rules. Switch off power before working near wiring and wear suitable PPE.
Quick material comparison
Use this as a starting point, then check the tape and compound labels for approved pairings and application instructions.
| Material | Often used for | What to remember | Beginner cue |
|---|---|---|---|
| Paper tape | Flat seams; inside corners | Needs a compound bed beneath it | ✓ Press out air |
| Mesh tape | Seams and repairs, as specified | Compound compatibility matters | ~ Check both labels |
| Ready-mixed compound | General work and coating | Typically dries as water evaporates | ✓ Allow full drying |
| Setting-type compound | Repairs or faster turnaround | Hardens chemically; has stated working time | ~ Mix manageable batches |
Trace the finish from board to paint
Every stage supports the next. Rushing a step can make the finished surface harder to blend under the room’s actual light.
Secure panels
Stable edges hold a more dependable joint.
Embed cleanly
Even compound beneath tape helps avoid bubbles.
Widen thin coats
Feathered edges soften the seam’s boundary.
Sand and inspect
Angled light reveals flaws before they are painted.
Dust and prime
A clean, primed surface helps patches blend.
Start with a sound surface so every coat has a fair chance
Drywall taping and finishing starts with preparation: secure panels, sound edges, clean surfaces, and screw heads just below the face paper. If the board moves, the paper is torn, or dust sits on the seam, compound cannot make a dependable finish. A few minutes with a utility knife and screw gun can save an hour of patching later.
Run your hand over each joint and check the fasteners. A screw head should make a slight dimple without breaking the paper; a proud head can catch the knife, while a torn paper face weakens the hold. Add a screw near a loose edge if needed, taking care not to drive it through the board. Trim ragged paper and fill damaged spots according to the compound instructions.
For example, imagine a ceiling panel that flexes when you press beside a seam. Taping over it may look fine at first, but movement can crack the joint or reveal a line later. Secure the panel before you spread mud. Remove dust with a brush or vacuum, and keep the work area ventilated; dry compound dust travels like flour through a kitchen.
Check the room’s lighting before you start, too. A wall beneath a window or a ceiling washed by recessed lights will show bumps more readily than a shaded closet. A straightedge can help spot broad unevenness, but joint compound is not a substitute for correcting badly misaligned framing or panels. If the substrate is rough, set expectations and fix the underlying issue where practical.
Popular right now

Breville Barista Pro Espresso Machine with Grinder, Brushed Stainless Steel

Vitamix Propel Series 750 Professional-Grade Blender, 4 Programs, Black

De’Longhi Classic Matte Black Espresso Machine with Milk Frother
As an affiliate, we earn on qualifying purchases.
Choose tape and compound that work together
Paper tape is a common choice for flat seams and inside corners, while mesh tape is often paired with setting-type compound. All-purpose premixed compound is convenient for general work; lightweight or topping compounds can be easier to sand for later coats. There is no universal best bucket: match the tape and compound to the job, then follow both product labels.
Paper tape needs a bed of compound beneath it. You press it into the wet layer and smooth it so it lies flat without bubbles. Mesh tape sticks directly to the board, which can feel simpler when you’re starting out, but compatibility matters; many installers pair it with setting compound. Some products permit other combinations, so don’t guess based on a color-coded bucket or a tip from an old project.
Ready-mixed compound generally dries as water evaporates. Setting-type compound hardens through a chemical reaction and can speed a repair or a short sequence of coats, but you need to mix and use it within its stated working time. A half-setting pan can turn lumpy and difficult to spread. If you’re taping a small laundry-room patch after work, a manageable batch may be more useful than a large bucket you cannot finish.
Beginner tools can stay simple: a 4- to 6-inch knife for tight areas, a wider knife for coats, a mud pan, utility knife, sanding sponge or pole sander, and protective eyewear and a suitable respirator for sanding. A pro-grade automatic taper can save time across whole houses, but for one bedroom it may cost more in setup and cleanup than it saves. Renting makes sense when the scope is large and you know how to use the equipment.
Embed tape cleanly, then widen each coat
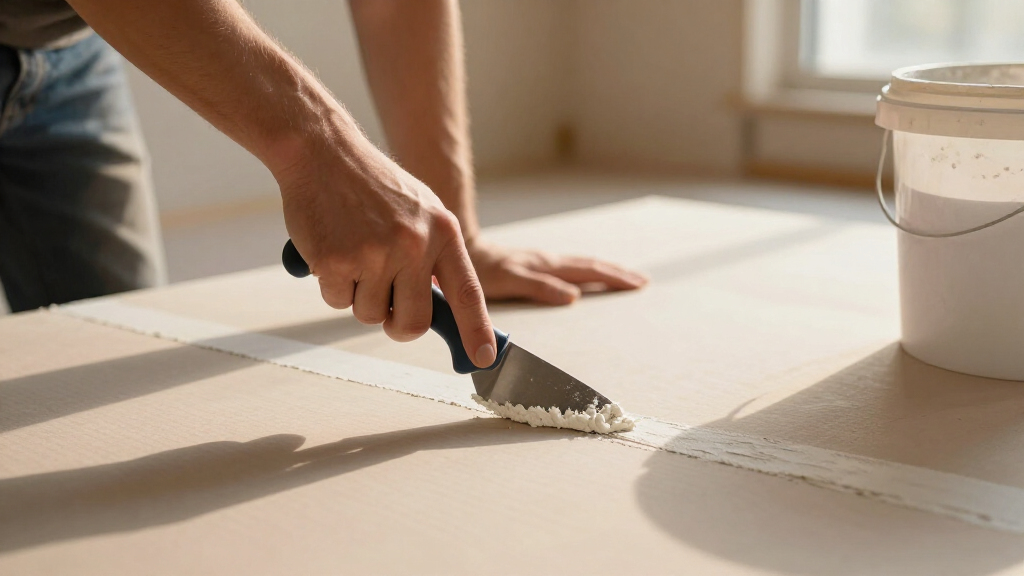
To drywall taping seams well, embed the tape in an even bed of compound and build several thin, wider coats. The first coat holds the tape; later coats hide its edges and blend the joint into the board. Smooth feathered edges matter more than a thick ridge down the center.
- Spread a narrow bed of compound over the seam with a knife. Keep enough material to hold the tape, but don’t leave a mound.
- Set the tape into the wet compound. For paper tape, press from the middle outward with steady strokes to push out trapped air while leaving compound beneath it.
- Scrape off excess without squeezing the seam dry. A bubble often means the tape did not bond evenly or the compound bed was too thin.
- Let the coat dry or set as the product label directs, then apply a wider coat and feather its edges. Add another wider coat if the seam still stands proud.
Use the same patient approach on fasteners. Cover each screw head, let it dry, and apply another pass if a dimple remains. In a small spare bedroom, a beginner might finish one wall, clean the knife, and notice that the first seam has started to firm up before moving on. That’s useful time management, but don’t recoat just because the surface feels dry; the full layer may need longer.
Keep the knife clean and scrape its edge often. A dried crumb dragged through wet compound leaves a scratch that can take longer to fix than the seam itself. Think of feathering like blending paint at the edge of a patch: the eye catches the abrupt boundary, not just the material in the middle.
Make corners and ceiling joints look straight
Inside corners usually take folded paper tape, while outside corners need a corner bead that is secured and coated with compound. Corners catch light from two directions, so a slight hump or wandering line often reads more clearly than a similar flaw across a broad flat wall. Work in manageable lengths and check the line as you go.
For an inside corner, apply compound to both sides, fold paper tape along its crease, and press it into the corner. A corner knife can help, but a standard knife also works if you hold it steadily and avoid dragging the tape out of place. Smooth one side, then the other. If you try to fix both sides with a heavy pass, you can pull the tape loose or leave a thick bead at the crease.
Outside corners take more knocks from boxes, vacuum cleaners, and hurried furniture moves. Fit a suitable corner bead according to its instructions, secure it as specified, and coat both flanges with compound. For example, on a hallway corner near a coat closet, a straight bead protects the edge and gives you a crisp reference line. A bent or loose bead will telegraph through the finish, so correct the fit before coating.
Ceiling seams deserve a light check from several angles. A ceiling may look smooth from the doorway yet show a long shadow when daylight runs across it. If the ceiling looks wavy because the panels or framing are uneven, extra mud can create a broad, heavy ridge rather than a clean surface. Stop and assess the base instead of trying to bury every problem under another coat.
Sand just enough, inspect with angled light, and prime
Sand only the ridges and tool marks, then inspect the whole surface with a bright light held at an angle. Pressing hard can scuff or fuzz the drywall paper, leaving a repair that needs more compound. A sanding sponge or pole sander gives you control; use a suitable grit for the compound and work gently.
Here’s a practical inspection: after the final coat dries, darken the room and move a work light close to the wall, aiming its beam sideways. The light will rake across the surface and reveal ridges, pinholes, and seam edges. Mark defects lightly with pencil, patch them, wait for the repair to dry, and sand again. Don’t chase every tiny shadow if the surface itself is flat and the room’s normal lighting won’t expose it.
Dust control is part of the finish, not an optional cleanup chore. Ventilate the area, contain dust where practical, and wear eye and respiratory protection while sanding. A vacuum-assisted sanding setup can reduce airborne dust, though claims and performance vary by tool. Clear dust from the wall before priming; otherwise, the primer can lock a gritty film onto the surface.
Prime the finished drywall before judging the paint-ready result. Primer helps even out differences in absorption between paper and compound, which can otherwise make seams flash through as dull or shiny bands. For instance, a freshly mudded patch may look perfectly blended in raw white compound, then appear as a pale rectangle after the first paint coat. A suitable primer gives you a more honest view of the surface and a better base for paint.
Avoid the shortcuts that make seams show through paint
Visible seams usually point to a process problem: thin coverage, abrupt feathering, incomplete drying, rough sanding, or skipped primer. Paint does not erase a ridge; it can highlight one, especially under side lighting. The fix usually starts with finding the cause, then making a small, controlled repair.
If a tape bubble appears, cut or lift the loose area only as the product and repair method allow, then re-bed or patch it. If a screw head shows, check whether it is proud, whether the paper has torn, and whether another coat is needed. A seam that looks like a narrow raised road may need a wider feathered coat, not another heavy stripe on top.
Dry time varies with compound type, coat thickness, humidity, and temperature. “Dry” at the surface does not always mean the whole layer is ready for another coat. In a cool basement after a damp day, a thick patch may take much longer than a thin coat in a warm, ventilated room. Follow the label and resist the temptation to speed the job with unapproved heat or airflow that could affect drying unevenly.
Modern low-dust sanding systems and compounds marketed for easier sanding or reduced shrinkage can help, but product formulas and claims differ. Check current labels and local availability rather than assuming one formula is the new standard. The core method stays steady: embed tape, build thin coats, sand lightly, and prime. A one-day finish is possible in some small jobs with suitable setting-type products and favorable conditions, but a careful multi-coat finish often takes longer.
Use a simple schedule to keep the job moving without rushing
A workable beginner schedule separates coating from drying and inspection. You can keep moving between seams while one area dries, but don’t stack coats onto a layer that has not reached the state the label calls for. The calendar depends on the compound and room conditions, so treat this as a sequence rather than a promise of exact hours.
- Prep the room and board. Secure panels, set fasteners correctly, repair damaged edges, vacuum dust, and protect floors.
- Apply the tape coat. Embed paper tape in compound or apply mesh as directed by the compatible product instructions.
- Wait, then inspect. Check for bubbles, loose edges, and missed fastener heads before adding more material.
- Apply wider coats. Feather each pass beyond the last so the seam gradually disappears into the face of the board.
- Sand, light-check, dust, and prime. Patch defects revealed by angled light, then let repairs dry before the final sanding and primer.
Say you’re finishing a spare room with four long seams and a dozen screw heads. You can coat the first wall, move to the second, and return when the first is ready—but you still need to check its actual condition. This rhythm saves wasted waiting without turning the room into a race. Keep a note of which areas you coated and which compound you used, especially if different products have different set or drying instructions.
For a small repair, buy only the tools you’ll use; for a whole house, consider whether a rental or experienced finisher will save time and rework. A powered sander with extraction may be useful across a large area, but it is easy to remove too much material if you lean on it. DIY-grade tools are adequate for one room when you work patiently. A broad, high-visibility ceiling or a tight deadline may justify hiring a pro.
Frequently Asked Questions
How many coats of drywall mud do beginners need?
Most seams need a tape coat and additional coats to cover and blend the tape, often several thin passes in total. The seam shape, compound, and finish quality you want affect the count; stop when the joint blends into the board rather than following a fixed number blindly.
Should I use paper tape or mesh tape?
Paper tape is a common choice for flat seams and inside corners because you can embed it in a compound bed and fold it for corners. Mesh tape applies directly to the drywall and is often paired with setting-type compound. Check the instructions for the specific tape and compound combination.
How long should drywall compound dry between coats?
Drying or setting time depends on the compound, coat thickness, temperature, and humidity. Follow the product label and wait for the whole coat to reach the stated condition; a dry-feeling surface can hide moisture underneath.
How do I stop bubbles from forming under drywall tape?
Apply an even bed of compound, press the tape firmly into it, and smooth from the center outward to release trapped air. Leave enough compound beneath the tape for it to bond instead of scraping the joint completely dry. If a bubble remains after drying, repair it before the next coat.
Do I need to prime drywall mud before painting?
Yes. Primer helps even out how paper and joint compound absorb paint, reducing dull or shiny patches and helping seams blend. Remove sanding dust first, then use a primer suited to the drywall and finish you plan to apply.
Conclusion
Remember the sequence: prepare, tape, coat thinly, let it dry, sand lightly, inspect, and prime. If a seam still shows, widen the blend or repair the cause instead of burying it under a thick stripe of mud. Give the work enough time to dry, and use the room’s real lighting as your final judge.
A smooth wall is built one quiet pass at a time. When the evening light slides across it, you want to see a clean plane—not the path your knife took.