
TL;DR

Get business pricing on tools and workshop supplies
- Business-only prices and quantity discounts
- Tax-exempt purchasing
- Multiple users, one account, clear invoices
Choose jobsite lighting by task and measured light at the work surface, not by lumens alone. Use broad, evenly placed area lights for open rooms and adjustable, high-CRI task lights for detail work; control glare, check runtime and environmental ratings, and follow site rules for power and wet or hazardous locations.
A 10,000-lumen light can still leave your cut line in shadow. If the beam hits your eyes, lands behind the work, or gets blocked by your body, the big number on the box won’t help you mark a straight cut or spot a loose connection.
Choosing jobsite lighting starts with the work being done and the spot where you need to see. You’ll learn how to match broad area lights and close-up task lights, read lumen and color specs, cut glare, and weigh cords against battery runtime. You’ll also see when weather, dust, or code requirements call for different equipment or a licensed professional.
Choose lights for the work surface: lumens measure output, while lux or foot-candles measure light landing on the task.
Use several evenly placed area lights for broad coverage and an adjustable, high-CRI task light for detail, wiring, paint, or inspection.
Aim from outside your direct sightline and check your own shadow before increasing brightness.
Compare battery runtime at the brightness you’ll use, and route cords away from walkways, heat, edges, and water.
Treat IP ratings as one part of equipment selection; follow site rules for wet or hazardous locations and use licensed professionals for regulated work.
Field Guide / Visibility & Safety
How to Choose the Right Jobsite Lighting for Different Tasks
Choose lighting by the work surface and the task, not by lumens alone. Pair broad, evenly placed area lights with adjustable task lights for detail work, then check glare, runtime, environmental ratings, and site requirements.
Key insight
“A 10,000-lumen light can still leave your cut line in shadow.”
Placement, beam spread, and obstructions determine how much light reaches the work.01 / The right measurement
Light the work—not the room’s most visible corner.
Lumens describe total fixture output. Lux or foot-candles describe light landing on an area, which is what matters at a bench, floor, cut line, or inspection point.
Output / lumens
What the fixture produces
A high lumen rating can help cover a large open space, but it does not tell you whether the beam reaches the task evenly or leaves a hard shadow.
Illuminance / lux or foot-candles
What reaches the surface
Beam angle, fixture height, distance, layout, and anything blocking the beam all affect useful light. If the plan specifies a level, measure there with a light meter.
02 / Match the setup
Area lights cover. Task lights reveal.
Several well-spaced fixtures usually reduce dark zones in a large room. For close inspection or assembly, bring an adjustable beam near the work and keep it outside your sightline.
| Task or setting | Helpful starting setup | Watch for |
|---|---|---|
| Open construction or renovation | Several area lights spread across the space | Dark zones behind partitions and equipment |
| Assembly, inspection, or detail | Adjustable task light near the work | Glare, blocked beams, and false shadows |
| Painting or finishing | Consistent light with good color rendering | Color shifts between work light and finished room |
| Confined electrical or mechanical access | Compact, aimable fixture suited to the location | Power, heat, cord routing, and site rules |
| Outdoor or moving between areas | Weather-suited fixture or portable battery light | Stable mounting and runtime for the task |
These are starting points, not universal specifications. Required illuminance varies by task, project plan, and jurisdiction.
03 / See details accurately
Color quality matters when color is part of the job.
Color temperature, measured in kelvins, describes whether light looks warmer or cooler. Color rendering index (CRI) indicates how faithfully it shows colors.
Distinguish real colors
Good color rendering can make conductor colors, labels, and visual details easier to check. It does not replace circuit verification or specifications.
Check under relevant light
Inspect a test patch under the work light and the lighting the room will use. A finish can look different under each source.
Prioritize even visibility
For rough framing, broad and even coverage may matter more than color fidelity. Match the light to the decision you need to make.
04 / Before raising brightness
Move the beam before turning it up.
Aim from outside your direct sightline. Check the work from where you stand, with your body and tools in working position.
05 / Power, durability & site safety
Choose equipment for the conditions and the shift.
Corded lights offer continuous operation where suitable outlets are available. Battery lights add mobility; compare runtime at the brightness you will actually use.
Route power safely
Keep cords out of walkways and away from sharp edges, heat, and water. Secure stands so they cannot tip when bumped.
Check the ratings
Match IP rating, impact resistance, and operating temperature to actual conditions. Marketing claims do not replace specifications.
Follow site requirements
Use approved equipment in wet or hazardous locations and follow manufacturer instructions and local rules. Use licensed professionals for regulated work.
“Set up, check the beam, then recheck coverage when the work area changes.”
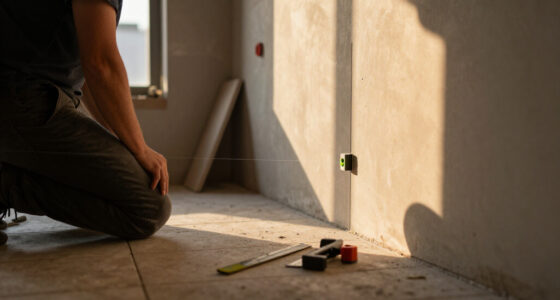
For a basement renovation, a tripod by the stairs may light the floor while a worker’s shoulder shadows cabinet hardware. Moving it to the opposite side and adding a compact task light can reveal the screw holes without simply increasing output.
Start with the work surface, not the brightest spec
Jobsite lighting works when enough light reaches the surface you’re working on, from an angle that lets you see the details without glare. Choose the fixture and its position for that point first; a high lumen rating alone can’t tell you whether the surface is bright, even, or free of shadows.
Lumens describe a fixture’s total visible light output. Lux and foot-candles describe light landing on an area, so they’re more useful when you need to know how bright a workbench or floor actually is. One light mounted high in the middle of a room can spill onto walls and ceilings while leaving the saw bench in a dim pocket.
For example, picture a basement renovation with one tripod light beside the stairs. Its bright beam makes the concrete floor shine, but a worker installing cabinet hardware stands between the fixture and the drill point. The worker’s shoulder throws a hard shadow across every screw hole. Moving the tripod to the other side of the cabinet, then adding a compact light near the hardware, makes the work easier to see without simply turning up brightness.
How to choose starts with three questions: what needs to be seen, how far away is the fixture, and what could block its beam? If the project specifies a lighting level, use that requirement. A light meter can check lux at the work surface; don’t guess based on how dramatic the room looks from the doorway.
Popular right now

Bose QuietComfort Wireless Bluetooth Headphones with Active Noise Cancellation, Mic, USB‑C Charging, Deep Bass, 24‑Hour Battery – White Smok

Bose QuietComfort Wireless Noise-Cancelling Over-Ear Headphones, Black

Apple AirPods Pro 3 Wireless Earbuds with Active Noise Cancellation
As an affiliate, we earn on qualifying purchases.
Use area lights for coverage and task lights for detail
Use area lights to brighten a broad room and task lights to reveal close details at the work point. For a large open space, several well-spaced fixtures usually make fewer dark zones than one intense lamp, while an adjustable light beside a small assembly can put useful light exactly where you need it.
A room being framed needs you to see where materials, people, and equipment are moving. Broad coverage from multiple area lights gives you a more even picture across the floor. A countertop installer checking a narrow seam, by contrast, benefits from a smaller beam aimed along the surface so ridges and gaps show up clearly. Same jobsite, different job.
| Work being done | Helpful starting setup | What to watch |
|---|---|---|
| Open construction or renovation area | Several area lights spread across the space | Dark zones behind partitions and equipment |
| Assembly, inspection, or close-up detail | Adjustable task light placed near the work | Glare, blocked beams, and false shadows |
| Painting or finishing | Consistent light with good color rendering | Color changes between the work light and final room |
| Confined electrical or mechanical access | Compact, aimable fixture suitable for the location | Power, heat, cord routing, and site rules |
These are starting points, not fixed lighting specifications. Required light levels vary by task, jurisdiction, and project plan. For instance, a painter might check a wall once under a broad work light, then again with a lower angled beam that reveals roller marks; the second view catches defects the first beam can hide.
Pick color quality that helps you spot real differences
Color quality matters when your task depends on telling colors apart or judging a finish. A light’s color temperature, measured in kelvins, describes whether it appears warmer or cooler; its color rendering index (CRI) indicates how faithfully it shows colors. Neutral to cool white light is common on jobsites, but a high CRI can be especially useful for wiring, paint, finish work, and inspection.
Imagine connecting conductors in a crowded box under a weak, yellowish lamp. Insulation colors may be harder to distinguish, while a cool-looking but poor-quality light can make paint look different from the finished room. Better color rendering can make visual checks clearer, but it doesn’t replace checking the actual circuit, labels, or specifications. For electrical work, a licensed electrician should handle work that requires one, and the correct circuit must be shut off and verified dead before work begins.
Finishes have their own wrinkle: a paint sample can look clean beside a work light and different again under the warm fixtures in a living room. If the final color matters, inspect a test patch under both the temporary lighting and the lighting the room will use. That two-light check is like hearing a guitar through two speakers; one can flatter a sound that the other exposes.
Match the light to the decision. If you’re checking rough framing, color fidelity may matter less than even coverage. If you’re matching stain or judging a wall’s finish, consistent color and direction matter more. Don’t chase a kelvin number in isolation: fixture placement, surface color, and the finished room all affect what your eye sees.
Cut glare and shadows before adding more brightness
To make jobsite lighting easier on your eyes, aim fixtures at the work from outside your direct line of sight and use more than one direction when a single beam leaves hard shadows. A worker who sees the task clearly can mark, cut, and inspect more accurately than one squinting into a bright lamp or chasing moving shadows.
Start with a simple walk-through after setting up. Look at the surface from the position where you’ll work, then shift one step to the side. If a polished counter flashes white or a saw blade disappears behind your arm’s shadow, move or angle the fixture before you continue.
- Place the light off to one side so its beam reaches the work without shining into your eyes.
- Check your own shadow while holding the tool or material in its working position.
- Add a second source from another angle if a hand, cabinet, or stud keeps blocking the first beam.
- Lower brightness if needed once coverage is even; maximum output isn’t a cure for a poor angle.
- Secure the stand or mount so the fixture won’t tip when a cord gets nudged or people pass by.
A drywall finisher working in a narrow hall may start with one tall tripod. The far corner looks bright, but the finisher’s body blocks the sanding area. A small task light placed beyond the worker can soften that shadow and reveal scratches without flooding the hallway with glare. If you can see detail without squinting or losing it every time you move, the setup is doing its job.
Choose corded or battery power around the whole shift
Choose a corded light when you have a suitable, protected power source and need steady operation; choose a battery light when mobility and fewer trailing cords matter more. Battery runtime changes with brightness, battery condition, temperature, and other features in use, so the advertised maximum may not match a full day at top output.
For a garage crew that spends a shift in one bay, corded area lights can run continuously and avoid swapping batteries. On a punch-list day spread across bedrooms, a rechargeable work light can move with the electrician or carpenter and keep cords out of doorways. The tradeoff is planning: a battery that lasts through inspection at medium brightness may not last through hours of full-output area lighting.
Check the stated runtime at the brightness setting you expect to use, then leave a margin for cold weather, an aging pack, or a delayed finish. If your cordless tool platform already has compatible batteries, sharing packs can simplify charging, though it can also leave you short when the drill needs power. Some lights offer USB charging or backup power, but using those features may cut lighting runtime.
Keep cords out of walkways and away from sharp edges, heat, and water. Use the voltage, grounding, cord type, and protection required by the manufacturer and local rules. If a light will serve overnight or during an outage, plan its charging and backup source before the crew leaves; finding a dead battery at 5 a.m. is a poor start to a concrete pour.
Match the fixture to dust, rain, and rough handling
For outdoor or dusty work, check the fixture’s IP rating, impact rating, and operating temperature range against the conditions on site. An IP rating describes protection against dust and water under defined tests; it does not automatically prove impact resistance or make a fixture safe in every wet or hazardous location.
A light under a roof eave may face windblown rain, while the same fixture inside a concrete-cutting area can collect fine dust around vents and controls. Those are different exposures. Check the rating and instructions, keep LED cooling openings clear, and clean the fixture using the method the manufacturer allows. LEDs produce less heat than many older lamps, but they still need adequate cooling and must stay within their stated temperature limits.
One practical example: a remodel crew uses a general-purpose rechargeable lamp while cutting tile outdoors. The sky darkens, dust clings to the lens, and the stand begins to rock on uneven ground. A fixture suited to the actual weather and dust, mounted securely and kept out of the cutting slurry, gives safer, steadier light. “Jobsite tough” printed on packaging tells you less than the specifications.
IP rating is not a permission slip. Wet areas, flammable gas, and combustible dust can require approved equipment and specific work practices. Follow local rules and site requirements; ask a qualified safety professional or licensed contractor when the location or task calls for it.
For overhead, structural, roof, gas, or electrical work, hire the appropriately licensed professional where required. Keep power off and verify it before electrical work; wear suitable eye, hand, and respiratory protection for the task. Code and permit requirements are part of the job, not details a brighter lamp can solve.
Set up portable lights so crews can move safely
Set up portable lights in a stable position, route their power safely, and recheck coverage whenever the work area changes. Tripod lights give broad, temporary coverage, while clamp and magnetic lights can reach tight spots; the best mount is the one that holds the beam steady without putting people, cords, or the fixture in danger.
In a kitchen renovation, the crew may move from cabinet installation to under-sink plumbing to painting. A tripod can illuminate the room during cabinet work, but it may block a narrow aisle when plumbers arrive. A compact light clipped inside the cabinet makes the pipe connections visible and leaves the floor clear for tools and knees.
- Choose the mounting style for the task: tripod for broad coverage, clamp or magnet for a fixed nearby surface, handheld or compact light for inspection.
- Test stability on the actual floor or mounting point, including uneven ground and nearby traffic.
- Route cords deliberately away from walking paths, water, hot surfaces, and sharp edges; use approved protection where site rules call for it.
- Re-aim as work changes so a new partition, worker, or machine doesn’t create a blind spot.
- Inspect and clean after use and store batteries and fixtures according to their instructions.
A small amount of setup discipline saves repeated stops. If a fixture is likely to be bumped, use a more secure mount or put it beyond the traffic lane. On a large or overnight job, agree on who checks charging and placement at the end of each shift so the next crew doesn’t inherit a dark corner and a dead pack.
Frequently Asked Questions
How many lumens do I need for a jobsite?
There isn’t one lumen number that fits every job, because lumens describe total fixture output, not light reaching the work. Room size, beam spread, mounting height, surfaces, and shadows all change the result. Check project requirements and measure at the work surface when the specified light level matters.
What is the difference between lumens, lux, and foot-candles?
Lumens describe the total visible light emitted by a fixture. Lux and foot-candles describe illuminance, or light falling on a surface; one foot-candle is about 10.8 lux. For a bench or floor task, the surface measurement tells you more than the lamp’s lumen total.
Should I choose corded or battery-powered jobsite lights?
Corded lights suit stationary work with an appropriate power source and a need for continuous operation. Battery lights suit moving crews and places where trailing cords create trouble, but runtime falls as brightness rises and depends on battery condition and temperature. Compare runtime at your expected setting and plan charging or spare packs for the whole shift.
What color temperature and CRI work best for painting or inspection?
Neutral to cool white light is common for jobsite visibility, while a higher CRI can help you judge paint, finishes, wiring colors, and surface defects. The room’s final lighting still matters: check a paint sample or finish under the light it will live under. A work light can reveal flaws, but it can also make a color look different from the finished space.
Can I use any jobsite light outdoors or in a wet area?
No. Check the fixture’s IP rating, impact resistance, temperature range, manufacturer instructions, and local site rules against the actual exposure. An IP rating does not establish suitability for every wet or hazardous location. Keep power connections protected as required and use approved equipment where flammable gases or dust may be present.
Conclusion
Choose a light by asking what you need to see, where the work surface sits, and what could block or damage the beam. Start with even coverage, add a close task light for detail, and check the actual surface instead of trusting a lumen number on its own.
When the crew packs up, the best sign of a good setup is simple: no one spent the shift squinting into glare or guessing at shadows, and the lights are ready for the next room.