
TL;DR

Get business pricing on tools and workshop supplies
- Business-only prices and quantity discounts
- Tax-exempt purchasing
- Multiple users, one account, clear invoices
For small renovation projects, start with a comfortable drill/driver, two compatible batteries, and a charger; add an impact driver, saw, or oscillating multi-tool when a real job calls for it. Choose a battery platform before expanding, match tool size to the material and workload, and account for dust, PPE, and code requirements.
A small cordless drill can save a Saturday; a giant kit full of tools you never use can eat the budget and crowd the closet. For a room refresh, cabinet assembly, or a few shelves, control and a compatible battery platform often matter more than the biggest torque number on the box.
This guide helps you choose the best cordless tools for small-scale renovation projects by matching tools to real jobs: drilling pilot holes, fitting trim, cutting plywood, and sanding a patched surface. You’ll learn how 12V and 18V/20V tools differ in practice, what battery ratings actually tell you, and when a rental or licensed professional makes more sense than another purchase.
Think of the tool bag like a kitchen drawer: a few dependable pieces you reach for beat a full set of gadgets that don’t fit the job. Start with the work in front of you, then build deliberately.
Start with a comfortable drill/driver, two batteries, and a charger on a platform you can expand.
Choose 12V or 18V/20V based on workload, tool balance, and runtime; voltage labels alone do not predict performance.
Amp-hours measure battery capacity, not tool power, and larger packs add weight.
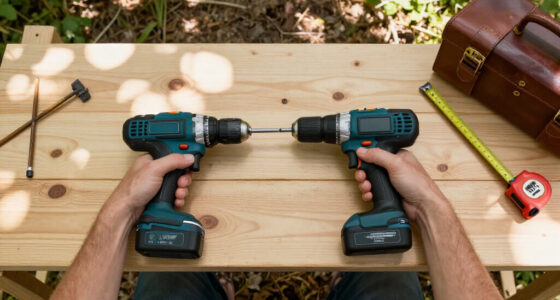
Use a drill for holes and controlled fastening; add an impact driver when repeated or long screws justify it.
Match saws and multi-tools to the cut, control dust, wear suitable PPE, and rent or hire help when the job warrants it.
Small-Scale Renovation · Practical Buying Guide
Best Cordless Tools for Small-Scale Renovation Projects
Build a compact kit around the work you actually have: a comfortable drill, a compatible battery platform, and task-specific tools added only when they earn their place.
Start with the work in front of you
A room refresh, cabinet assembly, and a few shelves call for a focused kit. Match each purchase to a real task.
Drill/driver
Handles pilot holes, general drilling, shelf brackets, cabinet hardware, and controlled screw driving. A clutch helps protect delicate surfaces.
Impact driver
Useful for many or long screws, with less wrist reaction. Keep the drill for clean, accurately sized holes and delicate fastening.
Saw or multi-tool
Choose a circular saw for straight cuts, a multi-tool for flush trim and detail work, or a reciprocating saw for rough demolition.
Choose a battery platform first. Batteries and chargers can be costly, and brands generally do not share them.
Hold the drill. Check the grip, trigger, balance, work light, and whether the clutch is easy to set.
Choose voltage by workload
Voltage labels alone do not predict performance. Consider tool balance, runtime, motor design, gearing, and the material.
Comfort is part of capability
A compact 12V tool is often enough for fixtures, cabinet assembly, and light repairs. Lower weight can make overhead work steadier and less tiring.
Choose 18V/20V when repeated drilling, cutting, or heavier work calls for more capacity. The larger platform may add weight and bulk, so compare actual tools and specifications.
Battery tradeoff: A higher amp-hour (Ah) rating generally provides longer runtime, but adds battery weight. Ah measures capacity, not tool power.
| Setup | Often suits | Tradeoff |
|---|---|---|
| Compact 12V | Assembly, fixtures, light repairs | Less capacity for sustained heavy work |
| 18V / 20V | More drilling, cutting, demanding tasks | Can be heavier and bulkier |
| Two batteries | One works while the other charges | Fewer charging interruptions |
Add tools when the job calls
Use the tool designed for the cut or finish. Rent or hire help when a one-off task or safety requirement makes buying impractical.
Oscillating multi-tool
Flush cuts, trim adjustments, scraping, and detail sanding. Check accessory needs and blade costs.
Circular or compact saw
Straight cuts in sheet goods and lumber. A guide improves accuracy; check depth and blade compatibility.
Random-orbit sander
Smooths wood and prepares surfaces. Connect dust collection where possible and choose suitable abrasives.
Work light
Improves visibility in closets, basements, and other areas without convenient lighting.
A simple buying sequence
Build deliberately, from the common jobs toward specialized cuts and finishes.
Choose a platform
Check compatibility and the cost of batteries, chargers, and later bare tools.
Try the drill
Favor a comfortable grip, variable-speed trigger, work light, and reliable clutch.
Cover runtime
Start with two batteries and a charger so one pack can work while the other charges.
Add for a task
Pick an impact driver, saw, or multi-tool when your project gives it a clear job.
Brushless designs can improve efficiency and reduce maintenance, but for occasional light use, price, ergonomics, and warranty may matter more. Treat broad market trends as context, not live product rankings.
Plan for dust, protection, and the work itself
Good tool choices include the setup around the cut: securing material, controlling dust, and knowing when a job needs a qualified professional.
Wear eye and hearing protection where appropriate. Follow the tool and battery instructions.
Cutting and sanding can create hazardous dust. Use suitable extraction and respiratory protection for the material and task.
Support and secure workpieces before cutting or drilling; use the right guide and blade for the material.
Check local code requirements. Rent equipment for occasional demanding work or hire a licensed professional when the job warrants it.
Start with one battery platform and a drill you can control
The best cordless tools for small-scale renovation projects start with a drill/driver, two batteries, and a charger on a platform you can expand. That setup covers pilot holes, shelf brackets, cabinet hardware, and plenty of general fastening without committing to a bulky collection. Two batteries matter because a dead pack otherwise stops the whole job; the second lets you keep working while the first charges.
Choose the battery system before you buy a second tool. Batteries and chargers can be among the costliest parts of a kit, and brands generally do not share batteries even when voltage labels look similar. The platform choice affects the price of every later bare tool, so a cheap starter kit may become expensive if you switch systems. A homeowner assembling kitchen cabinets, for example, may save money later by adding a bare tool that uses the batteries already on the shelf.
Prioritize a variable-speed trigger, a reliable clutch, a comfortable grip, and a work light. The clutch limits how hard the drill drives a screw; that can keep a cabinet face from getting chewed up when you’re fastening a hinge. It also makes repeat fastening more consistent, which is useful when several screws must sit flush without damaging the material. A balanced, lighter drill feels steadier overhead or inside a narrow closet, where awkward wrist angles make excess weight more tiring and harder to control.
For occasional assembly and light repairs, a compact 12V tool often supplies enough power with less hand fatigue. If you expect frequent drilling into tougher material or longer cutting jobs, an 18V/20V platform may make more sense. The right choice depends on workload and comfort, not the label alone: choosing more capacity than you need can mean carrying extra weight, while choosing too little can make a demanding job slow and strain the tool.
- Before buying: Check which tools use the same battery platform.
- At the store: Hold the drill and test how the grip and trigger feel.
- For a starter setup: Favor two batteries so one can charge while the other works.
Popular right now

Bose QuietComfort Wireless Noise-Cancelling Over-Ear Headphones, Black

Apple AirPods Pro 3 Wireless Earbuds with Active Noise Cancellation

KitchenAid Classic Series 4.5 Quart Tilt-Head Stand Mixer K45SS, Onyx Black
As an affiliate, we earn on qualifying purchases.
Choose 12V or 18V/20V by the work, not the label
The best cordless tools for small-scale renovation projects use 12V for lighter, tighter work and often use 18V/20V when the job demands more capacity. A 12V drill can be a comfortable choice for hanging a few shelves or assembling cabinets; a larger platform can be useful when you’re drilling repeatedly or cutting thicker stock. The distinction shows up over the course of a job: lower weight can make repeated overhead work easier, while more capacity can help a tool sustain demanding work with fewer pauses.
Voltage alone does not tell you how a tool performs. Motor design, gearing, battery capacity, and the task all matter, much like a car’s engine size doesn’t tell you how comfortably it fits down a narrow street. In many product lines, 18V and 20V refer to nominal and maximum battery voltage ratings for similar systems. Compare the actual platform and tool specifications rather than assuming a 20V label means more working power than an 18V one. For a homeowner, this means the tool’s weight, balance, runtime, and intended workload are more useful buying clues than a voltage number on its own.
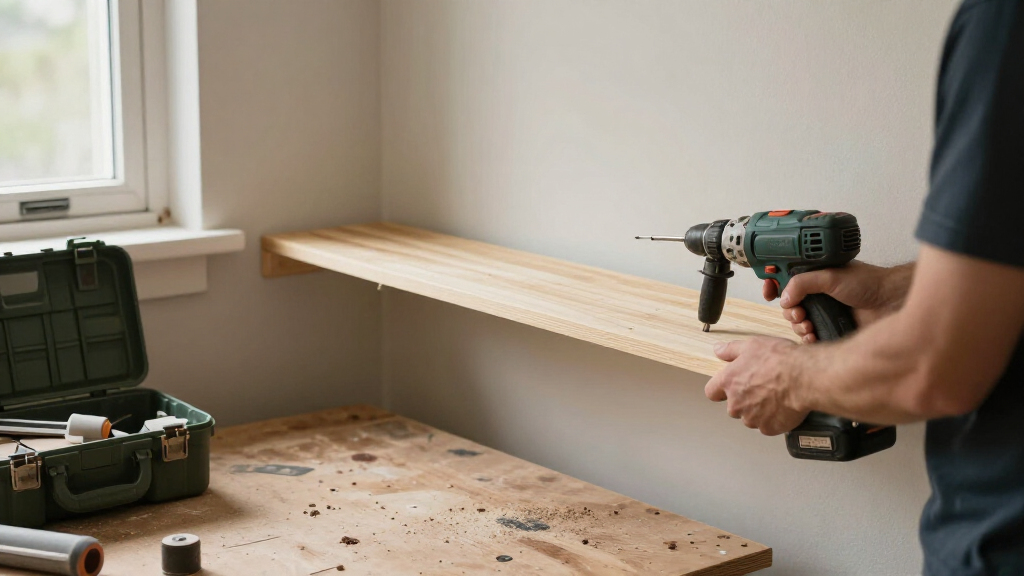
Imagine installing curtain brackets in a small bedroom. A compact drill is easier to keep level above your head, and its lighter battery may feel better after a dozen holes. If the same renovation includes drilling many holes or cutting lumber, a heavier tool may be worth its extra capacity. The decision is a workload tradeoff: occasional short tasks favor comfort, while repeated or demanding tasks can justify carrying more weight.
Battery size brings a tradeoff: larger capacity usually gives you more runtime but adds weight. For a short repair, a smaller pack can make the tool easier to handle. For a full day of cabinet installation, two batteries and a charger can reduce interruptions. A larger pack may be most useful on a saw or other tool that draws power steadily, while the same pack can make a drill feel unnecessarily bulky for light fastening.
| Setup | Often suits | Tradeoff |
|---|---|---|
| Compact 12V | Assembly, fixtures, light repairs | Less capacity for sustained heavy work |
| 18V/20V | More drilling, cutting, and demanding tasks | Can be heavier and bulkier |
Know when a drill is enough and when to add an impact driver
The best cordless tools for small-scale renovation projects often include a drill/driver first; an impact driver is a useful second tool when you’ll drive many or long screws. The drill handles both drilling and controlled fastening, while the impact driver is built to drive fasteners with less wrist reaction. Starting with a drill gives you one tool that covers more kinds of work; adding an impact driver pays off when repeated fastening is frequent enough that speed and reduced wrist strain matter.
That difference matters when you’re building a row of shelves or fitting a long run of cabinet screws. An impact driver can keep the work moving with less twisting force against your hand, but its hammering action makes it a poor stand-in for a drill when you need a clean, accurately sized hole. Use the drill and a proper bit for that hole, then switch tools if the fastening workload justifies it. Using the right tool also helps protect the work: the drill’s clutch offers more control for delicate screws, while the impact driver’s force can make it easier to overdrive a fastener in soft material.
For a homeowner repairing a loose door hinge or assembling one flat-pack cabinet, buying both tools may not pay off. A drill with a clutch and the correct driver bit can handle occasional screws neatly. For repeated framing screws or a series of cabinets, an impact driver can reduce fatigue and speed the job. Consider the cost of the extra tool against how often you expect to do that work, rather than treating the matching pair as an automatic purchase.
Technique still counts. Pick the correct bit, keep it seated squarely, support the workpiece, and let the tool do the work. A high torque rating cannot rescue a worn bit slipping across a screw head; the sharp squeal and stripped metal are usually signs to stop and reset. Continuing to drive when the bit slips can damage the fastener and surface, turning a quick fastening job into a repair.
- Use a drill/driver for holes, pilot holes, and controlled fastening.
- Add an impact driver for many or long fasteners.
- Use the right bit and secure the work before driving.
Pick a saw or multi-tool that matches the cut
The best cordless tools for small-scale renovation projects depend on whether you need a straight cut, a flush trim, or rough demolition. A circular saw suits straight cuts in sheet goods and lumber, an oscillating multi-tool handles small detail work, and a reciprocating saw is better suited to rough cuts where a polished edge does not matter. Matching the tool to the cut helps with accuracy and control: a demolition saw can remove material quickly but is a poor choice when the finished edge will be visible.
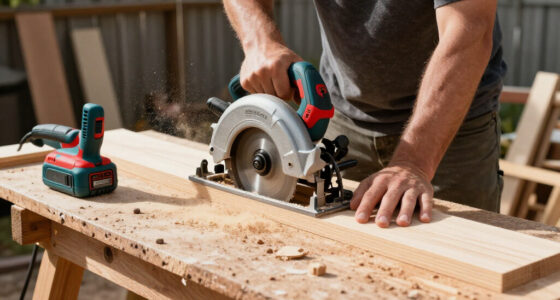
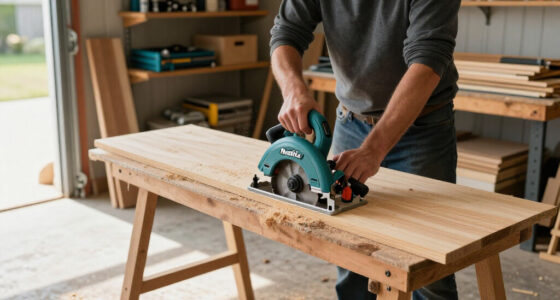
When a closet project needs a plywood shelf shortened, a circular saw and a straight guide can produce a cleaner, more accurate edge than freehand cutting. Check the saw’s cutting depth and compatible blade before buying. Secure the sheet so it cannot shift, keep hands clear of the blade path, and wear eye protection; cutting also calls for hearing protection where noise levels warrant it. Supporting the sheet properly matters too: unsupported material can pinch the blade or break away at the end of a cut, spoiling the edge and making the saw harder to control.
An oscillating multi-tool earns its place when trim needs a flush cut around a door jamb or a small flooring adjustment needs a precise blade. Its compact motion can reach tight spots a circular saw cannot, but the tool’s flexibility comes with slower cutting and dependence on the right accessory. Its usefulness depends on the accessories, and replacement blades can add up. For one minor cut, borrowing or renting may cost less than buying the tool and blades.
A reciprocating saw can make short work of rough demolition, such as cutting an old nail-studded piece of framing during a permitted interior repair. Its speed makes it useful where a clean edge is unimportant, but that same speed leaves less room to correct a mistaken cut. Hidden wiring, plumbing, and structural members can turn that simple cut into a serious hazard. Stop when you cannot confirm what lies behind the surface, and bring in a qualified professional for structural, electrical, gas, or roof work.
- Choose a circular saw for planned straight cuts.
- Choose an oscillating multi-tool for flush cuts and detail work.
- Choose a reciprocating saw for rough demolition after checking what is behind the material.
Control dust before sanding or cutting
The best cordless tools for small-scale renovation projects need good dust control and PPE as much as useful power. A random-orbit sander can smooth a wood edge or prepare a patched surface, but fine dust can spread through a room quickly if you sand without extraction. Dust control also protects the finish: particles settling on nearby surfaces can create extra cleanup and contaminate paint or other coatings.
For a small tabletop repair, connect the sander to suitable dust collection where possible, choose abrasives made for the material, and wear respiratory protection appropriate to the dust and task. Add eye protection, and use hearing protection when the tool or job calls for it. A shop vacuum or extractor can keep a pale cloud from settling over nearby shelves, though the right equipment depends on the material and the dust involved. Matching extraction and respiratory protection to the material matters because ordinary cleanup equipment may not capture or safely handle every kind of dust.
Before cutting into an older wall, check whether the material could contain hazardous dust. If you cannot identify the material or safely control the exposure, stop and seek qualified guidance. Respiratory protection is not a substitute for checking the material and using suitable extraction. This check can change whether a task is appropriate for DIY at all; a mask alone does not make an unknown material safe to disturb.
Battery safety belongs in the same routine. Use the charger and battery as directed, inspect them for damage, and store packs according to the manufacturer’s instructions. If a battery is cracked, swollen, or behaving unusually, stop using it and follow the manufacturer’s guidance instead of leaving it on the charger beside a pile of sawdust. Damaged packs can behave unpredictably, so setting them aside according to the manufacturer’s instructions is part of protecting both the workspace and the tool investment.
Protect the work area before you make dust: secure the material, set up extraction, wear appropriate PPE, and keep bystanders out of the cutting zone.
Buy a kit only when you’ll use what’s inside
The best cordless tools for small-scale renovation projects come from a kit only when its tools, batteries, and charger fit jobs you expect to do. A multi-tool kit can look like a bargain, but an unused saw still takes up space and the batteries can tie you to a platform you do not need. The sticker price alone hides the real value: consider what you would pay for the tools you will actually use, plus whether the included batteries suit those tools.
Compare the kit’s contents with your actual project list. If you plan to hang shelves and assemble a vanity, a drill, two batteries, and a charger may be a better first purchase than a set that adds a reciprocating saw and work light. If you already know a room refresh includes trimming shelves and sanding wood, a bundle with a compatible saw or sander may be useful. The distinction is whether the extra tools solve planned jobs; buying them in advance can make a kit feel cheaper while leaving you with unused equipment.
Brushless motors can improve efficiency and reduce maintenance compared with brushed designs. That can matter when you use a tool often or push it hard. For occasional light work, a well-made brushed tool may be a sensible value if it feels comfortable and comes with a suitable warranty. Paying extra for brushless technology makes more sense when frequent use allows the efficiency and durability benefits to matter over time.
Compare current specifications, warranty terms, and independent reviews because prices and tool availability change. Also check whether a kit includes batteries at a useful capacity for the intended tool. A very small pack may feel nimble on a drill, yet leave you swapping batteries frequently during a longer cutting job. A kit’s battery count is therefore only part of the comparison: capacity and the power demands of the included tools determine how useful those packs are on the jobs you have planned.
- Worth buying: tools tied to projects you can name.
- Worth checking: battery count, capacity, charger, warranty, and platform compatibility.
- Often better to rent: a specialized tool needed for one short job.
Rent the heavy tool and hire out regulated work
The best cordless tools for small-scale renovation projects are sometimes tools you rent or leave to a licensed professional. A large demolition job, a specialized concrete task, or a tool needed for one afternoon may not justify the purchase price, storage space, and learning curve. Renting can make the overall job more practical, but the rental fee is only one consideration: transport, setup, operating skill, and dust control also affect whether it is a good fit.
For example, replacing a few floorboards may call for a multi-tool and careful hand work; removing a whole tiled floor can call for heavier equipment, dust control, and a plan for debris. Ask a rental shop which tool suits the material and how to use its guards and attachments. Do not assume that a more powerful machine automatically makes a difficult job safer or cleaner. The right tool can reduce effort, but only when you can use it safely and manage the material it removes.
Electrical, gas, structural, and roof work require particular care. Hire a licensed professional for work that falls under those categories, and follow local permit and code requirements. If you are doing adjacent DIY work, switch off power at the correct breaker before working near electrical components, verify the circuit is de-energized with suitable equipment, and use appropriate PPE. Never rely on a wall switch alone. These precautions matter because mistakes around services or structural elements can cause harm beyond the immediate work area and may require regulated repair.
When demolition exposes an unexpected cable, pipe, gas line, rot, or structural member, stop. A cordless saw can cut through material in seconds; the damage behind that material can take far longer to repair. Continuing without understanding what you found can make the repair more dangerous and expensive. Good judgment is a tool too, and sometimes the fastest route to a finished room is a phone call to a qualified trade.
Frequently Asked Questions
Should I buy 12V or 18V/20V tools for home renovation?
Choose 12V for lighter assembly, fixtures, and small repairs where comfort and size matter. Choose 18V/20V when you expect more drilling, cutting, or sustained work. Try the tool in your hand, since balance and battery weight affect control.
Do I need both a drill/driver and an impact driver?
No. A drill/driver is the most versatile first tool because it makes holes and drives screws with clutch control. Add an impact driver if you regularly drive long screws or many fasteners; it is not the right tool for clean, accurately sized holes.
Are 18V and 20V batteries interchangeable?
Not by voltage label alone. Battery compatibility depends on the manufacturer’s platform and tool design, and brands generally do not share packs. Check the exact platform and compatibility information before buying a bare tool or spare battery.
What does amp-hour mean, and how many batteries should I buy?
Amp-hours (Ah) describe battery capacity, not the tool’s power. A higher capacity usually runs longer but adds weight. Two batteries are a practical starting point: one can work while the other charges.
Is a brushless cordless tool worth the extra cost?
Brushless motors can improve efficiency and reduce maintenance, which can matter for frequent or demanding use. For occasional light renovations, a comfortable brushed tool with a good warranty may be better value. Compare the whole tool and platform, not the motor label alone.
Can a cordless circular saw cut plywood or dimensional lumber?
Many cordless circular saws can handle these materials when their cutting depth and blade suit the work. Check the tool specifications, use a sharp compatible blade, and guide the cut with a straightedge when accuracy matters. Secure the workpiece and wear appropriate eye and hearing protection.
When should I rent a tool or hire a professional?
Rent a specialized tool when you need it for one short job and the purchase would add little long-term value. Hire a licensed professional for electrical, gas, structural, or roof work, and follow local permit and code requirements. Stop DIY work if demolition reveals hidden services or structural damage.
Conclusion
Build your cordless setup around the next real job: start with a drill/driver, two batteries, and a charger, then add a tool when the work makes its value clear. A balanced tool with the right bit, a stable workpiece, and good dust control will usually beat a heavier tool used carelessly.
Keep the battery platform consistent, respect code and permit requirements, and stop when hidden hazards or regulated work enter the picture. The best tool bag is the one that leaves the room cleaner, the cut straighter, and your hands steady enough to put everything away.