
TL;DR

Get business pricing on tools and workshop supplies
- Business-only prices and quantity discounts
- Tax-exempt purchasing
- Multiple users, one account, clear invoices
Choose high-visibility clothing to match vehicle and equipment hazards, lighting, weather, background and the rules for your project. Fluorescent material stands out in daylight, while retroreflective material returns light toward headlights at night; ANSI/ISEA 107 classes describe garment performance, but your employer’s hazard assessment and local requirements determine what you need. Inspect the whole outfit and keep traffic controls, lighting and safe work procedures in place.
A worker can wear the brightest vest on the crew and still disappear behind a parked loader, into a rain-dark roadway, or under a tool belt that covers the reflective strips. High-visibility clothing helps people stand out so equipment operators, drivers and coworkers can see them sooner, but the right choice depends on the job around them.
This guide shows you how to match a vest, jacket or other garment to traffic, lighting, weather and movement. You’ll also learn what ANSI/ISEA 107 classes tell you, where fit and other PPE can get in the way, and how to inspect clothing before its color fades or reflective trim wears down.
Use your employer’s hazard assessment and the project’s rules to make the final choice. Requirements differ by task and location, and a vest is only one part of a safe work zone. The goal is simple: keep workers visible while the site plan keeps them out of harm’s way.
Start with the employer’s hazard assessment: traffic speed, distance, background, lighting and weather affect the garment choice.
ANSI/ISEA 107 classes describe apparel performance; confirm the current standard edition and local, regulatory and project requirements.
Fluorescent material helps in daylight, while retroreflective trim returns light toward headlights or work lights.
Test the garment with the worker’s usual layers, hard hat, harness and tool belt so visibility features stay uncovered during movement.
Inspect, clean and replace garments under the care label and employer policy, and pair them with traffic controls, lighting and safe work procedures.
Field guide · Construction site visibility
Choosing the Right Safety Vests and High-Visibility Clothing
Match the garment to the hazards around the worker. Traffic speed, distance, lighting, weather, background and movement all shape what helps a crew stand out. Use the employer’s hazard assessment and project rules to make the final choice.
01 / Start with the hazard
Choose for the work area, not the color rack
A crew inside a bright, fenced site faces a different visibility problem from workers directing traffic beside a dark roadway. Walk the area from the operator’s point of view and note where workers can be masked or seen only from the side.
Speed changes the margin
Consider vehicle and machine speeds, viewing distance, reversing routes, cross-traffic and blind spots. Higher speeds and longer distances can call for greater conspicuity.
Check what sits behind the worker
Orange fencing or equipment can blend with orange fabric; a different background color may stand out better. Account for daylight, dusk, night work, shadows and work lights.
Visibility must move with the task
Rain, dust, wind and temperature affect garment choice. Side views, turning and lifting may call for visible sleeves or trouser coverage as well as front and back panels.
Observe the route
Map equipment paths, public traffic and worker crossing points.
Check the sight lines
Look for obstructions, busy backgrounds and profile views.
Match garment features
Choose class, coverage and fabric for actual conditions.
Reassess when work changes
Framing, deliveries and roadside tasks can change the risk.
02 / Know the materials
Daylight fabric and reflective trim do different jobs
Fluorescent background material helps a worker stand out in daylight and some low-light settings. Retroreflective material sends light back toward its source, which can help when headlights or work lights illuminate it.
Illustrative comparison: bars show which visibility features help in each condition; they are not measured performance scores. Neither feature works in every situation by itself.
03 / Use classes with context
ANSI/ISEA 107 helps compare apparel performance
The standard addresses visible material and garment design. Class labels help frame a choice, but the hazard assessment, current standard edition, regulations and written project requirements determine what is suitable.
| Class | Typical risk context | What it indicates | Decision check |
|---|---|---|---|
| Class 1 | Lower-risk situations | Apparel performance for settings with lower visibility demands. | Confirm the task and site rules allow this level. |
| Class 2 | Intermediate-risk settings | Greater visibility than Class 1 for more demanding conditions. | Check exposure, distance and garment configuration. |
| Class 3 | Demanding conditions | Highest visibility and coverage among these performance classes. | Assess comfort, heat, movement and required coverage. |
OSHA requirements may call for high-visibility garments for particular work, including certain highway work zones. Rules differ across countries and projects. Verify current regulations, contract specifications, employer policy and the current standard edition before purchasing.
04 / Fit the whole outfit
Keep visibility features clear through movement
Test the garment with the layers and protective equipment workers actually use. The complete outfit should fit comfortably, allow movement and keep visible areas uncovered as the task changes.
Coverage that suits the shift
Vests are light and easy to layer. Shirts, jackets, trousers or coveralls can add coverage or suit cold, wet and demanding work. Choose breathable materials for heat and moisture, and weather-resistant or insulated options for cold, rain or wind.
Check for hidden reflective areas
Hard hats, harnesses, fall-protection gear, tool belts and outerwear can cover trim or alter fit. Try the full setup while walking, turning, bending and lifting. Avoid unapproved patches or alterations that interrupt visible material.
A bright vest cannot see around a parked loader.
For a truck backing across a muddy site at dusk, conspicuous clothing can help the driver notice a worker sooner. A spotter, clear route, agreed signal, lighting and separation from equipment still shape the safe work plan.
05 / Inspect & maintain
Make visibility last through rain, dust and repeated washing
A garment helps only while its color, reflective trim, closures and fit remain in working condition. Follow the care label, manufacturer laundering limits and employer inspection criteria.
Look for fading and dirt. Soil and worn color can reduce contrast with the background.
Check reflective trim. Look for wear, damage, gaps or areas hidden by other PPE.
Inspect seams and closures. Tears or failed fasteners can affect fit and positioning.
Follow care instructions. Use the label and manufacturer limits for cleaning.
Replace when required. Follow employer criteria when performance is no longer acceptable.
Verify branding and layers. Confirm logos, pockets and add-ons do not compromise visible areas.
Start with the hazard, not the brightest color
Choosing the right safety vests and high-visibility clothing for construction sites starts with the hazard assessment. Look at how fast vehicles and machines move, how far away a worker may be, what the lighting is like, and what colors fill the background. A crew beside slow-moving equipment in a bright, enclosed site faces a different visibility problem from workers directing traffic beside a dark highway at night.
Walk the work area from the operator’s point of view. A worker in orange may stand out against green trees but blend into orange fencing or equipment; a yellow-green garment may show better there. Check likely blind spots, reversing routes, cross-traffic and places where workers turn their backs or move sideways. Visibility clothing helps people stand out from their surroundings, but no color can make a worker visible through an obstruction.
For example, imagine a delivery truck backing across a muddy site at dusk. A worker crossing behind it needs to be seen from several angles, while the driver also needs a spotter, a clear route and an agreed signal. More conspicuous clothing supports the plan; it doesn’t replace separation from equipment or communication.
Write down the real conditions: daylight or night work, rain or dust, public traffic or internal equipment, and whether workers need visibility from the side. Revisit the assessment when the work changes. A vest that worked during framing may be the wrong garment when the crew starts directing traffic near a road.
- Check speed and distance: Faster traffic and longer viewing distances can demand greater conspicuity.
- Check the background: Fencing, machinery and stored materials can mask a color.
- Check movement and direction: Workers seen from the side may need visible sleeves or trouser coverage.
Popular right now

KitchenAid Classic Series 4.5 Quart Tilt-Head Stand Mixer (K45SS), Onyx Black

Ninja Specialty Coffee Maker CM401, 10-Cup Carafe, Fold-Away Frother, Black

Ninja Flip Toaster Oven & Air Fryer, 8-in-1, Stainless Steel, SP151
As an affiliate, we earn on qualifying purchases.
Use ANSI classes as a guide, then check the job rules
ANSI/ISEA 107 classifies high-visibility apparel by its performance and visible material. Class 1 suits lower-risk situations, Class 2 provides greater visibility for intermediate-risk settings, and Class 3 offers the highest visibility and coverage for demanding conditions. Those descriptions help you compare garments, but the class label alone doesn’t decide what your work requires.
In the United States, ANSI/ISEA 107 addresses fluorescent background material, retroreflective material and garment design. OSHA requirements may call for high-visibility garments for particular work, including certain highway work zones. Other countries and projects may use different rules. Check the current edition of the standard, applicable regulations, contract specifications and employer policy before ordering a crew’s clothing.[1]
For a practical example, a small renovation crew moving materials inside a fenced site may work under a different risk assessment from a road crew exposed to moving traffic. If an ordinary reflective vest has no clear performance information, you can’t assume it meets the standard or project requirement just because it looks bright. Ask the supplier for garment labeling or conformity information, then have the employer verify that it matches the task.
Class 3 generally adds coverage and visibility for more demanding conditions, but it can be warmer or less convenient than a lightweight vest. The right class should follow the hazard assessment, not a guess that “more is always enough.” A high-class garment still cannot compensate for poor traffic control, blocked sight lines or a worker standing in a vehicle’s path.
Before buying in bulk, confirm the current standard edition and the site’s written requirements. A class name on a tag is useful only when it matches the work and the complete garment configuration.
Know why fluorescent and reflective strips do different jobs
Fluorescent material and retroreflective material solve different visibility problems. Fluorescent fabric helps a worker stand out in daylight and some low-light conditions by making the garment more conspicuous against its surroundings. Retroreflective trim returns light toward its source, which can help a driver see a worker when headlights or work lights illuminate the garment at night.
That distinction matters when a job runs across a full shift. At midday, a fluorescent shirt may be easy to pick out against a gray concrete wall. After sunset, that same shirt can lose its advantage if there is little light; reflective strips can catch a headlight beam and flash back toward the driver. Garments that combine background and retroreflective material offer both features, but neither works in every condition by itself.
Consider a road crew placing cones before sunrise. A worker approaching traffic needs to be conspicuous before the headlights reach them, while the reflective trim can help once those headlights land on it. Good work lights, a protected work area, barriers and traffic controls still do the heavy lifting. Visibility clothing helps operators see workers sooner; it doesn’t guarantee a driver will stop in time.
Check whether reflective material remains visible from the front, back and sides, especially when workers turn or walk across a route. A vest with a wide strip on the chest but little side coverage may leave a gap when someone rotates to lift a panel. Sleeve and leg visibility can matter when a worker is seen in profile or is moving through a vehicle area.
- Daylight: Look for suitable fluorescent background material.
- Night work: Check retroreflective coverage and available lighting.
- Changing light: Choose a garment suited to the whole shift, not just the first hour.
Choose a vest, jacket or trousers that stay visible while you work
The best garment is the one that meets the job requirement, fits over your work clothes and keeps its visibility features exposed while you move. A vest is light and easy to layer over a shirt or coat. A high-visibility jacket, shirt, trousers or coverall can add coverage when the weather turns cold or wet, or when workers need visibility across more of the body.
Try the garment over the layers workers will actually wear. It should close properly, stay in place when someone reaches overhead, and leave room to bend, climb and carry materials. A vest that rides up while a carpenter lifts a sheet of plywood or catches on a harness can expose reflective areas or interfere with movement. Loose, flapping fabric near moving machinery creates another problem: snagging.
Picture a cold morning when a laborer adds a thick insulated jacket under a vest sized for a T-shirt. The zipper strains, the hem rides up, and the reflective bands bunch across the chest. A jacket made for the required visibility level may fit the full layer stack better, provided it remains compatible with other PPE. In hot weather, a breathable shirt or lightweight vest can reduce heat discomfort, but it must still satisfy the site’s performance needs.
Use this quick comparison as a starting point, then check each garment’s label and site rules:
| Garment | What it can help with | Check before choosing |
|---|---|---|
| Vest | Lightweight layering in mild conditions | Fit over usual clothing; straps and tool belt may cover reflective areas |
| Jacket | Cold, wind or rain when designed for the required visibility | Heat, bulk, closures and compatibility with harnesses |
| Shirt or trousers | Coverage on arms or legs, including while workers move | Whether the complete outfit meets the job’s requirements |
| Coverall | More continuous coverage for some tasks and conditions | Fit, heat, task hazards and other protective equipment |
Keep hard hats, harnesses and tool belts from hiding the garment
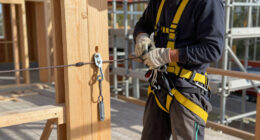
Check visibility on the complete PPE setup, not on a vest hanging by itself. Hard hats, harnesses, fall-protection gear, tool belts and protective outerwear can cover reflective strips, change the fit or pull a garment out of position. A compliant item may be less useful if the crew’s everyday equipment hides its visible areas.
Before the shift, have workers put on the layers and gear they need for the task. Look at the outfit from the front, back and sides. Ask the worker to bend, reach and turn as they would while setting forms or carrying a ladder. If a harness strap crosses a reflective band, or a pouch blocks much of the front, adjust the setup or choose a garment designed to work with that equipment.
For example, a worker wearing a fall-arrest harness over a vest may find that the harness covers the shoulder and chest bands. The answer isn’t to remove required fall protection. Check with the employer or PPE supplier for a compatible configuration that keeps both systems functional. Fall protection and electrical work also carry serious hazards; follow the site’s training and procedures, and use qualified professionals where the task calls for them.
Logos, patches and added pockets can also reduce visible area or interrupt reflective patterns. Some manufacturers offer garments built for specific customization, but an ad hoc patch sewn over a strip can change how the garment performs. Get approval before altering workwear and use approved garments and methods. Do not let branding, a radio clip or a tool pouch create a blind patch that an operator sees only after entering the work zone.
- Inspect the outfit with all required PPE in place.
- Check visibility while standing, bending and turning.
- Keep straps, pockets and attachments from obscuring key material.
- Never remove required protective equipment to expose a vest.
Make visibility last through rain, dust and repeated washing
A high-visibility garment only helps while its color, reflective trim and fit remain in working condition. Dirt can dull fluorescent fabric; fading, tears, damaged closures and worn or covered reflective strips can reduce how well the garment stands out. Inspect clothing regularly and follow the manufacturer’s care label and the employer’s replacement criteria.
Think about a vest that has spent a month under a truck seat. Its hem is frayed, cement dust cakes the fabric, and the zipper no longer closes. It might still look bright under a site light, but that quick glance doesn’t prove the reflective material or construction remains suitable. Clean it as directed, then inspect the strips and closures in good light. If the garment no longer meets the site’s inspection rules, replace it.
Washing can wear a garment over time, so follow the labeled instructions rather than using harsher cleaning methods or assuming every vest handles the same number of cycles. Don’t cut off a damaged section, sew on an unapproved strip, or cover worn areas with a patch unless the manufacturer and employer authorize that repair. Those changes can alter the visible material or its arrangement.
Weather changes the choice too. Breathable clothing can help with heat and moisture, while insulated or weather-resistant garments can make cold, rain and wind more manageable. A wet, bulky jacket that workers leave unzipped or remove may expose less visibility than a properly selected layer they can wear through the task. Fit and comfort support consistent use, but the garment still has to meet the project’s requirements.
- Check color, reflective areas, seams, closures and fit before work.
- Clean the garment by its care label and dry it as directed.
- Recheck after washing, damage or a change in task.
- Replace it when it fails the employer’s inspection criteria.
Pair visible clothing with a work zone that protects people
A safety vest cannot make a work zone safe by itself. High-visibility clothing improves conspicuity, but barriers, traffic controls, lighting, equipment procedures and worker separation reduce the chance of a collision. Plan the whole setup, especially where workers share space with trucks, loaders or public traffic.
Take a delivery area as an example. A spotter in the right garment can help an operator see a person sooner, but a marked route, a clear reversing area, reliable communication and a rule that keeps bystanders out give the crew more protection. In a highway work zone, the employer must follow applicable regulations and project controls; workers shouldn’t improvise traffic arrangements because everyone is wearing reflective material.
Before work begins, confirm who controls vehicle movement, where pedestrians may walk and how the crew communicates when visibility drops. Set lighting so it helps workers without creating glare that blinds operators. Rain, dust, darkness and clutter can all change what a driver sees. When conditions change, stop and review the work plan instead of treating a garment as a substitute for judgment.
On tasks involving electrical, gas, structural or roof hazards, use qualified professionals where required and follow the relevant safety procedures, permits and codes. Power must be isolated before electrical work, and workers need the correct PPE and training for the specific hazard. Visibility is one layer in a safety plan, not permission to approach an uncontrolled hazard.
Make the worker easy to see, then make the work area safer to enter. Clothing, lighting, communication and separation work together.
Frequently Asked Questions
What class of safety vest do I need for construction work?
It depends on the hazards, traffic, lighting, task and rules for your project. Ask the employer to use the site hazard assessment and verify the current standard and applicable regulations before selecting a class.
What is the difference between ANSI Class 2 and Class 3?
Class 3 generally provides more visible material and coverage for demanding conditions than Class 2. Check the current ANSI/ISEA 107 requirements and the job’s rules; the class name alone does not tell you whether a particular task requires that garment.
Are fluorescent and reflective materials the same?
No. Fluorescent material helps a worker stand out in daylight and some low-light conditions. Retroreflective material returns light toward its source, which can help when headlights or work lights illuminate it at night.
Can I wear a high-visibility jacket instead of a vest?
A jacket may work if it meets the required performance level and fits the task and weather. Check that its visible areas remain uncovered by harnesses, tool belts or other outerwear, and confirm the complete outfit meets site rules.
How often should I replace a safety vest?
There is no single replacement interval for every garment. Inspect it regularly for fading, dirt that does not wash out, tears, damaged closures and worn reflective strips, then follow the care label and your employer’s replacement policy.
Does a safety vest make a work zone safe?
No. A vest can help workers stand out, but it does not prevent collisions by itself. Use the required barriers, traffic controls, lighting, communication and equipment procedures as part of the site safety plan.
Conclusion
Choose high-visibility clothing by starting with the site’s real hazards, then check the required performance, fit and full PPE setup. A reflective strip can catch a headlight in the dark, but it cannot clear a blind spot, stop a reversing truck or replace a traffic plan.
Before the next shift, look at your crew’s clothing from the operator’s seat and from the side of the work zone. If the workers disappear behind their gear or surroundings, change the setup before the machines start moving.