
TL;DR

Get business pricing on tools and workshop supplies
- Business-only prices and quantity discounts
- Tax-exempt purchasing
- Multiple users, one account, clear invoices
Drywall sanding produces fine gypsum and crystalline silica dust that a shop vac alone cannot capture. The most effective method is a vacuum-assisted sander paired with a HEPA extractor, which cuts airborne dust by up to 90%, layered with plastic containment and an N95 or P100 respirator. Wet sanding works for final coats but won’t replace mechanical extraction on large jobs.
Sand one 4×8 sheet of drywall joint compound and you’ll fill a room with a white haze that hangs in the air for hours. Drywall sanding produces fine dust particles so light they drift through HVAC returns and settle three rooms away — and some of that dust contains crystalline silica, which your lungs treat like tiny shards of glass over time.
After twenty-plus years of hanging and finishing board, I’ll tell you the honest version: there is no such thing as dustless drywall sanding. But there’s a huge difference between a room you have to wipe down with a damp cloth for two days and one that’s clean by dinner. That difference comes down to method, not magic.
In this guide, you’ll get the ranked methods that actually work — from a $30 DIY setup to pro-grade extraction — plus the PPE that matters, when to wet sand, and when to skip the whole thing and rent equipment or call a licensed pro.
Vacuum-assisted sanding with HEPA extraction cuts airborne drywall dust by up to 90% — pair a proper extractor (100+ CFM) with the sander, never a stock shop v…
A true HEPA filter captures 99.97% of particles at 0.3 microns; "HEPA-style" filters don’t, and they quietly blow the finest, most harmful dust back into the r…
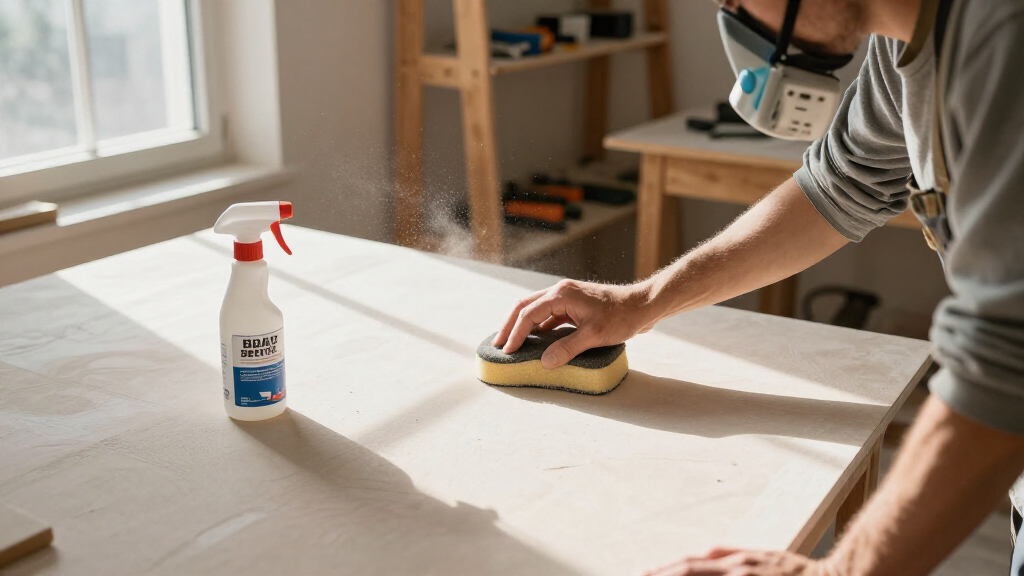
Wet sanding with a damp sponge is near-zero dust and ideal for patches and final finish coats, but it’s too slow for heavy leveling and can damage over-wetted…
Two hours of plastic containment — sealed doorways, taped vents, HVAC off — prevents gypsum dust from spreading through ductwork into the whole house.
For one-room projects, rent a vacuum-integrated sander ($40–75/day) instead of buying; buy only if you renovate repeatedly.
Best Dust Control Methods for Drywall Sanding
There is no such thing as dustless drywall sanding — but there’s a huge difference between a room you wipe down for two days and one that’s clean by dinner. That difference comes down to method, not magic: capture at the source with a vacuum-assisted sander and HEPA extraction, layer in containment, and protect your lungs.
Why Drywall Dust Is Worse Than It Looks
Drywall dust is primarily gypsum — calcium sulfate — ground fine enough to stay airborne. The particles carry an electrostatic charge that makes them cling to blinds, screens, and furnace filters. Worse, joint compound can contain crystalline silica, which your lungs treat like tiny shards of glass. OSHA has specific silica exposure rules for job sites — homeowners have more latitude, but the same lungs.
| Particle Threat | What It Is | Why It Matters |
|---|---|---|
| Gypsum | Calcium sulfate, ground fine; electrostatic, clings to everything | Travels through HVAC returns and settles three rooms away |
| Crystalline silica | Mineral found in some joint compounds | Repeated inhalation causes silicosis — permanent lung scarring |
| Sub-micron fraction | Particles at ~0.3 microns | Penetrate deepest into lungs; pass straight through standard shop-vac filters |
Dust control in drywall work is a systems problem, not a shopping problem. Standard vacuum filters clog within minutes on 5–15 pounds of dust.
The 5 Methods That Actually Work
Ranked by measured dust reduction — from pro-grade extraction to the budget air scrubber.
Vacuum-Integrated Sander + HEPA Extractor
Suction ports in the sander head capture dust at the source before it escapes. Pair with a 100+ CFM extractor — never a stock shop vac.
Pole Sander with Vacuum Attachment
A clamp-on shroud around the sanding head, connected to a true HEPA vac. Cheaper than an integrated sander, nearly as effective if sealed.
Wet Sanding with a Damp Sponge
Compound goes into the sponge as mud, not the air as powder. Ideal for patches and level-4/5 finish coats — too slow for heavy leveling.
Plastic-Sheeting Containment
Sealed doorways, zipper doors, taped vents, HVAC off. Two hours of setup prevents dust spreading through ductwork into the whole house.
Box Fan + MERV-13 Filter
Helps clear residual haze after sanding. Does nothing for what’s already in your lungs — a supplement, never a strategy.
Non-Negotiable: Respirator PPE
A properly fitted N95 minimum, P100 preferred, plus safety goggles. Layer it under every method above — extraction and containment are never 100%.
HEPA Vacuums: What 99.97% Actually Buys You
A HEPA filter captures 99.97% of particles at 0.3 microns — exactly the size range where drywall dust travels deepest into your lungs. A standard shop-vac filter is rated for ~10+ microns. The fine fraction blows straight through and back into the room as an invisible plume.
- DIYers hook a $60 shop vac to a shroud, see no cloud, and think they’ve solved it.
- The vac atomizes the finest particles and broadcasts them — the room looks cleaner while the air gets worse.
- “HEPA-style” on a label means nothing — only certified, sealed HEPA counts.
- A certified HEPA filter sealed to the vac body — no bypass, no “style”.
- A pre-separator or dust bag so fine dust doesn’t cake the HEPA after one room.
- 100+ CFM at the tool — undersized cordless vacs starve the shroud.
“If you can see a dust haze in your work light while vacuum-sanding, either your filter is loaded — or your vac was never truly HEPA to begin with.”
Wet Sanding vs. Dry Sanding
Most good finishers use both: dry-sand the bulk coats with extraction, then finish with a damp sponge for near-zero-dust final passes.
| Factor | Dry Sanding + HEPA Extraction | Wet Sanding (Damp Sponge) |
|---|---|---|
| Airborne dust | ~10–30% of uncontrolled sanding | Near zero |
| Speed on heavy leveling | Fast | Very slow |
| Best for | Full rooms, rough coats, textures | Patches, final finish coats, occupied homes |
| Skill required | Moderate | High — easy to over-wet |
| Risks | Residual fine dust if filtration is weak | Raised paper, fuzzy spots, streaks that telegraph through paint |
| Works on setting compounds | Yes | Not reliably |
| Paint-ready surface | After dust wipe-down | After full dry |
Capture at the Source, Layer Everything Else
A $400 extractor that pulls dust into a drum before it escapes the sander head is worth more than any amount of plastic and patience. But the cleanest rooms stack all five layers.
Step 1 · Contain
Plastic sheeting, zipper doors, taped vents, HVAC off. Quarantine the room before the first pass.
Step 2 · Extract
Vacuum-assisted sander + certified HEPA extractor at 100+ CFM with a pre-separator.
Step 3 · Finish Wet
Damp-sponge final coats for near-zero dust and a paint-ready surface.
Step 4 · Protect
N95 or P100 respirator, goggles, dust-resistant clothing — every method, every time.
Step 5 · Scrub
Box fan with MERV-13 filter to clear residual haze; damp-wipe surfaces.
Buy, Rent, or Call a Pro?
- $40–75/day for a vacuum-integrated sander — no ownership, no maintenance.
- Add a $30 DIY pole-sander shroud setup if the budget is tight.
- Return it clean; skip the filter-replacement schedule entirely.
- A true HEPA extractor ($400 class) pays for itself within a few jobs.
- Stick to the maintenance schedule: inspect after every session, replace at 20–40 hrs.
- For whole-house jobs or compliance-required commercial work, a licensed pro brings enclosed extraction as standard.
Why Drywall Dust Is Worse Than It Looks (and What’s Actually in It)
Drywall dust is primarily gypsum — calcium sulfate — ground fine enough to stay airborne. The particles are lightweight, slightly gritty, and carry an electrostatic charge that makes them cling to everything: window blinds, TV screens, the inside of your furnace filter. If you’ve ever run a finger across a windowsill a week after sanding and found a white film, that’s gypsum doing its thing.
The bigger problem is what can ride along with it. Joint compound and some drywall products can contain crystalline silica, and inhaling that over months or years causes silicosis — permanent scarring of the lungs. One weekend project won’t do it. But renovators sand room after room, year after year, and that exposure adds up. This is why OSHA has specific silica exposure rules for job sites.
Here’s the number that matters for cleanup logic: sanding drywall in a single average room can generate 5 to 15 pounds of dust. Standard vacuum filters clog within minutes on that volume because the fine particles cake the filter and choke airflow. That’s why dust control in drywall work is a systems problem, not a shopping problem.
There’s also the efficiency angle. Dust settling back into wet primer or pooled on your cut lines means rework. On commercial jobs, many regions require dust mitigation as a compliance matter, not a courtesy. Homeowners have more latitude — but the same lungs.
Popular right now

Shark Navigator Robot Vacuum with 30-Day Self-Emptying Base, White (AV2110S)

Ninja Flip Toaster Oven & Air Fryer, 8-in-1, Stainless Steel, SP151

eufy E25 Robot Vacuum and Mop Combo with HydroJet Roller Mop
As an affiliate, we earn on qualifying purchases.
The 5 Methods That Actually Work, Ranked by Dust Reduction
The best dust control methods for drywall sanding, in order of effectiveness, are: a vacuum-integrated drywall sander with HEPA extraction, a pole sander with vacuum attachment, wet sanding for finish coats, plastic-sheeting containment, and passive approaches like box fans with filters. Here’s how each performs in real rooms.
- Vacuum-integrated drywall sander + HEPA extractor — Cuts airborne dust by up to 90%. The sander head has built-in suction ports that capture dust at the source. This is the pro standard.
- Pole sander with vacuum attachment — A clamp-on shroud around the sanding head, connected to a HEPA vac. Cheaper, catches 70–80% of dust when sealed well.
- Wet sanding — Using a damp sponge to smooth compound instead of abrasive paper. Near-zero airborne dust, but only works on finish coats and slows you down on heavy leveling.
- Containment (plastic sheeting, zipper doors, taped seams) — Doesn’t reduce dust, it quarantines it. Essential as a layer under any method above.
- Box fan with a MERV-13 furnace filter — The budget air scrubber. Helps clear the room after sanding, does nothing for what’s already in your lungs.
My rule from the field: capture at the source beats cleanup every time. A $400 extractor that pulls dust into a drum before it escapes the sander head is worth more than any amount of plastic and patience.
HEPA Vacuums: What the 99.97% Number Actually Buys You
A HEPA filter captures 99.97% of particles down to 0.3 microns — and that specificity matters, because drywall dust sits right in the size range where particles travel deepest into your lungs. Your standard shop vac filter is rated for particles around 10+ microns and bigger. The fine fraction — the dangerous stuff — blows straight through and back into the room as an invisible plume.
That’s the trap DIYers fall into constantly. They hook a $60 shop vac to a sanding shroud, see no dust cloud, and think they’ve solved it. They haven’t. They’ve built an aerosol machine. The room looks cleaner while the air gets worse, because the vac is atomizing the finest particles and broadcasting them.
Three things make a HEPA setup actually work:
- A certified HEPA filter sealed to the vac body — not a “HEPA-style” filter, which means nothing.
- A pre-separator or dust bag so fine dust doesn’t cake the expensive HEPA filter after one room.
- Enough CFM (airflow) — you want 100+ CFM at the tool for sanding extraction. Undersized cordless vacs starve the shroud.
Maintenance counts too. A clogged HEPA filter kills suction and can push dust past seals. Check the filter after every major sanding session and replace it on the manufacturer’s schedule — typically after 20 to 40 hours of heavy drywall use.
Rule of thumb from Bauecho: if you can see a dust haze in your work light while vacuum-sanding, either your filter is loaded or your vac was never truly HEPA to begin with.
Wet Sanding vs. Dry Sanding: When Each One Wins
Wet sanding means using a damp sponge — usually a purpose-made drywall sponge with a dense foam face — to dissolve and smooth joint compound instead of abrading it dry. It produces almost no airborne dust because the compound goes into the sponge as mud, not into the air as powder. For small patches, final level-4 and level-5 finish coats, and occupied homes, it’s a genuinely great method.
But wet sanding has hard limits. It removes material slowly, so leveling a bad tape coat or knocking down heavy ridges with a sponge will eat your entire afternoon. Over-wet the surface and you can raise the drywall paper, create fuzzy spots, or leave streaks that telegraph through paint. It also doesn’t work at all on someSetting compounds and veneer plaster finishes.
| Factor | Dry Sanding + HEPA Extraction | Wet Sanding |
|---|---|---|
| Airborne dust | ~10–30% of uncontrolled sanding | Near zero |
| Speed on heavy leveling | Fast | Very slow |
| Best for | Full rooms, rough coats, textures | Patches, final finish coats |
| Skill required | Moderate | High (easy to over-wet) |
| Paint-ready surface | Yes, after dust wipe-down | Yes, after full dry |
My honest take: most good finishers use both. Dry-sand the bulk coats with extraction, then finish with a damp sponge pass to knock down swirl marks and dust nibs. You get speed where you need it and zero-dust precision where it counts.
Set Up Containment That Keeps Dust Out of the Rest of Your House
Containment doesn’t reduce how much dust you make — it decides where that dust lives afterward. Done right, a $40 roll of plastic and an afternoon of prep means the difference between cleaning one room and cleaning the whole floor. I’ve walked into renovations where the homeowner skipped this step and found white dust inside closed kitchen cabinets six months later.
- Seal the room: 4-mil plastic sheeting over doorways, taped with painter’s tape at the full perimeter. Zipper doorway kits run about $15 and let you walk through without peeling tape.
- Kill the HVAC: Shut off supply and return vents in the room and tape plastic over them. Dust in your ductwork becomes a whole-house problem on every heating cycle.
- Remove or wrap furnishings: Anything left gets plastic, taped at the bottom. Fabric absorbs gypsum dust permanently.
- Lay floor protection: Rosin paper or plastic over floors — taped at the baseboards so dust can’t run underneath.
- Run negative pressure if you can: A box fan blowing OUT a window, with the room otherwise sealed, pulls dust toward the exit instead of into the house. Add a MERV-13 filter on the intake side and you’ve built a crude air scrubber.
Budget maybe two hours for this setup on a standard bedroom. It feels like wasted time right up until you finish sanding and realize the hallway is still clean. Then it feels like the smartest two hours of the project.
The PPE That’s Non-Negotiable (Even With Great Extraction)
Even with a 90% reduction at the sander, you’re standing in the remaining 10% for hours. Your protection is a properly fitted respirator, and there’s a real difference between ratings. A NU-95 is the minimum — it filters at least 95% of airborne particles. A P100, with its magenta cartridges, filters 99.97% and stands up better to long sanding sessions. For drywall dust specifically, either works; the P100 is what I wear because facial seal and comfort over a full day matter more than the marginal filtration math.
The failure mode for most DIYers is fit, not rating. Any beard stubble along the seal edge leaks. Do the simple check: cover the intake valves with your palms, exhale gently, and feel for air escaping the mask edge. If it leaks, readjust or switch models.
- Respirator: N95 minimum, P100 preferred for full-day sanding.
- Sealed safety goggles: Gypsum dust under eyelids is miserable and genuinely risky. Vent-less goggles, not mesh or vented shop glasses.
- Coveralls or dedicated clothes: Wash work clothes separately — the dust loads a washer drum.
- Hearing protection: If you’re running a vacuum-integrated sander, you’re at 80+ dB for hours.
One honest note: if you have asthma, reduced lung capacity, or you’re sanding in a home with kids or someone with respiratory issues, the right call may be hiring a licensed drywall contractor with commercial extraction and containment. That’s not defeat — it’s matching the risk to the setup.
DIY-Grade vs. Pro-Grade vs. Rent: Where Your Money Should Go
Most homeowners sand drywall seriously two or three times in a lifetime. That changes the math completely. Buying a $500 vacuum-integrated drywall sander for one basement re-finish makes no sense when the same tool rents for $40–75 a day at most rental yards. Rent it, buy the HEPA vacuum bags, return it clean.
Here’s how I’d break down the tiers:
| Your Project | Right Setup | Rough Cost |
|---|---|---|
| One patch, one wall | Wet sanding sponge + N95 + plastic | Under $50 |
| One room, full tape and finish | Rental vacuum sander + containment kit | $75–150 rental |
| Whole floor / repeat renovator | Buy: drywall sander + HEPA extractor | $500–900 |
| Occupied home, kids, or respiratory concerns | Licensed contractor with pro extraction | Quote-based |
The middle tier is where people mess up. They buy a cheap “dustless” sanding shroud for $35 and expect pro results from a 6-gallon shop vac. The shroud starves the vac, the filter clogs in ten minutes, and they conclude dustless sanding is a scam. It isn’t — it was just mismatched equipment. Match the extractor to the tool or rent the matched pair.
Spend on extraction before you spend on the sander. A mediocre sander with great extraction beats a great sander feeding a cloud into your living room.
Frequently Asked Questions
What is the most effective way to reduce dust when sanding drywall?
The single most effective method is a vacuum-integrated drywall sander connected to a HEPA dust extractor, which reduces airborne dust by up to 90%. Add plastic containment around the work area and an N95 or P100 respirator for full protection. A pole sander with a clamp-on vacuum shroud is the cheaper alternative and still captures roughly 70–80%.
Can I sand drywall without creating any dust at all?
Not with dry abrasive methods — some dust always escapes. Wet sanding with a damp sponge comes closest to zero airborne dust, but it only works for patches and final finish coats because it removes material slowly. For full rooms, aim for 90% reduction with extraction rather than chasing zero.
Is drywall dust actually dangerous to breathe?
Yes, over repeated exposure. Drywall dust contains fine gypsum particles and can include crystalline silica, which is linked to silicosis — permanent lung scarring — with long-term inhalation. One weekend job is low risk, but renovators who sand room after room should treat respiratory protection as mandatory, which is why OSHA regulates silica exposure on job sites.
Will a regular shop vac work for drywall dust extraction?
Only with upgrades. A stock shop vac filter lets the finest particles blow straight through the exhaust. You need a certified HEPA filter (99.97% at 0.3 microns), a dust bag or pre-separator so the filter doesn’t cake, and adequate airflow — roughly 100+ CFM at the tool. Without all three, the vac broadcasts dust instead of capturing it.
Should I buy or rent a dustless drywall sander?
Rent for one-off projects. Vacuum-integrated sanders rent for roughly $40–75 per day at most rental yards and typically come paired with a compatible extractor. Buy only if you renovate repeatedly — a good sander-and-extractor combo runs $500–900. Just avoid the $35 shroud-on-shop-vac middle ground; it underperforms both options.
Conclusion
If you take one thing from this: capture dust where it’s created, contain where it travels, and protect what breathes it in — in that order. Source extraction does 90% of the work, plastic does the quarantine, and the respirator covers the residue. Skip the first layer and no amount of cleanup catches up.
Sanding drywall is one of the few jobs where the difference between amateur and professional isn’t visible in the finish — it’s visible in the air. Do it right, and you’ll prime clean walls the same afternoon, not excavate your house for a week. Your lungs will never send a thank-you note. Give them one anyway.