
TL;DR

Get business pricing on tools and workshop supplies
- Business-only prices and quantity discounts
- Tax-exempt purchasing
- Multiple users, one account, clear invoices
To install a tile backsplash with power tools, prepare a clean, flat wall, mark a level layout, and set tiles in small adhesive sections using the manufacturer’s specified trowel. Use tile-rated cutting tools with dust control and protective equipment, switch off power before working near outlets, and wait for the stated cure times before grouting.
A backsplash can look like a tidy weekend job until the first outlet lands halfway across a tile and the wet saw starts singing. A clean result depends less on owning the biggest tool and more on getting the wall flat, the layout balanced, and each cut planned before adhesive goes on.
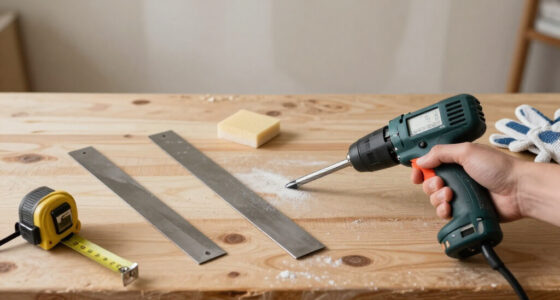
This step guide to installing tile backsplashes with power tools walks you through measuring, wall prep, tile cutting, setting, and grouting. You’ll learn where a drill and mixing paddle can save time, when a manual cutter is enough, and how to control dust without treating safety gear as optional.
It covers a typical kitchen or bathroom backsplash, but tile, adhesive, grout, wall construction, and water exposure all affect the right method. Follow the product instructions and local requirements. For electrical changes, shut off power before working near outlets and call a licensed electrician if wiring or boxes need alteration.
Buy about 10% extra tile for a simple layout and more for diagonal patterns, fragile tile, or many cuts.
Dry-lay the pattern and mark a level reference before spreading adhesive; this helps avoid skinny edge pieces and awkward outlet cuts.
Use a drill and mixing paddle only when the adhesive or grout instructions allow it, and follow the specified speed and mixing schedule.
Use tile-rated cutting tools, eye and hearing protection, and appropriate dust control; shut off power before working near outlets.
Wait for the stated adhesive and grout cure times, and use compatible flexible sealant at movement joints where the tile system calls for it.
Home project field guide · Tile + power tools
Step-by-Step Guide to Installing Tile Backsplashes with Power Tools
A clean backsplash comes from a flat, prepared wall, a balanced layout, and cuts planned before adhesive goes on. Choose tools for the tile and task, control dust at its source, and let every product cure on schedule.
Five decisions that shape the finish
Plan the job on a dry surface first. A few minutes with a tape, level, and sample row can prevent visible slivers and rushed outlet cuts.
Buy roughly 10% extra tile for a simple pattern; add more for diagonals, brittle material, or many cuts.
Dry-lay the pattern and mark a level reference before spreading adhesive.
Use a drill and paddle only when product directions permit; follow speed and mixing times.
Use tile-rated tools, eye and hearing protection, and suitable dust control.
Wait for stated cure times; use compatible flexible sealant at movement joints when specified.
Build a reliable starting point
Adhesive can only bond as well as the surface beneath it. Get the wall sound and the equipment ready before mixing.
Clean, dry, sound, suitably flat
Remove grease, loose paint, old adhesive, and switch plates. Repair defects; use primer or a backer surface when the adhesive instructions call for it. A straightedge can reveal high spots and dips that make tiles sit proud or lose support.
Make the work zone safe
Switch off the circuit before removing outlet covers or working near boxes, then verify power is off with an appropriate tester. Keep water away from electrical equipment and use required ground-fault protection. Use a licensed electrician if boxes or wiring need changes.
Tape, level or laser, pencil, straightedge
Specified notched trowel, spacers, trim
Tile-rated cutter, saw, or hole saw
Drill and compatible mixing paddle
Grout float, sponge, compatible sealant
Eye, hearing, hand, and respiratory protection
Dust matters: Tile and mortar dust may contain respirable silica. Prefer wet cutting or suitable extraction, wear task-appropriate respiratory protection, and set up control before the first cut. A damp rag afterward does not control airborne dust.
Balance cuts before adhesive
Use a level reference even if the countertop or cabinets appear straight. Small differences can grow across a long row.
Map the full span and height, including corners, cabinet ends, and outlets.
Mark a dependable reference line and check it at both ends.
Add spacers and trim to a sample row; shift it to reduce narrow slivers.
Check the pattern against counters, cabinet lines, corners, and outlet positions.
Example: A run just over six feet may leave a thin sliver if you start with a full tile at one end. Centering the pattern or shifting it can create more balanced edge cuts.
Match the tool to the tile
Cut quality, setup, and dust control all matter. A bigger tool is not automatically the better choice.
| Tool | Good fit | Plan for | Choice signal |
|---|---|---|---|
| Manual tile cutter | Straight cuts in suitable ceramic | Tile must score and snap cleanly | Quick, tidy setup |
| Wet saw | Many porcelain, stone, or difficult cuts | Water management, stable cutting area, safe electrical separation | Versatile; may be rented |
| Angle grinder + diamond blade | Certain shapes and detail cuts | Noise, hazardous dust, secure support, suitable extraction | Use only when appropriate |
| Tile-rated hole saw | Pipe or outlet openings | Follow tool speed and cooling method; support tile | Avoid pressure and chipping |
Work small, check often
Product instructions set the trowel, mix, working time, cleaning window, and cure schedule. Materials and room conditions change the details.
Prepare the wall
Clean, dry, repair, and confirm the substrate is sound and suitably flat.
Mark and dry-lay
Set level lines, place sample tiles with spacers, and plan cuts at edges and outlets.
Follow the product
Use a paddle only if allowed. Observe specified speed, rest time, consistency, and pot life.
Spread a small section
Use the specified notched trowel at a steady angle; comb ridges in one direction.
Press and align
Use a slight sliding motion, spacers, and regular level checks. Clear joints before adhesive hardens.
Make planned openings
Support tile, use rated tools and specified cooling, avoid excessive pressure, and smooth sharp edges.
Wait the stated time
Do not grout, remove spacers, or apply weight until the adhesive schedule allows it.
Fill and clean joints
Press grout in with a float, wipe diagonally at the recommended time, and avoid excess water.
Seal where specified
After grout cures, apply compatible sealant at movement joints when the tile system calls for it.
Let the materials set the pace
There is no universal cure time. Follow the package for the actual tile, adhesive, grout, substrate, temperature, and humidity.
Wait for the product’s full stated interval.
Rushing can disturb alignment or weaken the finished joints. Temperature, humidity, tile type, and substrate can all affect the schedule.
Illustrative sequence only — bar lengths do not represent hours. Use the stated time on each product label.
Protect the person and the work area
Prepare protection before cutting, drilling, or mixing. Follow tool guidance and local requirements throughout the job.
Wear suitable eye and hearing protection whenever tools require it.
Use wet cutting or suitable extraction and task-appropriate respiratory protection.
Shut off the circuit and test before working around electrical boxes.
Keep water clear of electrical equipment; use required ground-fault protection.
Scope check: A backsplash behind a sink is not automatically a shower wall. For frequent water exposure, confirm that the complete wall assembly, adhesive, grout, and sealant suit the conditions. Follow manufacturer instructions and local requirements.
Gather the right tools before adhesive hits the wall
For a small backsplash, you need measuring and layout tools, a compatible adhesive system, and a way to make the cuts your tile requires. Buy roughly 10% extra tile for a simple layout, then add more if your pattern has diagonals, many outlet cuts, or brittle material. That spare tile is cheaper than stopping mid-project to find a dye lot that no longer matches. The allowance covers ordinary breakage and trimming; it is not a guarantee if the pattern creates lots of unusable offcuts.
Set out a tape measure, level, pencil, straightedge, notched trowel, spacers, tile, trim, adhesive, grout, and any sealant specified for the joints. A manual tile cutter handles many straight cuts in ceramic. Porcelain, stone, and intricate cuts may call for a wet saw; an angle grinder with a suitable diamond blade can help with certain shapes, but it creates noise and hazardous dust. Choosing the tool is a tradeoff between cut quality, setup, and dust: a manual cutter is quick and tidy for suitable tile, while a wet saw is more versatile but needs water management and a safe cutting area.
A drill and mixing paddle can mix powdered adhesive or grout only when the product instructions allow it. Use the specified paddle and speed; a high-speed drill can whip air into the mix or splash it across your counter. Overmixing can also change the product’s working characteristics, while an underpowered or incorrect paddle may leave dry pockets. For a single modest backsplash, renting a wet saw may make more sense than buying one that gathers dust in the garage.
- Wear eye and hearing protection while cutting or drilling.
- Use suitable dust extraction or wet cutting, plus a suitable dust mask or respirator as the task requires.
- Keep water safely separated from electrical equipment and use required ground-fault protection.
Tile and mortar dust can contain respirable silica. A damp rag after cutting does not make uncontrolled airborne dust safe, so set up your cutting area and protective gear before the first pass. Dust control at the source also keeps fine powder off nearby surfaces and out of the air while you work.
Popular right now

Breville Barista Pro Espresso Machine with Grinder, Brushed Stainless Steel

Vitamix Propel Series 750 Professional-Grade Blender, 4 Programs, Black

De’Longhi Classic Matte Black Espresso Machine with Milk Frother
As an affiliate, we earn on qualifying purchases.
Prepare the wall so your tile has a sound base
A tile backsplash needs a clean, dry, sound, and suitably flat wall so adhesive can bond evenly. Remove grease, loose paint, old adhesive, and switch plates; repair defects and use primer or a backer surface if the adhesive instructions call for it. Tile can hide color, but it cannot make a loose or wavy wall stable. Flatness matters because a tile pressed against a high spot may sit proud while the next tile sinks into a dip; trying to compensate with uneven adhesive makes alignment harder and can leave weakly supported areas.
Imagine setting glossy white tile over a soft patch of peeling paint. The first row may look fine, but the adhesive is only as reliable as the surface underneath it. Scrape off anything that flakes, wipe away kitchen grease, and let the wall dry before you start. If a straightedge rocks against high spots or reveals dips, address those before spreading adhesive. This extra preparation can feel slower than tiling, but it reduces the chance that you will have to remove finished tile to repair a failed bond.
Switch off the circuit before removing outlet covers or working around electrical boxes. Verify the power is off using an appropriate tester, and keep water from the saw or mixing area away from electrical equipment. A backsplash often changes the finished wall thickness; if a box needs extending or wiring needs moving, use a licensed electrician and follow local code. Accounting for that thickness early matters because a box recessed behind the new tile can make the cover sit poorly and may create an electrical compliance issue.
For areas with frequent water exposure, confirm that the wall assembly and selected materials suit that exposure. A typical backsplash behind a sink is not automatically the same as a shower wall. Product labels and system guidance matter: the wrong adhesive or substrate can turn a sharp-looking install into loose tile or moisture trouble. The more often a surface gets wet, the more important it is to consider the whole wall system rather than choosing materials by the tile’s appearance alone.
Plan the layout to avoid skinny cuts and crooked rows
A good tile layout puts the cuts where they look deliberate and gives every row a dependable reference. Measure the backsplash area, mark a level starting line, and dry-lay tiles on a work surface or use a layout guide before mixing anything. A level countertop edge is useful, but don’t assume it is perfectly level or that cabinets line up with it. A small mismatch can compound across a long row, so the level line gives you a reliable visual reference even when the surrounding surfaces vary.
- Measure the full span and height. Include corners, cabinet ends, and the spaces around outlets.
- Mark a level reference line. Use a conventional level or laser, then check the line at both ends.
- Dry-lay a row with spacers. Include the intended grout joints and any edge trim.
- Shift the starting point to reduce narrow slivers at visible edges and avoid awkward outlet cuts where possible.
- Check the plan against the room. Look at cabinet lines, countertop seams, corners, and where tile will stop.
For example, a run that measures just over six feet may leave a thin sliver at one end if you start with a full tile at the other. Centering the pattern or shifting it a few inches can give you two more balanced edge cuts. That small decision is easier to make on the counter than while adhesive is drying on the wall. A balanced layout usually means more cutting up front, but it can make the finished edges look intentional and avoid fragile slivers that are difficult to set neatly.
Large-format and textured tile deserve extra planning because they can demand flatter walls, careful coverage, and more precise cuts. Leveling clips can help manage lippage, but they do not correct a wall that bows. Your pencil marks and dry layout are the map; clips are only one tool for holding the route. Textured tile can also make grout cleanup less forgiving, so test a small area or keep the recommended cleanup timing in mind before committing to a large section.
Mix and spread adhesive before it skins over
Mix adhesive only as its instructions direct, and spread only as much as you can cover while it remains workable. Powdered and premixed products have different handling rules, so check the label for water amounts, mixing speed, any rest time, and pot life. A drill with a paddle is useful when permitted, but the right speed is the one the product specifies. Pot life tells you how long mixed material remains usable in the bucket; open time describes how long it can sit on the wall and still bond properly. Both affect pacing, but they describe different limits.
Comb adhesive with the specified notched trowel, holding it at a steady angle and pulling the ridges in one direction. Those consistent grooves give the tile a more predictable bed when you press and slide it into place. The trowel notch and angle control how much material is available to support the tile, so switching tools or tilting the trowel unpredictably can create uneven coverage. If you spread adhesive over the whole counter run and then get pulled away to cut a tile, the exposed surface can skin over before you return. A skinned surface may look wet but fail to transfer adhesive to the tile, weakening the bond.
Work in small sections you can set promptly. Press each tile into the adhesive with a slight sliding motion, then use spacers or the recommended leveling system to maintain joints. Check the row with a level and straightedge as you go; correcting a tile while the adhesive is fresh is far easier than chipping it off after it hardens. The useful section size depends on your pace, tile size, room conditions, and product open time, so begin conservatively and expand only when you know you can keep up.
A common DIY mistake is treating a faster drill as a shortcut. Too much mixing speed can introduce air or create a splattery bucket, while too much wall coverage can leave adhesive unusable. If the bucket begins to thicken or the wall ridges lose their shape, follow the product directions instead of adding water by guesswork. Re-tempering material that has started to set can undermine its performance, so discarding a small amount is usually less costly than risking a weak bond across the wall.
Cut tile and outlet openings with control
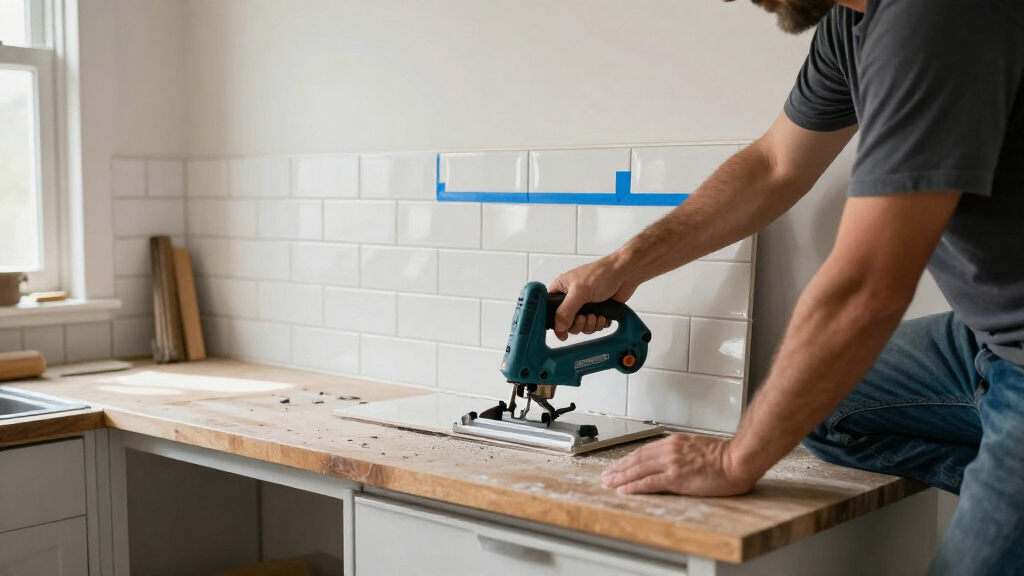
Choose the cutting tool to match the tile and cut shape: a manual cutter suits many straight cuts in ceramic, while a wet saw handles many porcelain, stone, and difficult cuts. A tile-rated hole saw can make openings for pipes or outlets. Tool instructions specify the speed and cooling method; support the tile and avoid forcing the blade, since pressure can crack a piece or chip its glaze. Test a spare tile first when possible: the sample shows whether your blade leaves a clean edge and gives you a chance to adjust before a visible piece is at risk.
For instance, a pipe opening near a tile edge can break through the narrow strip if you drill too fast or leave the tile unsupported. Mark the opening carefully, check that the finished cut will be covered by the escutcheon or trim, and test your method on a spare tile. Smooth sharp edges and keep cut edges beneath trim or outlet plates when the layout allows. The remaining strip is weaker as it gets narrower, so adjust the layout or use a different cut sequence if a tiny section is likely to snap during drilling or handling.
Cutting produces sharp fragments, loud noise, and potentially hazardous dust. Wear eye and hearing protection, use wet cutting or suitable dust extraction where appropriate, and follow the tool maker’s safety instructions. Keep water and electrical equipment safely separated. Never cut near live wiring; switch off the circuit before work around outlet openings. Wet cutting can suppress dust but introduces water and slurry that need controlled collection and disposal, while dry cutting requires effective dust extraction and suitable respiratory protection.
Outlet openings also need to fit the box and cover plate without violating electrical requirements. A cover plate is not a fix for a poorly positioned box or unsafe wiring. If tile thickness means the box needs an extension, or you need to move or modify wiring, stop and call a licensed electrician who can follow local code. Planning for the finished tile thickness before cutting helps keep the opening accurate and avoids enlarging a hole after the tile is installed.
Set the rows straight and give adhesive time to cure
Set each tile with a slight sliding press, keep joints consistent, and check alignment as you move across the wall. Remove adhesive from the grout joints before it hardens; dried lumps can prevent grout from filling the joint evenly. Level and straightedge checks catch a drifting row while you can still correct it. A countertop or cabinet line may look like a guide but can be out of level, so compare the tile to your marked reference instead of letting a crooked surface gradually pull the row off course.
Picture a row of small green tiles creeping upward by a fraction with each piece. The first few may look square, but by the time you reach the window trim, the gap is obvious. Stop every few tiles to check the line and joint spacing. Leveling clips can assist with larger tile, but they cannot flatten an uneven wall or replace careful setting. The point of these checks is to catch small errors before they accumulate; once a long row is set, correcting the end can disturb several tiles.
When a tile shifts, correct it while the adhesive is still workable. Don’t keep nudging it after the bond has started to grab; follow the product’s instructions for removal or adjustment. A modest pace helps: set a manageable area, inspect it, clean the joints, then continue. If you cannot restore the tile without pulling it away from the adhesive bed, remove and reset it according to the product guidance rather than accepting a hollow or poorly aligned placement.
After setting, wait the full cure time on the product before removing spacers, grouting, or putting weight against the tile. Temperature, humidity, tile type, and substrate can change how quickly adhesive cures. A small backsplash may take a day to set, but that does not mean it is ready for grout by bedtime. Grouting too soon can trap moisture or disturb tiles that have not developed a stable bond, so the package schedule is the one to follow.
Grout cleanly and finish movement joints the right way
Grout fills the tile joints, and the correct product and cleanup timing depend on your tile system. Mix and apply grout according to its instructions, pressing it into the joints with a grout float. Remove excess by moving diagonally across the joints so the float does not rake fresh grout back out. The diagonal pass crosses the joints at an angle and is less likely to catch their edges, helping preserve a full, even fill.
Clean the tile face with a damp sponge at the recommended time, rinse it often, and avoid flooding the joints with water. If you wait too long, dried haze can cling to textured tile; if you wash too early or use too much water, you can pull grout from the joints. Work in manageable patches and watch the surface sheen for the timing indicated by the product. Frequent rinsing keeps loosened grout from being dragged back over the tile, while a lightly damp sponge limits the water that reaches the fresh joints.
After grout cures, apply sealer only if the grout or tile manufacturer recommends it. Some cement-based grouts benefit from sealer, while other products may not need it or may call for a specific one. A small test on spare tile can show whether the sealer changes the surface appearance. Sealer can help with stain resistance in some systems, but it does not make an unsuitable grout or wall assembly waterproof.
At corners and other changes of plane, a compatible flexible sealant is commonly used where the system calls for movement accommodation; grout is generally not a substitute. Think of a counter-to-wall joint as a seam that may move slightly as the house responds to temperature and use. A rigid grout bridge can crack when those surfaces shift, while a suitable flexible joint can accommodate some movement. Follow the tile-system guidance for that joint, then reinstall outlet covers only when work is complete and it is safe to restore power.
Solve common backsplash problems before they spread
Most backsplash problems trace back to a few fixable causes: an uneven wall, inconsistent adhesive coverage, a rushed layout, or letting adhesive sit too long before setting tile. Catching the problem while the adhesive is workable can save a row; spotting it after cure usually means more cleanup and replacement work. Keep checking alignment rather than trusting the first tile to dictate the whole wall. A check is most useful when it tells you what to correct: a straightedge reveals plane changes, while a level checks the row’s direction.
- Tiles look uneven: check wall flatness, adhesive coverage, and alignment with a straightedge. Correct lippage while the adhesive still allows adjustment.
- Tiles shift: reduce the size of each adhesive section and use spacers or a suitable leveling system.
- Outlet cuts look rough: plan the opening in the dry layout, test the hole saw or cutting method on spare tile, and place edges under the plate when allowed.
- Grout joints look shallow: clear adhesive from the joints before cure and press grout fully into clean spaces.
Suppose the first few tiles sit proud of the next row. Don’t hope grout will hide the ridge; it won’t. Pause, check whether the wall has a high spot, and correct the setting while the adhesive remains workable. If the wall itself is out of plane, leveling clips only hold the tile against that problem. That distinction matters: adjusting the tile can fix a placement error, but it cannot remove the wall’s underlying high spot.
Adding tile over existing tile can work when the old surface is firmly bonded, clean, flat, and approved for the new system. But the added thickness can affect outlet reach, trim, and cabinet clearances. Loose, cracked, or uneven old tile needs attention first, and a water-exposed wall needs a suitable assembly rather than a cosmetic cover-up. The overlay also adds weight and another bond between layers, so the existing tile and its substrate must be sound enough to support the new installation.
Frequently Asked Questions
Do I need a wet saw to install a tile backsplash?
No. A manual cutter handles many straight cuts in ceramic tile. Porcelain, stone, intricate shapes, or frequent cutting may call for a wet saw or another tile-rated method; for one small job, renting can be practical.
How much extra tile should I buy?
About 10% extra is a common starting point for a simple layout. Add more for diagonal patterns, lots of cuts, fragile material, or tile that may be hard to match later.
Can I use a drill to mix tile adhesive or grout?
Only if the product instructions permit a drill and mixing paddle. Follow the specified speed and any rest time; mixing too fast can introduce air or splash, and some products require hand mixing.
How do I cut tile around an outlet safely?
Switch off the circuit before removing the cover or working near the box, and verify the power is off. Measure carefully, use a tile-rated cutting method, and keep the opening within the cover plate’s allowance; call a licensed electrician for wiring or box changes.
Can I grout the corners where the backsplash meets the counter?
Changes of plane commonly need a compatible flexible sealant where the tile system calls for movement accommodation. Grout generally does not replace a movement joint, so follow the product and system guidance for that seam.
Can I install new tile over an existing backsplash?
Sometimes, if the existing tile is firmly bonded, clean, flat, and approved as a base by the new system. Added thickness can affect outlet boxes, trim, and cabinet clearance; loose, cracked, or uneven tile should be addressed first.
Conclusion
Remember the order: prepare the wall, plan the cuts, set small sections, and respect cure times. Power tools can make a backsplash move faster, but they cannot rescue a crooked layout, a dusty wall, or a rushed adhesive bed.
Take the extra few minutes to dry-lay the row and check the outlet cuts. Then let the finished tile sit until the product says it is ready. The payoff is a clean, straight surface that catches the light instead of catching your eye for the wrong reason.