
TL;DR

Get business pricing on tools and workshop supplies
- Business-only prices and quantity discounts
- Tax-exempt purchasing
- Multiple users, one account, clear invoices
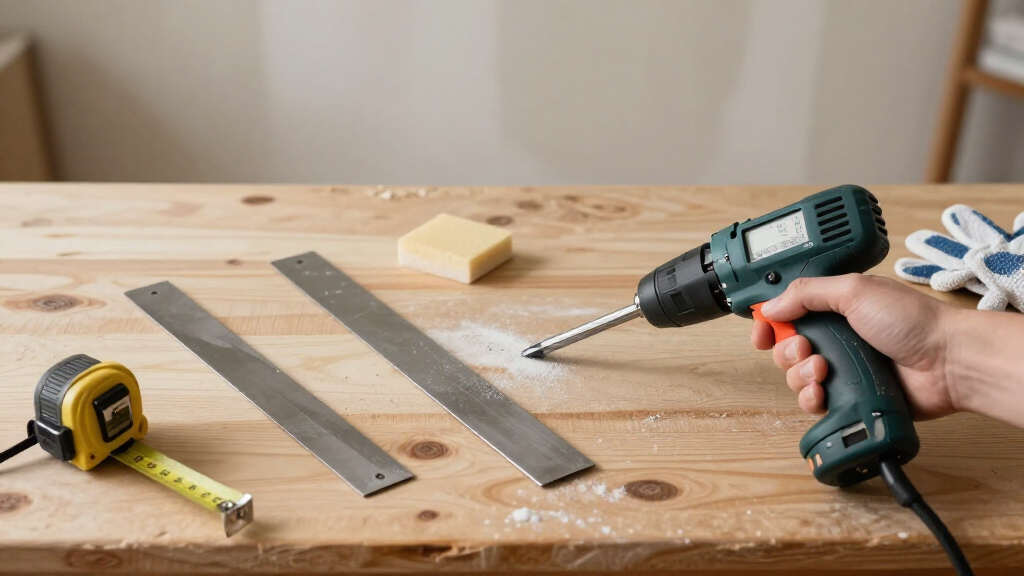
The essential drywall tools are accurate measuring and cutting tools, controlled fastening gear, three useful knife widths, a clean mud pan, and a dust-managed sanding setup. Straight boards, correctly set screws, thin coats, sharp knife edges, and raking-light inspection matter more than an expensive collection of specialty equipment.
A painted wall can expose a bad drywall seam from across the room. Morning sun slides across the surface, and a joint that looked fine under a ceiling bulb suddenly resembles a long, pale speed bump. The frustrating part is that the problem often started with something small: a dull blade, an overdriven screw, or a coat of compound laid on too thick.
You do not need a van full of specialty gear to avoid that result. You need accurate cutting tools, controlled fastening, clean knives, workable compound, and a way to inspect the wall before primer locks in every ridge and pinhole. This guide shows you which tools earn their place and where DIY-grade equipment stops making sense.
You will also see how the tools fit into a practical sequence, from marking the first sheet to checking the final coat with light skimming sideways across the wall. The goal is not simply a smooth drywall surface. It is a finish you can produce safely, with less dust, less rework, and fewer Saturday afternoons lost to sanding.
Build a core kit around a sharp utility knife, T-square, controlled screw driver, clean mud pan, three knife widths, sanding sponge, and raking light.
Seat screws just below the face without breaking the paper; add another fastener nearby whenever a screw tears through.
Use paper tape for conventional seams and corners, and follow the specified compound requirements when using fiberglass mesh.
Apply a tape coat plus progressively wider thin coats instead of one heavy coat that shrinks, cracks, and demands heavy sanding.
Inspect with side lighting, remove fine dust safely, and apply dedicated drywall primer before paint.
Essential Drywall Tools for a Smooth Finish
A professional-looking wall comes from accurate cuts, controlled fastening, thin coats, clean edges, restrained sanding, and inspection under strong side lighting—not from owning a van full of specialty equipment.
One Sequence, Fewer Surprises
A smooth finish depends on using each tool at the correct moment. Every early error—crooked cuts, unsupported gaps, torn paper, or proud screws—returns later as extra coating and sanding.
Measure
Tape measure, pencil, and T-square establish repeatable marks.
Cut
Score, snap, trim, and rasp without shredding the face paper.
Fasten
Set shallow dimples while keeping the paper surface intact.
Tape
Embed tape fully and remove trapped air before it hardens.
Coat
Build thin, progressively wider layers with clean knives.
Sand
Use fine abrasives, light pressure, and effective dust control.
Inspect
Use raking light, correct defects, remove dust, and prime.
The Small Kit That Does Most Jobs
For repairs and single-room projects, this compact setup covers the essential work. Add specialized lifting, mixing, and dust-extraction equipment when the scale of the job justifies it.
Tape Measure, Pencil & T-Square
Produce square, full-width marks quickly. A drywall T-square is more stable than balancing a short level across a sheet.
Sharp Utility Knife
Score the face paper confidently, snap the gypsum core, then cut the rear paper. Replace blades when they begin dragging fibers.
Drywall Saw & Rasp
Use the pointed saw for irregular openings and the rasp for adjustments of only a few millimeters—not for rescuing a poor cut.
Depth-Setting Driver
Seat each screw just beneath the face without breaking the paper. If a screw tears through, place a new fastener nearby.
Stainless Mud Pan & Knives
A clean pan and three useful widths handle tape, fasteners, intermediate coats, and broad finish feathering.
Sanding Sponge & Work Light
The sponge refines corners and small flaws. A bright light placed close to the wall reveals ridges, scratches, and pinholes.
Three Widths, Three Jobs
Knife width should increase as the joint develops. The aim is not to bury a seam under a heavy mound, but to distribute thin compound over a wider area with each coat.
Choose Compound by Task
The best compound is the one that matches the required strength, fill depth, working time, and finish. Setting time and complete drying time are not always the same.
| Compound | Best Use | Embed Tape | Deep Fill | Easy Sanding | Main Tradeoff |
|---|---|---|---|---|---|
| Premixed All-Purpose | Paper tape and general coating | ✓ Yes | ✗ Limited | ~ Moderate | Heavier to spread and slower to dry |
| Lightweight | Second and finish coats | ~ Check specification | ✗ No | ✓ Yes | Not specified for every tape bed |
| Topping | Smooth final coats and broad feathering | ✗ Usually no | ✗ No | ✓ Yes | Normally not used to embed tape |
| Setting-Type | Pre-filling gaps, repairs, and faster schedules | ~ System-dependent | ✓ Yes | ~ Harder | Limited working time and demanding cleanup |
| Dust-Control | Occupied spaces where cleanup matters | ~ Check specification | ✗ Limited | ✓ Yes | Reduces airborne dust but does not eliminate exposure |
Rule: Fiberglass mesh should be paired with the compound specified by its manufacturer; setting-type compound is commonly required.
What Actually Controls the Finish
Tools matter because they make good technique repeatable. These seven checkpoints have a greater effect on the painted result than a large collection of specialty equipment.
From Tool Choice to Painted Wall
Each decision affects the next stage. Precision at the beginning reduces filling, sanding, dust, and visible defects at the end.
Sharp Blade
Clean scoring leaves strong paper edges and predictable snaps.
Controlled Fastening
Correct screw depth keeps the panel secure without surface damage.
Clean Knives
Thin coats spread smoothly without dried fragments or drag marks.
Minimal Sanding
Small corrections protect the paper and reduce airborne dust.
Primer-Ready Surface
Broad transitions remain visually quiet under paint and daylight.
The Small Tool Kit That Handles Most Drywall Jobs
Essential drywall tools for most repairs and single-room projects include a tape measure, T-square, utility knife, drywall saw, screw-setting tool, mud pan, three knife widths, sanding equipment, and a bright work light. Add eye protection and a suitable respirator before you make the first dusty cut.
- Tape measure, pencil, and drywall T-square: These give you repeatable marks and square crosscuts across a standard sheet. A T-square is faster and less likely to wander than balancing a short level across four feet of chalky paper.
- Utility knife with spare blades: A sharp blade scores the face paper cleanly so the gypsum core snaps with a dry crack. Change the blade when it starts dragging fibers instead of slicing them.
- Drywall saw and rasp: Use the pointed saw for irregular openings and the rasp for shaving a tight edge. The rasp should tune a fit by a few millimeters, not rescue a wildly crooked cut.
- Drill with a depth-setting bit: This is adequate for a patch or small room. The bit helps seat the screw slightly below the surface without tearing the paper face.
- Mud pan and taping knives: A stainless-steel pan plus roughly 6-inch, 10-inch, and 12-inch knives covers taping, intermediate coats, fasteners, and feathering.
- Sanding sponge and raking light: The sponge handles corners and small corrections. A light placed close to the wall exposes shadows that front-facing room light hides.
For example, imagine replacing a water-damaged section beneath a window. You can measure the opening, cut the patch with a knife and straightedge, trim the corners with a keyhole saw, set a dozen screws, and finish the repair with two knives. That compact kit works because every tool has a clear job.
For a full house, the equation changes. A dedicated screw gun, panel carrier, lift, mixing drill, and vacuum-assisted sander can save hours and aching shoulders. Buy for repeated use, but rent the large, expensive equipment when you only need it for one ceiling.
Popular right now

Vitamix Propel Series 510 Professional-Grade Blender, 3 Programs, Black

Vitamix Propel Series 750 Professional-Grade Blender, 4 Programs, Black

Shark Navigator Robot Vacuum with 30-Day Self-Emptying Base, White (AV2110S)
As an affiliate, we earn on qualifying purchases.
Cut Straighter Panels and Set Screws Without Damaging the Paper
Essential drywall tools for clean installation are the ones that control the panel before compound ever touches it. Use a sharp knife for straight cuts, a saw or oscillating tool for openings, a rasp for small corrections, and a depth-controlled driver for screws that hold without tearing the face paper.
A straight cut begins with a firm T-square and one confident scoring pass. Snap the sheet away from the cut, fold it back, and slice the rear paper from the opposite side. If the edge looks furry and gray crumbs spill onto the floor, replace the blade; extra pressure on a dull edge only makes the cut less predictable.
Electrical-box openings need more restraint. Switch off the circuit at the breaker, verify it is de-energized with an appropriate tester, and protect the box before cutting. Never push a saw blindly into a wall cavity where wiring, plumbing, or gas lines may sit inches behind the paper.
Safety warning: Electrical modifications belong to a licensed electrician, and wall openings must follow local fire, fastening, and permit rules. Wear eye protection, control loose clothing, and keep both hands clear of powered blades.
Suppose a box cutout lands half an inch too large. Compound alone is not reliable backing for a broad unsupported gap, and the edge may crack after the cover plate goes on. Fit a supported patch or replace the damaged area, then pre-fill smaller gaps with an appropriate setting-type compound before taping.
Screw depth has the same long-term effect. A correct screw forms a shallow dimple while leaving the brown face paper intact; an overdriven screw punches through the paper and loses much of its holding value. Place a new fastener nearby rather than pretending the damaged one still counts.
Choose Compound That Matches Your Pace and Repair
The right joint compound depends on the task, working time, and depth of the fill. Premixed all-purpose compound offers flexibility, lightweight and topping compounds make finish coats easier, while setting-type compound handles deep fills and faster schedules without relying only on evaporation.
| Compound | Best use | Main tradeoff |
|---|---|---|
| Premixed all-purpose | Embedding paper tape and general coating | Heavier to spread and slower to dry |
| Lightweight | Second coats, finish coats, and easier sanding | May not be the specified choice for every tape bed |
| Topping compound | Smooth final coats and broad feathering | Usually not selected for embedding tape |
| Setting-type compound | Pre-filling gaps, repairs, and time-sensitive work | Limited working time and harder cleanup after setting |
| Dust-control compound | Occupied homes where cleanup matters | Reduces airborne dust but does not remove the exposure |
A common repair shows why the choice matters. You remove a damaged corner and find a half-inch void beside the replacement piece. Filling that cavity with a thick blob of premixed mud invites shrinkage and a soft center; setting compound provides a firmer pre-fill, followed by tape and wider finish coats after the repair is ready.
Setting time does not always equal drying time. A product marked for an approximate 45-minute set may become hard quickly, yet a thick application can retain moisture beneath the surface. Follow the bag instructions and wait until the repair is fully dry before sanding or priming.
Use a mixing paddle and a heavy-duty drill for larger batches, but keep the speed low enough to avoid whipping air into the mud. Add water only where the manufacturer permits it, and add very small amounts. Creamy mud spreads cleanly; soupy mud shrinks, runs, and leaves pinholes.
Clean your pan, paddle, and knives before dried crumbs break loose into fresh compound. One hard fleck caught under a 12-inch blade can carve a thin groove down an otherwise clean coat, leaving you another round of scraping, filling, and drying.
Use Three Knife Widths to Make Seams Disappear
Essential drywall tools for finishing include a narrow knife for embedding tape, a medium knife for building the joint, and a wide knife for feathering the final coat. A practical set is about 4–6 inches, 8–10 inches, and 12–14 inches, with clean, flexible edges.
The narrow knife applies the tape bed, presses paper tape into the compound, and covers screw heads. The medium knife carries the second coat beyond the first. The wide knife stretches the finish coat farther across the board, creating a gradual visual slope instead of a narrow hump.
That distinction matters because a wide knife does not flatten a raised joint by magic. It spreads compound over more wall, much like a long entrance ramp feels gentler than a short, steep curb. The joint remains slightly proud, but your eye reads it as flat under normal light.
Paper tape remains the dependable choice for conventional seams and inside corners because it resists cracking and folds into a sharp crease. Self-adhesive mesh is quick to position, but product instructions often pair it with setting-type compound for suitable crack resistance. Match the tape and mud system instead of mixing materials by convenience alone.
For an inside corner, many experienced finishers coat one side, let it dry, and then coat the other. This avoids dragging the knife through fresh mud on the opposite face. An inside-corner knife can speed consistent shaping, though a standard knife often gives you better control on a small job.
Imagine a six-foot butt joint between two cut sheet ends. Unlike tapered factory edges, those ends provide no recess for tape and compound. You must spread each coat farther—sometimes well beyond a foot overall—to hide the rise, and that is where the wide knife earns its keep.
Follow This Sequence to Reduce Cracks, Ridges, and Rework
A smooth drywall finish depends less on owning many tools than on using each tool at the right moment. The reliable sequence is to correct the boards first, embed tape in an even bed, apply progressively wider coats, and reserve sanding for small final corrections.
- Check the installation. Press on panel edges, inspect screw depth, trim loose paper, and add a nearby fastener wherever a screw broke the face paper.
- Pre-fill damaged areas. Fill meaningful gaps with a suitable setting compound, while large or unsupported openings receive backing and a fitted drywall patch.
- Embed the tape. Lay an even compound bed, center the tape, and press out excess mud without squeezing the joint dry.
- Cover screws and corner bead. Keep coats tight and remove ridges before they harden into sanding work.
- Build wider coats. Extend each coat beyond the previous edge and feather firmly at the margins.
- Let the compound dry. Respect product directions, temperature, humidity, coat thickness, and airflow.
- Scrape, then sand lightly. Knock off raised crumbs with a clean knife before reaching for abrasive paper.
- Inspect and touch up. Move a bright light close to the wall so it throws long shadows across defects.
- Remove dust and prime. Apply dedicated drywall primer before paint to balance the different porosity of paper and compound.
Trying to finish a seam in one thick pass feels fast until the center shrinks into a shallow valley and the edges crack. Three controlled applications take more visits but less brute-force sanding. Thin coats beat thick shortcuts: less dust, shorter correction time, and a cleaner painted surface.
On a humid weekend, premixed mud that usually dries in about a day can remain dark and cool well into the next afternoon. Coating over it traps moisture and disturbs the soft layer below. Judge actual dryness and follow the product label rather than treating 24 hours as a guarantee.
This sequence also protects your tools. Scraping ridges between coats keeps chunks out of the pan, while washing knives before material hardens preserves their edges. Do not pour compound wash water down a drain; gypsum residue can settle and harden inside plumbing.
Control Dust Without Sanding Away Your Good Work
Drywall dust control starts before sanding: apply thin coats, remove ridges with a knife, isolate the room, and connect sanding equipment to a suitable fine-dust extractor. Wear a properly selected respirator and eye protection because dust-control products do not eliminate exposure.
According to NIOSH field testing, vacuum sanding controls reduced drywall-dust exposure by roughly 80% to 97% in the evaluated systems [2]. That does not make the room dust-free, but it explains why a vacuum-assisted hand block or powered sander can change an occupied renovation from a white haze into manageable cleanup.
Do not connect a drywall sander to an ordinary household vacuum unless the machine is designed and filtered for fine construction dust. Fine powder can pass through weak filtration, foul the motor, and blow back into the room. Use a suitable fine-dust vacuum, seal doorways, protect HVAC returns, and ventilate in a way that does not carry dust into adjoining rooms.
Choose abrasives with restraint. Around 120–150 grit works for initial smoothing, while 180–220 grit suits careful finishing, subject to the compound maker’s directions. Use light, broad passes; hard pressure hollows the joint, exposes tape, and scuffs the fuzzy brown paper beneath the face.
A real-world warning comes from powered sanders. A beginner holds the spinning head over one ridge for two seconds too long, the pitch changes, and a gray patch of tape appears. Run low speed, keep the head moving, and let the abrasive skim rather than dig.
Wet sanding with a damp sponge makes sense for a closet repair or a few screw dimples because it creates little airborne dust. On a full room, it can smear compound and soften crisp edges. Dry sanding offers more predictable shaping, but only when you pair it with extraction, containment, PPE, and patient technique.
Use Side Lighting and the Right Finish Level Before You Paint
The final inspection tool is a bright work light placed close to the wall and aimed across it, not straight at it. This raking angle turns tiny ridges, scratches, bubbles, and pinholes into long shadows, giving you one clean chance to repair them before primer.
Run the light from several directions because a seam can disappear from the left and flare from the right. Mark defects lightly with a pencil, apply tight touch-up coats, and let them dry before another check. A hand held against the wall also catches sharp edges your eyes may miss.
Drywall finish levels run from Level 0 through Level 5. According to Gypsum Association finish guidance, Level 4 is commonly used for ordinary painted interiors, while Level 5 adds a skim coat across the full surface for demanding visual conditions [1]. Glossy paint, dark color, large windows, and strong side lighting make small differences easier to see.
For example, a north-facing hallway with flat paint may look good at Level 4. The same workmanship on a deep-blue living-room wall opposite floor-to-ceiling windows can show every joint at sunset. That room may justify a Level 5 finish, especially when the design calls for higher sheen.
Primer is part of the finish system, not an optional paint-saving trick. Bare drywall paper and joint compound absorb paint differently, which can create flashing and uneven sheen even when the surface feels smooth. A dedicated drywall primer helps equalize porosity before the color coat goes on.
For a smooth drywall result, tools than on their price tags matter less than control, cleanliness, and timing; put more plainly, the finish depends less on owning many tools than on using a few well. Inspect under harsh light now, and your finished room will look calm under soft light later.
Frequently Asked Questions
What drywall tools does a beginner really need?
A beginner needs a tape measure, straightedge or T-square, sharp utility knife, drywall saw, screw-setting tool, mud pan, 6-inch knife, 10- or 12-inch knife, sanding sponge, work light, respirator, and eye protection. For a small bedroom patch, that set handles cutting, fastening, taping, coating, and inspection without expensive automatic tools.
Should you use paper tape or mesh tape?
Paper tape is the standard choice for seams and inside corners because it resists cracking and folds into a crisp crease. Mesh is easier to position on a flat repair, but many product systems call for setting-type compound; follow the tape and compound instructions as a matched system.
Do you need a drywall screw gun for one room?
No. A drill with a drywall depth-setting bit can handle one room if you work carefully and check every screw. A dedicated screw gun earns its cost on larger jobs through faster fastening, consistent depth, and features such as auto-start or collated screws.
How many coats of joint compound should you apply?
Most joints receive one tape coat and two progressively wider coats, though butt joints, corner bead, repairs, and higher finish levels may need extra work. If a coat feels like cake frosting, it is probably too heavy; apply thin layers and let each one dry as directed.
Should you sand between every drywall coat?
Usually, you only need to scrape ridges and dried crumbs between coats with a clean knife. Save broad sanding for the final coat, then use fine abrasive and light pressure so you do not expose tape or roughen the drywall paper.
Why can you still see drywall seams after painting?
Visible seams usually come from narrow feathering, ridges, exposed tape, missing primer, or uneven texture. Strong side light, dark paint, and glossy finishes amplify those defects, so a demanding room may need wider finishing or a Level 5 skim coat.
Conclusion
Spend your effort on control, not tool count. Make accurate cuts, keep the face paper intact, mix workable compound, clean your knife edges, and spread each coat wider and thinner than the one before it. Rent a lift for ceilings, use proper dust extraction, and bring in licensed professionals when electrical, structural, gas, roof, permit, or code work enters the job.
Before opening the primer, place a bright light near the floor and let it rake across the wall. If the surface stays quiet—no long shadows, bright ridges, or fuzzy patches—you are ready. The best drywall finish is almost invisible; when sunlight reaches the painted wall, you see the room, not the seams.