
TL;DR

Get business pricing on tools and workshop supplies
- Business-only prices and quantity discounts
- Tax-exempt purchasing
- Multiple users, one account, clear invoices
A handheld tile saw is a water-cooled power tool for trimming tile, making short straight cuts, and cutting notches where a larger saw is awkward. Match a diamond blade and saw capacity to the tile, set up stable support and the manufacturer-specified water and electrical protection, then feed slowly without forcing the blade. Clean and inspect the saw after use; rent a larger wet saw when a project calls for many long, repeatable cuts.
A handheld tile saw can turn a tight cut beside a pipe into a quick adjustment—or send a good tile skittering across the floor if you rush it. The difference usually comes down to the blade, support, water flow, and how hard you push. Small tools still demand a steady setup.
This guide explains how to match the saw and blade to ceramic, porcelain, or stone; set up a safe cutting area; and make straighter cuts with fewer chips. You’ll also learn what to clean after each session, when a handheld model makes sense, and when a table-style wet saw or rental is the better call.
Think of the blade as a cutting edge that needs both the right abrasive and room to work. Let the motor reach speed, keep the tile planted, and use a controlled feed. That simple rhythm helps protect the tile, blade, and your hands.
Match the blade’s tile rating, diameter, arbor, and speed to the saw and material.
Support both sides of a fragile cut, keep the waste piece from pinching the blade, and feed without forcing.
Use the manufacturer-specified water flow and electrical protection; water suppresses dust but does not remove every exposure risk.
Disconnect power before cleaning or adjusting, then clear slurry, inspect safety parts, drain, and dry the saw.
Choose a handheld saw for occasional trims and awkward access; consider renting a table-style wet saw for many long, repeated cuts.
FIELD GUIDE / TILE WORK
How to Use and Maintain Handheld Tile Saws for Precise Cuts
A compact wet saw can trim tile where a larger machine cannot reach. Match the blade to the material, secure the work, keep water flowing as directed, and guide the cut with a steady hand.
Water cools the blade and suppresses dust. It does not make cutting dust-free.
Maintain ventilation and use suitable respiratory protection when exposure may remain.Small tool. Careful setup. Cleaner results.
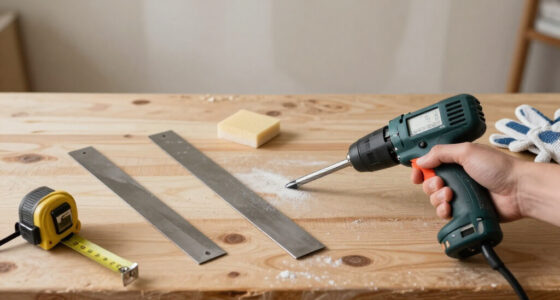
Tile rating, blade fit and saw capacity
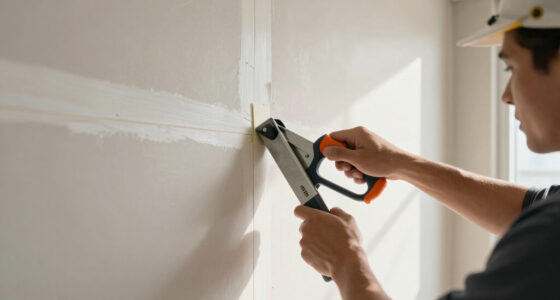
Steady tile; waste piece free to move
Eyes, ears, footing and electrical protection
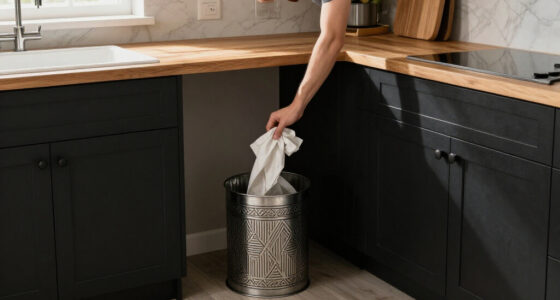
Disconnect, clean, inspect, drain and dry
01 / Choose the setup
Blade, tile and saw must agree.
Check the saw manual and blade label before mounting. A blade that fits the arbor may still be wrong for the tile or the tool’s maximum speed. Confirm thickness capacity too.
Use a rated diamond blade
Ceramic often cuts more readily than dense porcelain. Stone varies. Choose a blade explicitly rated for the material, then test it on a same-tile offcut.
Check the specifications
Match diameter, arbor size and maximum speed to the saw. The blade must mount correctly, clear the guard and withstand the tool’s rotation.
Replace damaged blades
Cracks, visible warp, wobble, heavy wear or new excessive chipping mean stop and inspect. More pressure cannot restore a worn edge.
For a porcelain backsplash cut around an outlet, use a porcelain-rated blade and test on a spare offcut before touching the finished tile.
02 / Prepare the work area
Stability is part of accuracy.
Set up on a level, firm surface with clear footing. Keep the cord and water supply out of the cut path, and contain slurry before it spreads into a slick film.
Mark clearly
Measure carefully. Use a pencil or marker that stays visible when wet.
Support both sides
Keep the tile planted near the cut; leave the waste piece free so it cannot pinch the blade.
Check water and power
Follow the manual for water flow and required ground-fault protection. Keep connections clear of standing water.
Wear protection
Use eye and hearing protection, suitable footwear, and ventilation or respiratory protection when needed.
Cutting a backsplash strip beside a sink? Use a nonslip support on a level bench rather than balancing tile on a bucket. Never defeat guards; disconnect power before adjustments.
03 / Make the cut
Let the blade do the work.
Bring the blade to operating speed, confirm water reaches it on wet-cutting models, and follow the mark at a slow, even pace. If the cut bogs down, pause and find the cause instead of pushing harder.
Recheck support. The tile should not rock, and the offcut must not trap the blade.
Reach speed first. Confirm water delivery as the model’s manual directs.
Guide steadily. Keep the base supported as designed; avoid leaning your weight into the saw.
Keep supporting. Switch off and wait for the blade to stop before setting the tool down.
04 / Maintain the saw
Clean up before slurry dries.
Disconnect power first. Follow the model’s manual for cleaning, blade dressing and service intervals; water paths and maintenance needs vary between saws.
A short routine protects the next cut.
Clear slurry from accessible blade-area surfaces, guard and water path as directed. Check that water reaches the blade before the next job.
Remove slurry
Disconnect power, then clean accessible parts according to the manual before residue dries.
Check safety parts
Look for cracks, wobble, loose fasteners, damaged guards, frayed cords or leaks. Stop if a critical part is damaged.
Dry the tool
Drain water and dry the saw. Store it protected so the blade and cord are not bent or struck.
Follow the manual
Lubrication and blade dressing depend on the model. Do not assume every saw needs the same service.
05 / Pick the right tool
Match the tool to the workload.
Portability is useful for short adjustments and awkward access. Tile thickness, cut length and repeatability determine when a larger saw is the better choice.
Trim, notch, adjust
Choose it for smaller jobs, in-place fitting and spaces where a table-style wet saw is impractical. Confirm the specific model’s capacity and water setup.
Long, consistent runs
Consider a larger wet saw when making many long cuts. A guided table and fence can improve repeatability; renting can make sense for a single project.
Traceability / a safer cut cycle
From match to maintenance
Choose a blade that matches your tile and saw
A handheld tile saw cuts cleanly when its diamond blade is rated for the tile and fits the saw’s arbor, diameter, and maximum speed. Check the tool manual and blade label before mounting anything; a blade that fits physically may still be wrong for the material or speed. These specifications work together: the arbor and diameter determine whether the blade mounts and clears the guard, while the speed rating determines whether it can safely withstand the saw’s rotation. A mismatch can lead to poor cutting, excess heat, or blade failure.
Ceramic often cuts more readily than dense porcelain, while natural stone can vary widely. A blade marketed for ceramic may struggle on porcelain because the denser material takes more work to abrade; the resulting slow cut can tempt you to push harder, increasing heat and chipping. For example, if you’re trimming a porcelain backsplash tile around an outlet, use a blade explicitly rated for porcelain and test it on a spare offcut first. The test tells you whether the combination cuts cleanly before a mistake costs a finished tile.
Look over the blade before every session. A crack, visible warp, wobble, or heavy wear calls for replacement, not one more cut. A damaged or worn blade can cut unevenly and put extra strain on the tool. If a blade begins to chip tile that it previously cut cleanly, stop and inspect it rather than compensating with extra force; pressure cannot restore a worn cutting edge and may make binding more likely.
Tile saws for occasional repair work can be DIY-grade, but the workload matters. If you have dozens of long cuts, a larger wet saw may deliver straighter, more repeatable results because the table and fence guide the tile throughout the cut. Renting can cost less than buying a pro-grade tool for one bathroom. Match tool capacity to tile thickness too—never assume a compact saw can handle every format, since insufficient capacity may prevent a safe, complete cut.
Popular right now

Ninja Flip Toaster Oven & Air Fryer, 8-in-1, Stainless Steel, SP151

Samsung 48-Inch S90H OLED 4K Smart TV (2026)

Breville BES870XL Barista Express Espresso Machine, Brushed Stainless Steel
As an affiliate, we earn on qualifying purchases.
Set up a stable, safer cutting area
A safe setup starts with a stable, level support, clear footing, and the water and electrical protection specified by the saw maker. Before the first cut, make sure the tile cannot rock, the waste piece can move without pinching the blade, and the cord or hose stays out of the cutting path. Each condition matters: movement can pull the blade off line, a trapped offcut can bind it, and a misplaced cord or hose can create a trip or contact hazard. Water helps cool the blade and suppress dust, but it does not make the work dust-free.
- Mark the cut: Use a pencil or a marker that stays visible when wet. Measure twice, especially when trimming around a valve or cabinet edge. A clear mark helps you follow the intended line without making repeated corrections that can widen or roughen the cut.
- Support the tile: Place it on a firm surface and support both sides near the cut. Leave the waste piece free so it does not bind as the blade exits. Support reduces vibration and the chance of breakage; a free offcut can separate without squeezing the blade.
- Prepare water and power: Connect the specified supply or reservoir and verify flow as the manual directs. Use required ground-fault protection and keep electrical connections away from standing water. Water delivery matters for cooling and dust suppression, while ground-fault protection helps reduce shock risk in a damp work area.
- Put on PPE: Wear safety glasses or a face shield, hearing protection, and footwear suited to a wet floor. Add suitable respiratory protection and ventilation when dust exposure remains possible. A wet process lowers dust but cannot guarantee that airborne particles are absent.
For example, when cutting a small backsplash strip beside a sink, put a nonslip support on a level bench instead of balancing the tile on a bucket. A stable bench reduces both the chance of the tile shifting and the effort required to guide the saw. Keep the wet slurry contained and clean it before it becomes a slick film underfoot. Never defeat guards, and unplug the saw before changing or adjusting parts.
Make a straight cut without rushing the blade
To make a straight cut with a handheld tile saw, mark a clear line, support the tile, bring the blade to operating speed, and feed at a slow, even pace. Keep the saw’s base or guide supported as designed, and let the blade do the cutting. A steady feed gives the abrasive edge time to remove material; forcing it can make the motor bog down, increase heat, and pull the cut off line. A handheld tool is useful for short cuts and adjustments, though a long run may not match the straightness of a well-set-up table saw.
- Check the line and support: Confirm the tile is stable and the offcut will not pinch the blade. If the tile moves, the blade must follow that movement, making a straight edge harder to achieve.
- Start the saw as directed: Confirm water reaches the blade before cutting if your model is a wet-cutting saw. This establishes cooling and dust suppression before the blade contacts the tile.
- Align, then cut: Follow the mark with the base or guide steady. Use a consistent feed rather than leaning your weight into the tool. If the cut slows, pause to find the cause instead of adding force.
- Finish under control: Keep the tile supported as the blade exits, then switch off and wait for the blade to stop before setting the tool down. The exit is a vulnerable point: unsupported material can break away and damage the edge.
Imagine trimming a 20-centimeter strip to fit behind a toilet. If the blade bogs down, the answer is not to shove harder: stop, check the blade and water delivery, and make sure the tile is not binding. Excessive pressure can roughen the edge, overheat the blade, or cause binding and damage. Continuing through the strain can also hide whether the actual problem is a dull blade, blocked water path, or poor support.
For a narrow strip or fragile tile, support both sides close to the cut and follow the manual’s limits. Close support helps limit vibration, though the waste side still needs room to move free. Practice on a scrap of the same tile, since a glossy ceramic sample can behave differently from the denser porcelain in your finished floor.
Reduce chipping, dust, and messy slurry
You reduce chips by using a sharp, suitable blade, supporting the tile against vibration, and keeping the feed slow and steady. Chipping often points to a setup problem rather than a need for more muscle. A dry or blocked water path, a worn blade, or a loose tile can all make the cut rough because they interfere with cooling, cutting action, or stability. Checking these causes is usually more useful than changing how hard you push.
Water on a wet-cutting saw cools the blade and suppresses dust, yet it does not eliminate every exposure risk. A poor spray pattern can leave dust in the air, especially when cutting indoors. Use ventilation and suitable respiratory protection when needed, and manage the slurry so it does not create a slip hazard or enter drains where local rules prohibit it. Slurry is the material removed by the blade mixed with water; once it dries, it can also leave residue that is harder to clean.
For example, if a cut through a bathroom floor tile leaves a string of chips along the edge, pause before cutting the next piece. Check that the blade is rated for the material, the tile is firmly supported, and water reaches the blade. Then try a slower pass on an offcut. This sequence isolates likely causes while keeping the next finished tile out of the test.
- Wet cutting: Helps cool the blade and suppress dust, but produces slurry and still needs sensible exposure controls. The tradeoff is less airborne dust against the need to manage water, cleanup, and electrical protection.
- Dry cutting: Use only when the specific saw and blade are designed for it. Dry cutting can create substantial hazardous dust, so convenience does not remove the need for appropriate exposure controls.
- Finishing the edge: A tile rubbing stone or diamond hand pad can smooth small chips. Plan visible edges so the cleanest face stays exposed. Edge finishing can improve appearance, but it cannot reliably disguise a badly chipped or out-of-square cut.
A handheld tile saw is also useful for small notches or short relief cuts, depending on the model and blade. Complex curves may call for several controlled cuts or another tool; forcing a tight turn with a straight blade can spoil the tile because the blade is designed to advance along a line, not pivot sharply within the material.
Clean and inspect the saw after every session
Clean a handheld tile saw after every use by disconnecting power first, then removing accessible slurry from the blade area, guard, and water path according to the manual. Dried slurry can block water delivery and interfere with moving parts. If flow is restricted at the start of the next session, the blade may not cool as intended. A few careful minutes at cleanup can prevent the next cut from starting with a clogged port or gritty mechanism.
- Disconnect power: Unplug the saw or remove its battery before cleaning, adjusting, or changing a part. This prevents an accidental start while your hands are near the blade.
- Clear slurry: Use the cleaning method described in the manual on accessible surfaces and water passages. Avoid spraying or soaking electrical parts unless the maker permits it. Cleaning the water path is especially useful because a clear blade surface does not guarantee that water can reach the cutting area.
- Inspect the tool: Check the blade for cracks or wobble, fasteners for looseness, guards for damage, and cords or hoses for wear and leaks. These checks can reveal problems that cleaning alone will not fix.
- Drain and dry: Empty reservoirs and dry the tool as directed. Store it where the blade and cord will not be struck, bent, or buried under heavy materials. Dry storage helps limit residue and keeps the cord and blade from being damaged between jobs.
Say you finish cutting a handful of trim tiles on Friday and leave the saw in a cold garage. If water and slurry remain in the tool, the next job can begin with blocked flow or mess around the guard. Draining and drying it reduces that nuisance and makes the next inspection easier.
Maintenance needs differ by model. Lubrication, blade dressing, and service intervals are not universal, so follow the manufacturer’s schedule rather than borrowing instructions for another saw. Stop using the tool if a safety-critical part is damaged, a cord is frayed, or the blade wobbles. Continuing can turn a correctable maintenance issue into a safety or cut-quality problem.
Know when a handheld saw is the right tool
A handheld tile saw earns its place when you need portability, on-site trimming, or a short cut in a cramped spot. It is less appealing for long, repeated cuts where consistent alignment and speed matter. Your choice depends on the number and length of cuts, tile material, access to water and power, and the finish the job needs. The main tradeoff is setup flexibility versus guidance: a handheld saw can go to the tile, while a table and fence can help keep repeated cuts aligned.
| Job | Handheld tile saw | Table-style wet saw or rental |
|---|---|---|
| One-off trim or notch | Portable and easy to bring to the tile | Often more setup than the cut requires |
| Many long straight cuts | More effort to guide each cut consistently | Fence and table can improve repeatability |
| Dense porcelain | Works only within the model’s rating and capacity; cut slowly | May suit sustained work better, depending on blade and setup |
| Small repair at an awkward location | Compact access can be useful | Moving the tile to a larger saw may be impractical |
Consider a homeowner replacing three cracked kitchen tiles. A handheld saw may be convenient for adjusting a couple of edges on site, especially if the saw and blade are rated for the tile. For a full 30-square-meter floor with rows of repeated cuts, renting a suitable wet saw may save time and produce more consistent edges. The rental adds transport and setup, so it is most compelling when the volume of guided cuts offsets that overhead.
Battery-powered models can help where a cord is awkward, but runtime and cutting capacity depend on the model, battery, and material. A battery label alone does not tell you how many porcelain cuts you can make, because dense tile and repeated cutting draw more from the tool than occasional light trimming. Check the manual and plan around charging, water delivery, and the day’s workload.
Solve common cut problems before they ruin another tile
When a cut goes wrong, stop and inspect the tool and setup before trying again. Chipping, wandering, or a slowing motor each gives you a clue. Pushing harder often makes the edge worse and increases the chance of binding or blade damage. A pause is useful because it lets you separate a technique problem, such as an unsteady guide, from a tool problem, such as a worn blade.
If the cut wanders, check whether you are following the mark with the intended guide or base and whether the tile is moving. For a long straight line, a handheld saw has less built-in guidance than a table saw. Try a shorter supported cut on scrap before committing another finished tile. If the test also wanders, the tool’s guidance or your setup may be the limiting factor; if it tracks correctly, focus on how the finished tile was held.
If the saw slows or the blade heats, check the blade rating, water flow, and tile support. A blocked port can interrupt cooling; an incompatible or worn blade can make a suitable saw perform poorly. Let the motor reach operating speed before feeding, and ease off if it bogs. The sound and feel of the motor provide useful feedback: a sudden drop in speed means the blade is under more load than it can comfortably handle.
Suppose a porcelain cut leaves a rough edge and the motor sounds strained. Stop, disconnect power, and inspect for a worn blade, loose fastener, or obstruction. Restore water delivery as instructed and test again on scrap. If the problem persists, the blade or saw may not suit the material, and a rental or professional tile setter may be the practical choice. A different tool can be less costly than repeated broken tiles or a poor visible edge.
Safety check: Never run a wet-cutting saw dry, remove a guard, or change a blade while the tool is connected to power. Follow the manual’s electrical protection requirements, and stop work if the cord, guard, or blade shows damage.
Frequently Asked Questions
Can a handheld tile saw cut porcelain?
Usually, if the saw’s manual allows porcelain, the tile thickness is within capacity, and you use a diamond blade rated for porcelain. Expect a slower cut than with some larger wet saws. Test on an offcut first.
Can I use a handheld tile saw without water?
Only if that specific saw and blade are designed for dry cutting. Do not run a wet-cutting saw dry; follow the manual. Dry cutting can create substantial hazardous dust, so use the specified controls and suitable protection.
Why is my tile chipping along the cut?
Common causes include a worn or unsuitable blade, fast feeding, poor tile support, vibration, or poor water delivery. Stop and check the blade and setup, then try a slower cut on a scrap piece of the same tile.
How do I get a straight cut with a handheld saw?
Mark the line clearly, support the tile, use the saw’s base or guide as intended, and keep a slow, even feed. A handheld saw can be useful for short cuts, but a well-set-up table saw is often more consistent for long repeated cuts.
Can a handheld tile saw cut curves or notches?
Some models can make short relief cuts or small notches, depending on the blade and tool design. Multiple controlled cuts may work for a simple notch. For complex curves, use a more suitable tool or ask a tile setter.
How often should I replace the blade?
Replace a blade when it is cracked, warped, heavily worn, or no longer cuts effectively. The interval depends on the blade, tile, and workload, so inspect it and judge by performance rather than following a fixed calendar.
Is a handheld tile saw a good choice for a large tiling job?
It can handle on-site adjustments and occasional cuts, but many long, repeated cuts can take longer and be harder to keep consistent. For a large floor or wall, compare the cost of renting a suitable table-style wet saw with the time and finish you need.
Conclusion
For precise cuts, match the blade to the tile, steady the work, confirm water and power protection, and feed slowly. When the saw strains or the edge chips, stop and diagnose the setup instead of pushing harder.
Clean and inspect the tool before you store it. If the job calls for a stack of long, identical cuts, rent a larger wet saw and save the handheld for the tight corners where it shines.