TL;DR

Get business pricing on tools and workshop supplies
- Business-only prices and quantity discounts
- Tax-exempt purchasing
- Multiple users, one account, clear invoices
Safe demolition starts before you swing anything: shut off and test circuits, map wiring and plumbing, wear rated PPE, and match the tool to the material. Battery-powered tools and dust extraction have made DIY demo safer, but load-bearing walls, gas lines, and suspected asbestos always call for a licensed professional.
The most dangerous moment in any renovation isn’t the build — it’s the tear-out. I’ve walked into more botched jobsites than I can count where somebody buried a reciprocating saw blade in a live wire or took a sledgehammer to a wall that was holding up the ceiling. One afternoon of demolition can cost you a shock, a crushed foot, or a five-figure structural repair.
Here’s the good news: demolition injuries are almost entirely preventable. This guide gives you a comprehensive overview of the most important aspects of safe demolition work — the prep, the PPE, the tools, the technique, and the cleanup — along with common mistakes I’ve watched homeowners make for twenty years.
I’ll also be straight with you about the line between DIY demo and pro demo. Sometimes the safest tool decision is the phone.
Shut off power at the breaker and verify with a non-contact circuit tester before any cut or swing — and confirm the tester works on a known-live outlet first.
Wear ANSI Z87.1 eye protection, an N95 or P100 respirator, 25+ dB NRR hearing protection, and cut-resistant gloves. Silica in drywall dust is an OSHA-regulated…
Match the tool to the material: buy pry bars and a reciprocating saw for DIY work, rent rotary hammers and jackhammers for tile and concrete — a rental day run…
Layer dust control: wet methods, HEPA extraction at the tool’s dust port, and plastic containment with a fan exhausting out a window cut airborne dust by 90% o…
Load-bearing walls, gas lines, electrical service work, and suspected asbestos in pre-1980 homes always require licensed professionals and permits — not DIY ju…
How to Safely Use Demolition Tools During Renovations
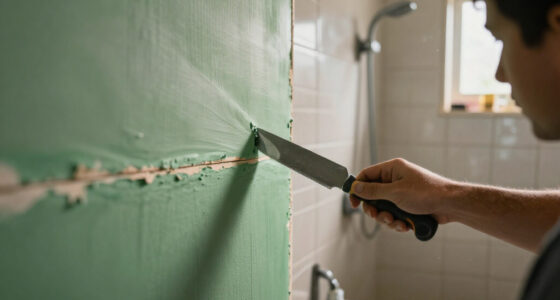
The most dangerous moment in any renovation isn’t the build — it’s the tear-out. Safe demolition starts before you swing anything: kill the circuits, test them, map the utilities, gear up, and match the tool to the material.
The 30-Minute Check That Prevents Disaster
Every wall is a potential hiding place for wiring, plumbing, gas lines, and ductwork. Hitting any of them turns a satisfying Saturday demo into an emergency visit — or a fire. Follow this sequence before anything breaks.
Scan the Wall
Run a stud finder with electrical detection across the entire surface. Mark every alert with painter’s tape.
Kill the Power
Flip the breaker for that room at the electrical panel before touching the wall with any tool.
Test the Circuit
Verify with a non-contact tester at every outlet. Confirm the tester works on a known-live outlet first.
Check for Asbestos
Pre-1980 home? Assume pipe insulation, popcorn ceilings, and 9×9 tile may contain asbestos. Test, don’t disturb.
Clear the Permit
Removing walls or touching plumbing/electrical usually triggers a permit. A five-minute call answers it.
The PPE Kit That Actually Protects You
The $9 combo pack fails at the first swing. Drywall dust contains crystalline silica — OSHA-regulated for a reason. Every piece below needs a rating, not a decoration.
ANSI Z87.1 Glasses
A pry bar snaps drywall screws at eye height faster than you can flinch. Rated goggles or glasses, every time.
N95 → P100 Respirator
Minimum N95; step up to a P100 half-mask for concrete, tile, or mortar. Silica fibers your lungs can’t expel.
25+ dB NRR Protection
Foam plugs or muffs. Demo saws run 100+ decibels — damage is cumulative and permanent.
Cut-Resistant Gloves
ANSI A4 or better for jagged lath, nail-studded lumber, and metal studs. One lath job = 40 splinters without them.
Steel-Toe Boots
Long pants and durable long sleeves. Debris doesn’t aim — it just falls.
Seal Every Time
Cover the respirator intake and inhale — if it collapses and holds, you’re sealed. A leaking mask passes silica straight through.
Field lesson: A homeowner skipped gloves pulling plaster lath. Forty splinters and a tetanus shot later, he became a believer. Learn from his afternoon, not yours.
Match the Tool to the Material
Overpowered tools destroy what you meant to save; underpowered tools fatigue you — and fatigue causes injuries. Two decades of renovation experience, distilled:
| Material | Best Tool | DIY or Rent? | Safety Note |
|---|---|---|---|
| Drywall | Pry bar, utility knife, reciprocating saw | BUY — under $80 total | Check for wiring before every single cut |
| Ceramic tile | Rotary hammer with chisel bit | RENT — $50–$90/day | Silica dust: P100 mask + wet methods required |
| Concrete slab | Electric demolition jackhammer (15–22 lb) | DEFINITELY RENT | Two-person job for anything over a few square feet |
| Wood framing | Reciprocating saw, nail puller | BUY — most versatile demo tool | Bi-metal blades; carbide for embedded nails |
| Load-bearing wall | None — no DIY tool applies | HIRE A CONTRACTOR | Requires engineer’s plan and temporary shoring |
Technique Beats Muscle
Most demo injuries aren’t dramatic failures — they’re repetitive-strain mistakes and poor body positioning. Correct form lets a 140-pound homeowner out-work a gym rat with bad form. Set your stance: feet shoulder-width, dominant foot back, knees bent, and never stand in line with your swing arc. Let the tool’s mass do the work. Inspect every tool before use — cracked handles, frayed cords, and chipped sledge heads shed steel at full swing speed.
DIY Demo vs. Call the Pro
Sometimes the safest tool decision is the phone. Be straight with yourself about which column your project falls into.
Safe to Handle Yourself
- Non-load-bearing interior walls & partitions
- Drywall, cabinetry, and finish tear-out
- Flooring removal (tile, laminate, carpet)
- Framing removal with a reciprocating saw
- Cordless 60V/36V tools — near-corded power, zero trip hazard
Never DIY These
- Load-bearing walls — engineer’s plan + shoring required
- Gas lines and electrical service work
- Suspected asbestos in pre-1980 homes
- Structural or permit-triggered alterations
- Large concrete slabs needing a two-person jackhammer crew
What’s Inside That Wall? The 30-Minute Check That Prevents Disaster
Before you break anything, you need to know what you’re about to break into. Every wall in your home is a potential hiding place for electrical wiring, plumbing supply and drain lines, gas lines, and ductwork. Hitting any of these turns a satisfying Saturday demo into an emergency plumber visit — or worse, a fire.
Start with a stud finder with electrical detection and scan the entire wall surface. Mark every alert with painter’s tape. Then head to your electrical panel, flip the breaker for that room, and verify with a non-contact circuit tester at every outlet and switch on the wall. Testers cost $15–$30 and they are the single cheapest piece of life insurance in this trade. A tester that’s never been checked against a known-live outlet is a guess, not a tool — always confirm it works first.
If your home predates 1980, assume the possibility of asbestos-containing materials: pipe insulation, popcorn ceilings, 9×9 floor tile, and duct wrap. Disturbing asbestos releases fibers you can’t see and your lungs can’t expel. Testing runs $30–$100 per sample at an accredited lab, and abatement is a licensed-professional job. Full stop.
Kill the power, test the circuit, and only then pick up the tool. A dead circuit tester reading is the last safety check between you and a live wire.
Check your local permit requirements too. Interior demo that involves removing walls, altering structure, or touching plumbing or electrical typically triggers a permit. Skipping it can void insurance claims and stall future sales. A five-minute call to your building department answers it.
Popular right now

Dyson Ball Animal 3 Corded Upright Vacuum

Shark Navigator Robot Vacuum with 30-Day Self-Emptying Base, White (AV2110S)

eufy E25 Robot Vacuum and Mop Combo with HydroJet Roller Mop
As an affiliate, we earn on qualifying purchases.
The PPE Kit That Actually Protects You (Not the $9 Combo Pack)
Your personal protective equipment is the only thing standing between you and silica dust, flying nails, and a dropped sledgehammer. You need five pieces, and they need to be rated, not decorative. The bargain-bin kit with a paper mask and plastic goggles fails at the first swing.
Here’s what a working kit looks like, based on what I keep in my own trailer:
- Eyes: ANSI Z87.1-rated safety glasses or goggles — a must, because a pry bar will snap a drywall screw at eye height faster than you can flinch.
- Lungs: At minimum an N95 respirator; for concrete, tile, or mortar work, step up to a P100 half-mask. Drywall dust alone contains crystalline silica, which OSHA regulates for a reason.
- Ears: Foam plugs or muffs rated 25+ dB NRR. A reciprocating saw runs 100+ decibels; damage is cumulative and permanent.
- Hands: Cut-resistant gloves (ANSI A4 or better) for handling jagged lath, nail-studded lumber, and metal studs.
- Feet and body: Steel-toe boots, long pants, and a durable long-sleeve shirt. Debris doesn’t aim — it just falls.
Fit matters as much as rating. A respirator that doesn’t seal against a clean-shaven face leaks silica straight past the filter. Glasses that slide down your nose get taken off, and that’s when the nail flies. Check the seal on the respirator every time — cover the intake and inhale; if it collapses slightly and holds, you’re sealed.
I once watched a homeowner skip gloves while pulling down old plaster lath. Forty splinters and a tetanus shot later, he became a believer. Learn from his afternoon, not yours.
Match the Tool to the Job: What to Use for Drywall, Tile, and Concrete
Using the right demolition tool for the material is both a safety practice and a time-saver. Overpowered tools destroy what you meant to save; underpowered tools fatigue you, and fatigue causes injuries. After two decades on renovations, here’s my honest breakdown of DIY-grade versus pro-grade.
| Material | Best Tool | DIY or Rent? | Safety Note |
|---|---|---|---|
| Drywall | Pry bar, utility knife, reciprocating saw | Buy — under $80 total | Check for wiring before every cut |
| Ceramic tile | Rotary hammer with chisel bit | Rent ($50–$90/day) | Silica dust — P100 and wet methods required |
| Concrete slab | Electric demolition jackhammer (15–22 lb) | Definitely rent | Two-person job for anything over a few square feet |
| Wood framing | Reciprocating saw, nail puller | Buy — most versatile demo tool you’ll own | Use bi-metal blades; carbide blades for embedded nails |
| Load-bearing wall | None — call a contractor | Hire it out | Requires engineer’s plan and temporary shoring |
Battery platforms have genuinely changed the game. A modern 60V or 36V cordless reciprocating saw or rotary hammer delivers near-corded performance with zero trip hazard across a debris-strewn floor — cords dragged through demo zones are a documented cause of falls. But runtime is the tradeoff: a homeowner-grade 5Ah battery may deliver 15–20 minutes of hard chiseling, so if you’re pulling up a whole tile floor, renting a corded electric jackhammer for the day beats buying.
Inspect every tool before use. Look for cracked handles, frayed cords, loose chucks, and dull blades. A chipped sledgehammer head can shed steel fragments at full swing speed. Ten seconds of inspection beats a trip to the ER.
Technique Beats Muscle: How to Swing, Cut, and Pry Without Hurting Yourself
Most demolition injuries aren’t dramatic failures — they’re repetitive-strain mistakes and poor body positioning. Correct technique lets a 140-pound homeowner out-work a gym rat with bad form, and finish the day able to get off the couch.
Follow this sequence for any swing or pry work:
- Set your stance: feet shoulder-width, dominant foot back, knees slightly bent. Never stand directly in line with your swing arc.
- Let the tool do the work: a 10-lb sledge generates force from its own mass and a smooth arc — muscling it wastes energy and wrecks your control.
- Pry toward open space: position your body to the side of a crowbar, never behind it. When the fastener lets go suddenly — and it will — the bar snaps back along its own line.
- Keep two hands on reciprocating saws: brace the shoe against the material and start at low speed until the kerf is established.
- Take a 10-minute break every hour. Fatigue slows reaction time, and demo is nothing but reaction-time situations.
Pull drywall in sections you can carry — a 4×8 sheet of double-layer drywall with wet plaster on it can weigh over 80 lbs. Score it into 2-foot strips with a utility knife first. Your back will thank you on day three.
Clear the room as you go. Stacked debris on the floor is the most common cause of demo-day ankle injuries. Walk each load to the dumpster or debris pile on a cleared path before starting the next wall.
Dust Control: The Invisible Hazard That Ends Careers
Dust is the hazard most DIYers ignore completely, and it’s the one that does long-term damage. Crystalline silica — present in drywall joint compound, concrete, tile, mortar, and brick — causes silicosis, an irreversible scarring of the lungs. According to OSHA, silica exposure is one of the most serious occupational health risks in construction, and it’s fully present in your kitchen remodel too.
Three controls, layered together, cut airborne dust by 90% or more:
- Wet methods: mist surfaces with a spray bottle before and during cutting or chiseling. Damp dust can’t become airborne.
- Dust extraction: attach a HEPA-rated shop vac directly to your tool’s dust port. On rotary hammers and circular saws, this is the single biggest improvement you can make.
- Containment: hang 4-mil plastic sheeting over doorways with a zipper flap, and run a box fan blowing out a window. Negative pressure keeps dust out of the rest of the house.
Here’s a scenario I see constantly: a homeowner demolishes a bathroom, works without a respirator because “it’s just a small room,” then finds gray dust on every surface of the house for months. Your HVAC system distributes that dust to every bedroom. Seal the registers in the work area with tape before you start.
The respirator is your last line of defense, not your first. Control the dust at the source, then wear the PPE. Do both and a two-week tear-out becomes a nuisance instead of a health event.
Know When to Put the Hammer Down and Call a Pro
Some demolition work is a legitimate DIY project, and some will hurt your house, your finances, or you. Knowing the difference is a skill in itself, and honestly, it’s the one that separates smart renovators from the ones who fund my emergency repair invoices.
Call a licensed professional before demo begins if your project involves any of these:
- Load-bearing walls. Removing one without an engineer’s plan and temporary shoring can bring the ceiling — or the floor above — down. This is structural work, full stop, and it always involves permits.
- Gas lines or gas appliances. Only a licensed plumber should cap or relocate these. A nicked gas line is an evacuation-level event.
- Electrical panel or service work. Even with the main breaker off, the service entrance is live. Licensed electrician territory.
- Suspected asbestos or lead paint (pre-1980 homes). Licensed abatement contractors only.
- Roof decking or structural framing compromised by rot or termite damage — the framing may be carrying loads invisibly.
A quick field test for a load-bearing wall: if the wall runs perpendicular to the floor joists above it, assume it’s bearing until an engineer or qualified contractor tells you otherwise. In the basement, walls sitting on the beam line are almost always structural.
Hiring out the risky 10% of a demo while doing the other 90% yourself is a legitimate strategy — and often the cheapest safe one. A pro may charge $500–$1,500 to safely remove and shore a bearing wall opening, which is a rounding error against the cost of a structural failure.
Cleanup and Disposal: Finishing the Job Without Fines
Demolition isn’t done when the wall is down — it’s done when the debris is legally and safely gone. Improper disposal can earn you fines at the transfer station, and overloaded trailers are a real road hazard. I’ve seenDIYers lose a weekend’s savings to disposal mistakes that took five minutes of planning to avoid.
Sort debris into categories as you work, not at the end. Clean drywall and lumber can often go to a C&D (construction and demolition) recycler for a fraction of landfill tipping fees. Metal studs, copper pipe, and fixtures go to a scrap yard — that old copper supply line is worth actual money at $3–4 a pound. Concrete and tile get their own load; most facilities won’t accept them mixed with general debris.
Load smart: heavy material (concrete, tile) goes on the bottom and toward the trailer axle; light material stacks on top. Strap everything down — a sheet of plywood exiting a trailer at highway speed is a lethal projectile and a liability you own. Don’t exceed the trailer’s rated load capacity; a 6×10 utility trailer typically tops out around 2,500–3,000 lbs, which a bathroom tile tear-out can approach fast.
Finally, check your municipality’s rules on renovation debris and hazardous materials. Paint, solvents, and batteries never go in construction loads. Five minutes on your city’s website keeps you compliant and keeps your project — and your permits — clean.
Frequently Asked Questions
What are the most essential safety precautions when using demolition tools?
Wear rated PPE (safety glasses, respirator, hearing and cut protection), verify power is off with a circuit tester, inspect tools for damage before use, and keep the work area clear of debris and bystanders. Map hidden wiring and plumbing with a detecting stud finder before opening any wall. None of these steps is optional — together they prevent the majority of demo-day injuries.How do I know if a wall is load-bearing before demolishing it?
Walls running perpendicular to the floor joists above — or sitting directly on the main beam in a basement — are likely load-bearing. But visual rules are a screening tool, not a confirmation. Have a structural engineer or qualified contractor verify before removing any suspect wall; removal requires a plan, temporary shoring, and a permit. The $300–$500 engineering consult is cheap insurance against a ceiling collapse.Should I buy or rent demolition tools as a DIYer?
Buy the hand tools and a cordless reciprocating saw — you’ll use them constantly. Rent rotary hammers and jackhammers for tile and concrete jobs, since rental runs $50–$90/day and homeowner-grade versions lack the runtime and impact energy for large areas. A rented 15–22 lb electric jackhammer with fresh bits will beat a cheap cordless hammer drill every time.How do I control dust during indoor demolition?
Layer three controls: mist surfaces with water before and during cutting, connect a HEPA shop vac to your tool’s dust port, and seal the work area with 4-mil plastic plus a fan exhausting out a window. Tape off HVAC registers so dust doesn’t spread through the house. This layered approach cuts airborne dust by 90% or more.Do I need a permit for demolition work during a renovation?
In most jurisdictions, yes — any demo that removes walls, alters structure, or touches plumbing, electrical, or mechanical systems typically requires a permit. Check with your local building department before starting; unpermitted work can void insurance claims and complicate future home sales. Demo of finishes like flooring and cabinets usually doesn’t need a permit, but a five-minute call confirms it.When should I hire a professional instead of demolishing it myself?
Hire licensed pros for load-bearing wall removal, gas line work, electrical service or panel work, roof structure repairs, and any suspected asbestos or lead in pre-1980 homes. These carry collapse, fire, explosion, and toxic-exposure risks that PPE can’t manage. Doing the cosmetic demo yourself and subcontracting the hazardous portions is often the safest and cheapest path.Conclusion
Demolition safety isn’t about being cautious — it’s about being prepared. The circuit tester, the respirator, the right tool, the cleared path: every one of them is a decision you make before the work gets loud. The best demo days are boring: nothing shocked anybody, nothing collapsed, and the only surprise was how smoothly it went.
So before that first swing, ask yourself one question: do you know what’s inside the wall? If the answer is anything but a confident yes, put the hammer down and find out. The wall isn’t going anywhere — make sure you can say the same.